
Добавить бота в дискорд чип
Обновлено: 05.07.2024
Для начала вам нужно создать новый сервер в Discord (или получить права администратора на уже существующем). Откройте страницу вашей учетной записи Discord в браузере — так будет удобнее перемещаться между страницами настроек.
1. Нажмите на «+» на левой панели.
2. Выберите шаблон сервера в зависимости от вашей сферы или создайте собственный.
3. Укажите, для каких целей хотите его использовать.
4. Выберите изображение будущего сервера и укажите его название (1), затем нажмите Create. (2).
5. Сервер создан. По умолчанию в него уже добавлены два канала — текстовый и голосовой (1). Чтобы изменить настройки канала, нажмите значок шестеренки (2). Добавить новый канал можно, нажав на «+» рядом с названием раздела. Мы не будем создавать новый канал и для подключения нашего бота используем уже существующий канал general.
6. Теперь нужно получить ID выбранного канала. Для этого нужно сначала включить режим разработчика в настройках вашего профиля. Нажмите на значок шестеренки рядом с вашим никнеймом и фотографией.
7. Перейдите в раздел APP SETTINGS, на вкладку Advanced (1) и переместите селектор Developer mode — режим разработчика активируется (2).
8. Вернитесь из меню настроек и кликните по нужному каналу правой клавишей мыши (1), во всплывающем меню выберите Copy ID — идентификатор вашего канала будет скопирован (2). Сохраните его в любом текстовом документе, чтобы не возвращаться к этому шагу.
Создать бота и добавить его на сервер, скопировать токен ботаСначала вам нужно создать приложение, затем в этом приложении создать бота и настроить для него разрешения, и только после этого — добавлять бота на сервер.
1. На вкладке Applications выберите New Application.
2. Введите название будущего приложения (1) и нажмите Create (2).
3. Приложение создано. Перейдите не вкладку Bot (1) и нажмите Add Bot, чтобы добавить нового бота.
4. Согласитесь добавить бота в ваше приложение.
5. Бот создан. На вкладке Bot отобразится вся информация о нем. Тут можно изменить его имя, добавить изображение и скопировать токен бота (1). Этот токен понадобится вам для настройки модуля Discord на платформе Appmaster.i. Каждый раз при внесении изменений портал разработчика будет предлагать вам сохранить их (2).
Сохраните токен бота, чтобы при последующей настройке не возвращаться к этому шагу.
7. Вставьте скопированную ссылку в адресную строку браузера и перейдите по ней — откроется окошко вашего приложения. Выберите ваш сервер в раскрывающемся списке (1) и нажмите Continue (2).
8. Убедитесь, что приложению (а значит, и созданному в нем боту) даны только необходимые разрешения, после чего добавьте его на ваш сервер.
Через AppMaster.io Studio подключить бота в приложениеThe Ultimate Guide to Use Chip Music Bot on Discord to play, add or remove music on your voice channel with Chip Bot Commands.
Chip Music is a Discord music bot that can be used to play any music available either through its name or url. Chip bot is a free music bot and the only way it makes money is through Patreon for people who want a premium version of the bot. Using Chip bot, you can literally invite four different versions of the bot to your server simultaneously for free. Chip bot is a feature rich bot with a lot of abilities and commands. It has got all the main features that you want like playing music, searching for it, looping it, shuffling it, etc.
- How To Invite/Add Chip Bot (Helping Hand to people trying Chip for the first time)
- How To Use Chip Bot (A Complete how-to guide for Chip Bot like How to add playlist, skip or stop the song, How to use a queue, and many more)
- All Chip Bot Commands List (A Neat Tabular list for all commands in Chip for you to reference)
I have tried my best to provide you with all the information about the Chip bot that will be super useful while you use this bot. This guide contains all the possible how-to for the Chip bot. The How-to also has screenshots of various commands tried and tested in my own discord server. If you want anything to be included in this guide then mention it down in the comment section.
TABLE OF CONTENTS
How to Add or Invite Chip Music Bot on your server?
You can add the Chip bot to your server by using the invite link: Invite . To properly add and set up the Chip Bot follow the steps below.
Invite Chip Music Bot
STEP 1: Click on the Invite Button Above.
STEP 2: Select the server to which you want to add the Chip bot.
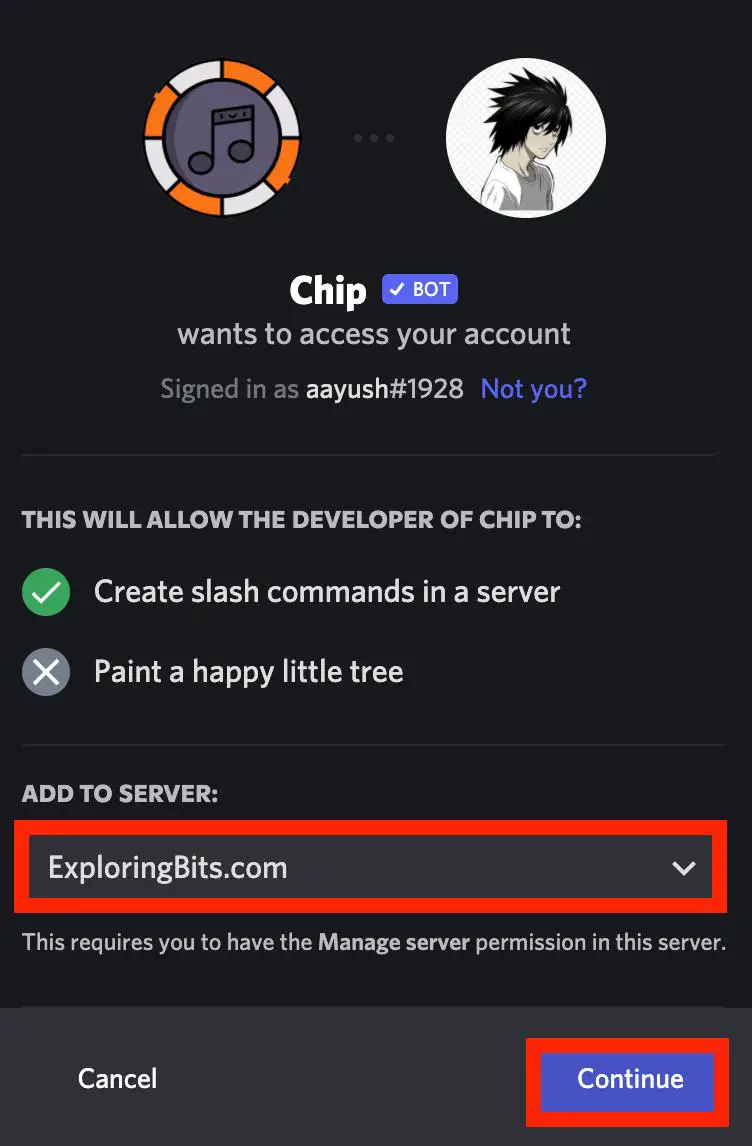
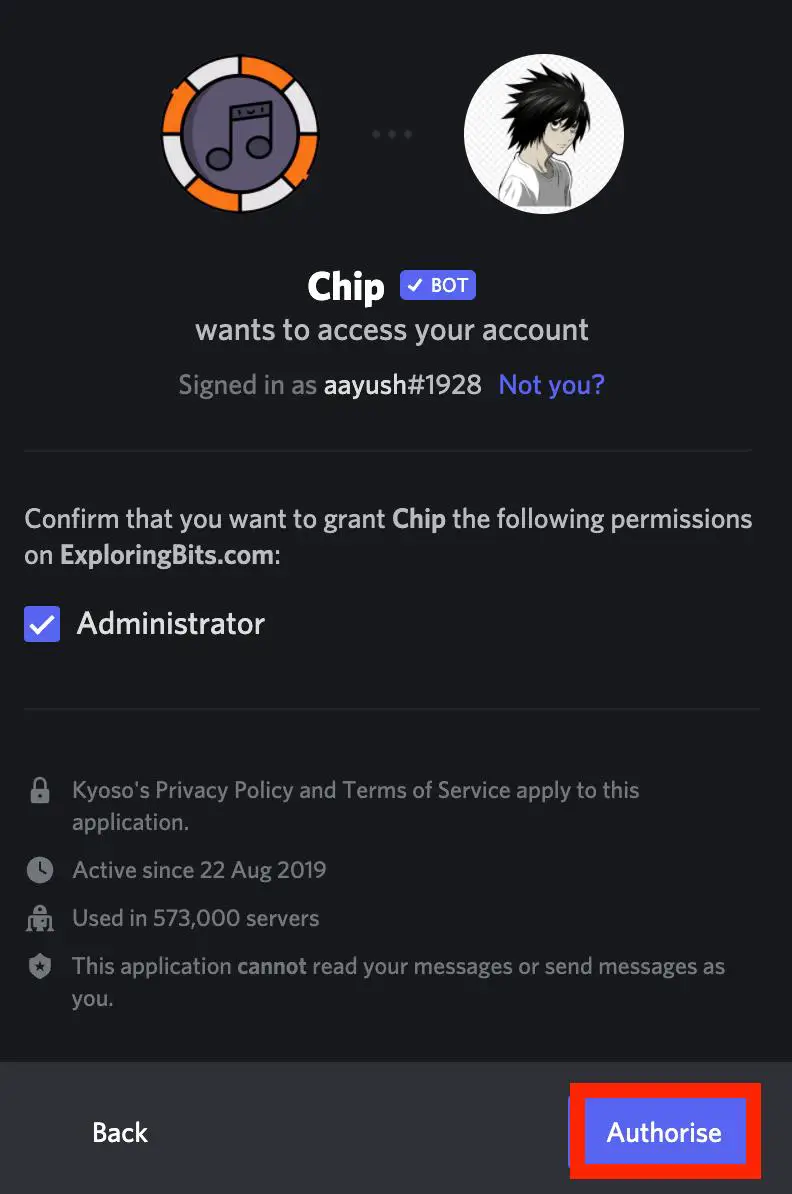
STEP 3: Authorize the permissions that the Chip bot requires to work properly.
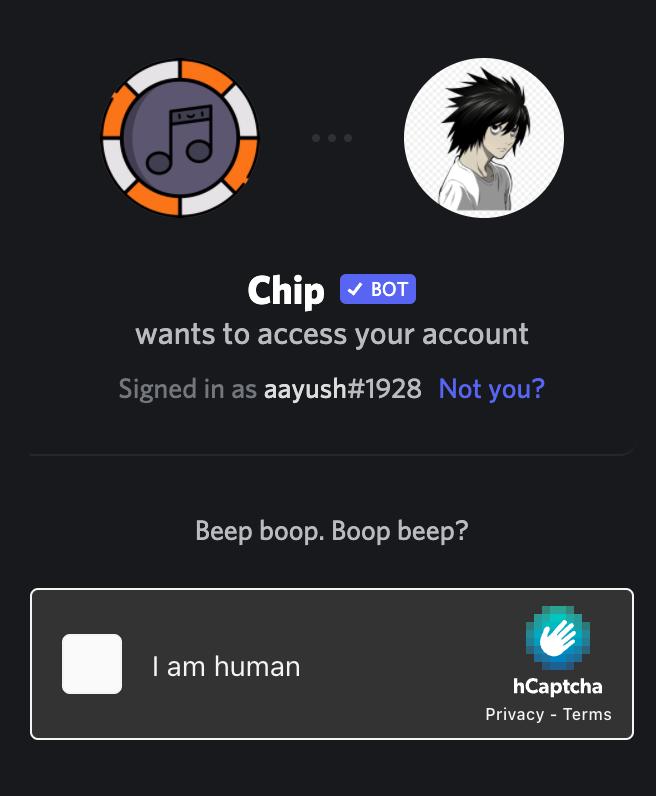
STEP 4: Fill up the Captcha.
STEP 5: Return to the discord server where you have added the Chip bot. You will be able to see the Chip bot message in the general text channel.
You have successfully added the Chip bot on your discord server !!
STEP 6: Go to the heading ‘how to play songs with Chip Bot’ where I have detailed how you can play songs with commands.
Also, I will mention joining the support community group of Chip bot so if you ever face difficulty with the bot you can ask for help in the community – Chip Bot Support Server .
How to use Chip Bot on Discord Server
First of all, make sure that you have added the discord bot to the required server and also you are connected to any voice channel in that server.
Let’s proceed with some basic how-to of Chip bot.
How to Play Music in Discord Using Chip Bot
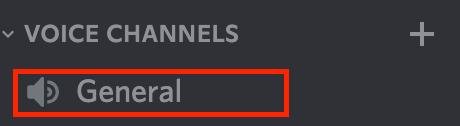
STEP 1: Join a Voice Channel. You can easily join a voice channel by clicking on the channels with a speaker icon on them.
STEP 2: When Joined to a Voice Channel, it will show Voice connected in the bottom of right sidebar.

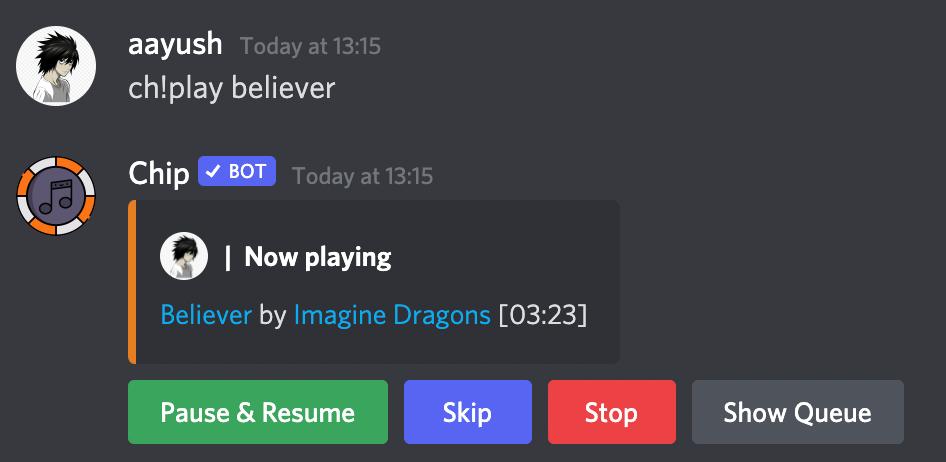
STEP 3: Play the music. You can use the ‘ch!play’ command followed by song name or link from Spotify, SoundCloud, etc.
STEP 4: You can also play music album from Spotify and Sound cloud by pasting the album URL in front of ‘ch!play’ command.
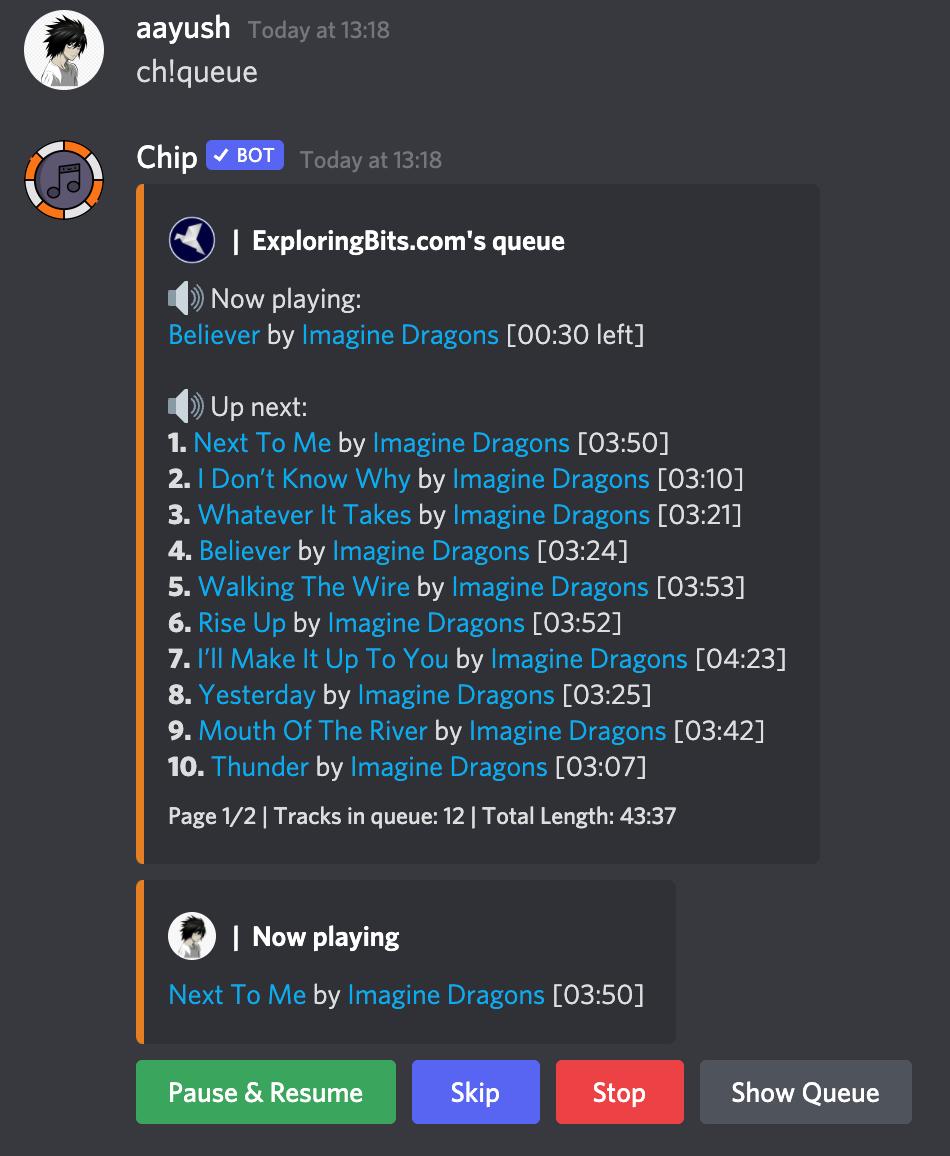
STEP 5: If you want to view and control the queue use ‘ch!queue’ command.
There are many commands related to playing songs that have been mentioned below in the commands section of this article.
All Chip Bot Commands List [ Updated ]
Chip bot Prefix
The default prefix of chip bot is ‘ch!’. Examples
Chip Bot Music Commands
Chip Bot Management Commands
Chip bot Setting Commands
Chip Bot Miscellaneous Commands
Chip Bot Supported Platform
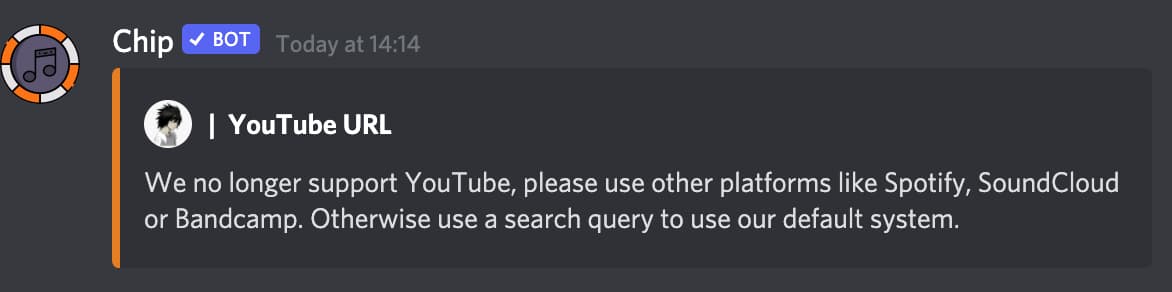
Chip bot has removed the support for the YouTube platform or it might have ended like other great music bot going down due to Youtube C&D Letter.
The Major Platform Supported By Chip Bot are
1. Spotify
2. SounCloud
3. Bandcamp
Why Chip Bot Shows “Chip Bot No Sources Found” ?
As chip Bot has removed YouTube from their supported platforms therefore you might sometime found error of no source of music found for a particular query. It is also due to reason that YouTube used to be one of the major source of music for the chip bot but once the YouTube started giving cease and desist letter to popular music bot, chip bot quickly removed the support of Youtube platform. Therefore, sometimes you might face this error due as chip bot is not able to find a suitable source for the same query from its other supported platform. You can instead paste the URL of the music to listen it from its supported platforms.
What to do if Chip Bot isn’t Working | Chip Bot Offline?
Sometimes the Chip Bot might have issues, such as it may not respond and it may be offline. This can be due to a complete discord bot server being overused or down for maintenance or upgrade purposes, if you face the issue check on the Chip bot support community server they keep a constant update about the server.
Also, make sure that you have provided sufficient permissions to the Chip Bot, it can be done in the setting tab.
If the Chip Bot does not respond after applying the above steps, then make sure you did not change the Chip Bot default prefix.
Some Great Music Bots
Hope you like the Chip Bot discord Guide. You can provide feedback about the article in the comment section. If you want any specific feature of the Chip bot guide to be included in this article do mention it in the comments.
Читайте также: