
Outlook is offline что делать
Обновлено: 05.07.2024
With a Microsoft Exchange Server or Microsoft 365 account, you can work offline to avoid connection charges or stop Outlook from attempting to send and receive messages over a slow network connection.
Switch between working offline and working online
Click Send / Receive > Work Offline.
When Outlook switches between working online and offline, all email accounts are changed.
You know you’re working offline when Work Offline is highlighted on the ribbon or Working Offline appears on the status bar at the bottom of the Outlook window.

When you’re ready to work online again, click Send / Receive > Work Offline. The button text doesn’t change, but it’s only highlighted when you’re working offline. Working Offline on the status bar also goes away when you’re working online.
Change how much mail to keep offline
Click File > Account Settings > Account Settings.
Select an Exchange or Microsoft 365 account, and then click Change.
Under Offline Settings, move the slider to the desired amount of time, such as All, 12 months, 6 months, 3 months, or 1 month. Note: If you're using Outlook 2016, you can also select an amount of time as short as 3 days.
For example, if you move the slider to 3 months, only mail from the past three months will be synchronized to your Offline Outlook Data (.ost) file from the Exchange server. Items older than 3 months reside only in your mailbox on the server. You can change this setting at any time.
Cached Exchange Mode, which downloads a copy of your messages, must be turned on.
If you're using Outlook with an Microsoft 365 account, we recommend you use Cached Exchange Mode.
By default, Outlook configures Exchange and Microsoft 365 accounts to only synchronize 12 months of your email.
Changing the amount of data to synchronize can affect the time it takes Outlook to open as well as the amount of storage space Outlook uses on your computer. If you're running in a virtual desktop environment, we recommend you only synchronize one month of data.
Use offline folders with your Exchange account
Offline folders make it possible to work with the contents of an Exchange folder while you are offline, that is, not connected to the network. The next time that you establish a connection to the server running Exchange, the offline folders are synchronized.
Offline folders are stored in your Offline Folder file (.ost), which is different from a Personal Folders file (.pst). The .ost file starts as a mirror image of your folders on the server running Exchange. Any changes made on the server running Exchange or on your computer while you are offline are synchronized when a connection becomes available. A .pst file, by contrast, is just a storage location on your hard disk drive. Changes to a .pst file are not synchronized back to the server running Exchange.
When you are working offline, you work with the contents of an offline folder exactly as you do with a folder that is on the server running Exchange. For example, you can change and move items in your offline Inbox and send messages that are placed in your offline Outbox. You continue to receive new messages in your mailbox on the server running Exchange. However, you will not be aware of these changes on the server until you connect to the network.
When you need to update the contents of the offline folder, you synchronize the folder with the server and then continue to work offline. The Send/Receive command connects to the server, copies the changes that were made, and then disconnects. Any item that you delete from either the offline folder or the corresponding server folder is deleted from both folders when synchronization occurs.
Note: If you are using Cached Exchange Mode, you are always working with an .ost file even when you have an active connection with the server running Exchange. Cached Exchange Mode allows you to work uninterrupted if your server connection is lost or if a network connection is not available. The procedures that follow in this section are not applicable to your configuration. For more information about Cached Exchange Mode, see the Use Cached Exchange Mode section of this article or the See Also section.
On the File menu, click Work Offline.
Select or clear the Prompt me at startup so I may choose to work offline or online check box, and then click OK.
If you clear the check box, Microsoft Outlook will automatically start offline if a connection to the server is not available.
Click Yes to copy the data from the server to your new Offline Folder file (.ost).
Note: Beginning with Microsoft Office Outlook 2003, a new Offline Folder file format was introduced that offers greater storage capacity for items and folders and supports multilingual Unicode data. A file that is created in this format is not compatible with earlier versions of Outlook and cannot be opened in an earlier version of Outlook. Outlook automatically determines the format in which the Offline Folder file is created, based on the version of Microsoft Exchange, the administrator settings, and the formats of the data files that are configured for the profile. If the settings do not allow the file to be created in the new format, Outlook creates the file in the format that is compatible with earlier versions of Outlook that do not support Unicode and that offer the same storage capacity that was available in earlier versions of Outlook.
Choose the folders that you want to be available for offline use.
The Inbox, Outbox, Deleted Items, Sent Items, Calendar, Contacts, and Tasks folders are automatically made available offline when you set up offline folders. To use any other folder offline, you must select it for offline use by doing the following:
On the Tools menu, point to Send/Receive, point to Send/Receive Settings, and then click Define Send/Receive Groups.
In the list, click a Send/Receive group that contains an Exchange account, and then click Edit.
Under Accounts, select your Exchange account.
Under Folder Options, select the folders that you want to use offline.
Do one of the following:
Select Download headers only.
Select Download complete item including attachments.
You can limit downloads of items that exceed a specified size to headers only. Select the Download only headers for items larger than check box, and then enter the size limit that you want in kilobytes (KB).
Use Cached Exchange Mode
By default, Microsoft Office Outlook 2007 uses Cached Exchange Mode. Cached Exchange Mode provides you with a better experience when you use a Microsoft Exchange account by using a copy of your mailbox that is stored on your computer. This copy provides quick access to your data and is frequently synchronized with the mail server.
When you use Cached Exchange Mode, all of your Exchange folders are available automatically.
On the Tools menu, click Account Settings.
The Account Settings command is missing
The Account Settings command is on the Tools menu in Microsoft Office Outlook 2007. If you are using an earlier version of Outlook, the following instructions do not apply. Use the Help that is included with that product. If the title bar of the program that you are using displays Microsoft Outlook Express, you are using a program that is not the same as Outlook. See Help in Outlook Express for assistance.
Select your Exchange account, and then click Change.
Under Microsoft Exchange, select the Use Cached Exchange Mode check box.
Exit and then restart Outlook.
All folders are kept synchronized; however, you can specify the folders that you want to be included in an immediate synchronization when you initiate a manual send/receive command to run by pressing F9.
On the Tools menu, point to Send/Receive, point to Send/Receive Settings, and then click Define Send/Receive Groups.
Keyboard shortcut To open the Send/Receive Groups dialog box, press CTRL+ALT+S.
In the list, click the Send/Receive group that contains your Exchange account, and then click Edit.
Under Accounts, select your Exchange account.
Under Folder Options, select the check box for each folder that you want to include when you initiate a manual Send/Receive All.
Do one of the following:
Select Download headers only.
Select Download complete item including attachments.
You can limit downloads of items that exceed a specified size to headers only. Select the Download only headers for items larger than check box, and then enter the size limit that you want in kilobytes (KB).
Note: You can download headers only when your Exchange account connects to Microsoft Exchange 2003 or later. Headers are not available on folders that do not contain mail items, for example, Calendar folders.
Change the folders and content that are available offline
Whenever you use offline folders, regardless of whether you use Cached Exchange Mode, you can change the folders that are copied to and synchronized on your computer.
On the Tools menu, point to Send/Receive, point to Send/Receive Settings, and then click Define Send/Receive Groups.
Keyboard shortcut To open the Send/Receive Groups dialog box, press CTRL+ALT+S.
In the list, click the Send/Receive group that contains your Exchange account, and then click Edit.
Under Accounts, select your Exchange account.
Under Folder Options, select the check box for each folder that you want to use offline.
Do one of the following:
Select Download headers only.
Select Download complete item including attachments.
You can limit downloads of items that exceed a specified size to headers only. Select the Download only headers for items larger than check box, and then enter the size limit that you want in kilobytes (KB).
Tip: To quickly designate a folder for offline use, click the folder in the Navigation Pane, and on the Tools menu, point to Send/Receive, point to Send/Receive Settings, and then click Make This Folder Available Offline.
In Outlook, you have the flexibility to make Outlook work online or offline with your mail server.
How do you know when you're working offline or online in Outlook? There are visual cues, starting with the status bar at the bottom of your Outlook window. If either of the following status indicators are shown, it means Outlook isn’t connected to your mail server.
or
You can’t send or receive email until you reconnect.
Status: Working Offline
Working offline usually is a choice. Returning to an online work mode is a simple process.
In Outlook, on the Send/Receive tab, choose Work Offline to reconnect.

If the background of the Work Offline button is shaded (as shown in the image above), you're not connected. But if the background is clear, you are connected.
If you don’t see the Work Offline button and your email account is a Microsoft Exchange Server account or a Microsoft 365 account, Cached Exchange Mode might be turned off. Follow the steps in Turn on Cached Exchange Mode to change that setting. Or contact the person who manages the Exchange server for your organization.
We recommend always turning on Cached Exchange Mode with a Microsoft 365 account.
Status: Disconnected
There can be different reasons why you're disconnected from Outlook. What follows are just a few examples of some of the possible reasons.
If your Internet connection is working, there might be a problem with the mail server.
If you can send and receive mail on the website, then your mail server is fine. But your computer might need updates or there might be a problem with your account settings.
Tips for reconnecting to Outlook
Here are some suggested ways to reconnect to Outlook.
Reset the Work Offline status
On the Send/Receive tab, choose Work Offline, and check your status bar. If the status shows Working Offline, repeat the action until the status changes to connected.
Check for updates
Read the check for updates topic and install any required updates.
Create a new profile
To eliminate the possibility that there's a fault in your current Outlook profile, create a new profile. If you open Outlook using the new profile and it’s still disconnected, try removing your account and then adding it back again.
In the Folder pane, right-click your account name, and then choose Remove <name of the account>.
Follow the steps in adding the account again to proceed.
Important: Office 2010 is no longer supported. Upgrade to Microsoft 365 to work anywhere from any device and continue to receive support.
If the status bar at the bottom of your Microsoft Outlook window shows Working Offline, it means Outlook’s disconnected from your mail server. You can’t send or receive email until you reconnect.
The first thing to check is your Internet connection by trying to connect to a website. If your Internet connection is working, try reconnecting to the mail server. Here's how:
Click Send/Receive.
Notice that when Outlook is set to Work Offline, the button is highlighted.
Click Work Offline to return to working online.
After you reconnect to the server, the Work Offline button has a plain background:
If you can get and send mail on the website, the mail server’s fine. But Outlook might need updates or there might be a problem with the mail account settings. If you’re using an Exchange account, check for updates and install any required ones. (It’s always a good idea to keep current with updates.)
Desperate? Maybe your email account needs a fresh start. Try creating a new mail profile.
When you might want to work offline
When you work online with Outlook and your mail server, you receive new mail as it arrives, and mail that you send is sent immediately. However, there can be times when working online isn't practical. For example, maybe there's no network connection available. Or maybe there is a network available, but you don't want to connect to it because you've exceeded your data plan or will be charged a fee.
In Outlook, you have the flexibility to choose whether you want to work online or offline, and you can do so either automatically or manually. If you elected to work offline, but are ready to manually start a send/receive operation, just click Send/Receive > Send/Receive All Folders.
Work offline with a Microsoft Exchange Server account
If you're using a Microsoft Exchange Server account, your messages are saved in your mailbox on the server. When you're connected to the server and you work online, you can use all of the functionality in Outlook, such as opening items, moving them between folders, and deleting items. However, when you work offline, you lose access to all items on the server. That is when offline folders, which are saved in an offline Outlook Data File (.ost) on your computer, are useful.
The offline Outlook Data File (.ost) file is a replica or copy of your Exchange mailbox. When you are online, this file is automatically synchronized with the server so that both copies are the same, and changes made in either copy are made to the other. You can configure Outlook to automatically start offline if a connection to Exchange cannot be established. You can also manually switch between the online and offline connection states and choose which Exchange folders are kept up-to-date locally on your computer.
If you use an Exchange account, it is recommended that you use it with Cached Exchange Mode. Most of the reasons to work offline are eliminated when you use Cached Exchange Mode. The lack of a network connection is virtually transparent to you because you can continue to work with your items.
By default, Cached Exchange Mode creates and uses an offline Outlook Data File (.ost) and then downloads and maintains a synchronized copy of the items in all folders in your mailbox. You work with your information on your computer, and Outlook synchronizes it with the server.
Whether you are at the office, at home, or on an airplane, network changes or availability are transparent to you. When your connection to Exchange is interrupted, you can continue to work with your data. When a connection is restored, Outlook automatically synchronizes changes, and the folders and items on the server and on your computer are once again identical. Outlook manages your connection to the server and keeps your data up-to-date. There is no need to switch to working offline and to keep trying to reconnect to the server — it is all automatic.
Cached Exchange Mode also frees you from having to set up Send/Receive groups because it chooses the folders that you want to be available offline and keeps those folders synchronized.
The only time when you might still choose to work offline is when you want greater control over what is downloaded to the local copy of your Exchange mailbox. This can include situations where you are using a connection device or service that bases the charges on the amount of data that you transfer. Cached Exchange Mode keeps everything up-to-date. Working offline allows you to use Send/Receive groups to refine the type and amount of information that is synchronized.
The fastest way to work offline is to use the default Outlook settings. If you want to customize the settings, including where to save the offline Outlook Data File (.ost), use the Customized setup instructions.
Quick setup
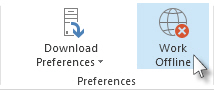
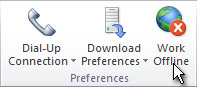
On the Send / Receive tab, in the Preferences group, click Work Offline.
To set up an offline Outlook Data File (.ost), click OK.
By default, the Prompt me at startup so I may choose to work offline or online check box is selected. If you want Outlook to always work online when a connection is available, clear this check box.
After the offline Outlook Data File (.ost) file is created, when you exit and restart Outlook, you must synchronize your Exchange mailbox with the new file. The fastest way to do this is as follows: On the Send / Receive tab, in the Send & Receive group, click Send/Receive All Folders.
Customized setup
If you want to customize the offline Outlook Data File (.ost) settings, such as where the file is saved on your computer, do the following:
If you have not already done so, create an offline Outlook Data File (.ost).
Create an offline Outlook Data File (.ost)
Click the File tab.
Click Account Settings, and then click Account Settings.
On the E-mail tab, select the Exchange Server account, and then click Change.
Click More Settings.
Click the Advanced tab, and then click Offline Folder File Settings.
In the File box, type the path to the file that you want to use as the .ost file.
The default file name is Outlook.ost. If this file already exists, you are prompted for a new name.
Click the File menu,
Click Account Settings, and then click Account Settings.
On the E-mail tab, select the Exchange account, and then click Change.
Click More Settings.
Do one of the following:
Always start Outlook offline Click Manually control connection state, and then click Work offline and use dial-up networking.
Choose whether to work offline or online each time you start Outlook Click Manually control connection state, and then select the Choose the connection type when starting check box.
Always connect to the network Click Manually control connection state, and then click Connect with the network.
Outlook automatically detects whether a connection to the server is available Click Automatically detect connection state. If Outlook is unable to connect with the mail server, it starts in offline mode automatically.
Note: To specify the amount of time to wait for a response from the server before you are notified to retry or work offline, type a number in the Seconds Until Server Connection Timeout box.
Important: Office 2007 is no longer supported. Upgrade to Microsoft 365 to work anywhere from any device and continue to receive support.
About working offline
When you work online with Outlook 2007 and your mail server, you receive new mail as it arrives, and mail that you send is sent immediately. However, there are times when working online is not practical. For example, there can be times when a network connection is not available because of your location. There are also instances when even though a connection might be available, you don't want to use it to avoid incurring connection fees.
If your account connects to Exchange, your messages are saved in your server's mailbox. When you are connected to the server and work online, you can use all of the functionality in Outlook, such as opening items, moving them between folders, and deleting items. However, when you work offline, you lose access to all items on the server. That is when offline folders, which are saved in an Offline Folder file (.ost) on your computer, are useful.
The .ost file is a replica or copy of your Exchange mailbox. When you are online, this .ost file is automatically synchronized with the server so that both copies are the same, and changes made in either copy are made to the other. You can configure Outlook to automatically start offline if a connection to Exchange cannot be established. You can also manually switch between the online and offline connection states and choose which Exchange folders are kept up-to-date locally on your computer.
If you use an Exchange account, it is recommended that you use it with Cached Exchange Mode. Most of the reasons to work offline are eliminated when you use Cached Exchange Mode. The lack of a network connection is virtually transparent to you because you can continue to work with your items.
By default, Cached Exchange Mode creates and uses an Offline Folder file (.ost) and then downloads and maintains a synchronized copy of the items in all folders in your mailbox. You work with your information on your computer, and Outlook synchronizes it with the server.
Whether you are at the office, at home, or on an airplane, network changes or availability are transparent to you. When your connection to Exchange is interrupted, you can continue to work with your data. When a connection is restored, Outlook automatically synchronizes changes, and the folders and items on the server and on your computer are once again identical. Outlook manages your connection to the server and keeps your data up-to-date. There is no need to switch to working offline and to keep trying to reconnect to the server — it is all automatic.
Cached Exchange Mode also frees you from having to set up Send/Receive groups because it chooses the folders that you want to be available offline and keeps those folders synchronized.
The only time when you might still choose to work offline is when you want greater control over what is downloaded to the local copy of your Exchange mailbox. This can include situations where you are using a connection device or service that bases the charges on the amount of data that you transfer. Cached Exchange Mode keeps everything up-to-date. Working offline allows you to use Send/Receive groups to refine the type and amount of information that is synchronized.
When you work offline, Outlook connects to the mail server only when you choose for it to do so. When offline, Outlook does not try to connect to your mail server to check for new messages, download headers that you marked for download, or send messages.
If you have a Microsoft Exchange account
You must restart Outlook 2007 to switch between working online and offline. Consider using Cached Exchange Mode for greater flexibility when you switch between online and offline connection states.
The fastest way to work offline is to use the default Outlook settings. If you want to customize the settings, including where to save the Offline Folder file (.ost), use the Customized setup instructions.
Quick setup
On the File menu, click Work Offline.
To set up an Offline Folder file (.ost), click OK.
By default, the Prompt me at startup so I may choose to work offline or online check box is selected. If you want Outlook to always work online when a connection is available, clear this check box.
After the .ost file is created, when you exit and restart Outlook, you must synchronize your Exchange mailbox with the .ost file. The fastest way to do this is as follows: On the Tools menu, point to Send/Receive, and then click Send/Receive All.
Customized setup
If you want to customize the Offline Folder file (.ost) settings, such as where the .ost file is saved on your computer, do the following:
If you have not already done so, create an Offline Folder file (.ost).
Create an Offline Folder file (.ost)
On the Tools menu, click Account Settings.
On the E-mail tab, select the Exchange account, and then click Change.
Click More Settings.
Click the Advanced tab, and then click Offline Folder File Settings.
In the File box, type the path to the file that you want to use as the .ost file.
The default file name is Outlook.ost. If this file already exists, you are prompted for a new name.
On the Tools menu, click Account Settings.
On the E-mail tab, select the Exchange account, and then click Change.
Click More Settings.
Do one of the following:
Always start Outlook offline Click Manually control connection state, and then click Work offline and use dial-up networking.
Choose whether to work offline or online each time you start Outlook Click Manually control connection state, and then select the Choose the connection type when starting check box.
Always connect to the network Click Manually control connection state, and then click Connect with the network.
Outlook automatically detects whether a connection to the server is available Click Automatically detect connection state. If Outlook is unable to connect with the mail server, it starts in offline mode automatically.
Note: To specify the amount of time to wait for a response from the server before you are notified to retry or work offline, type a number in the Seconds Until Server Connection Timeout box.


Пользователи одного из клиентов стали жаловаться, что Outlook при загрузке всегда запускается в автономном режиме. Естественно, письма при этом не отправляются и не получаются, а в трее на иконке Outlook нарисован красный крест с надписью: «Приложение Microsoft Outlook находится в автономном режиме».

Чтобы отключить автономный режим, пользователю каждый раз приходится отключать его в Outlook на вкладке Отправка и получение -> Автономная работа. Но при следующем запуске Outlook снова переключается в автономный режим. Приходится опять отключать его в настройках. Понятно, что постоянное переключение из Offline в Online ужасно раздражает пользователей.

Проблема проявляется только у некоторых пользователей с Outlook 2016 и 2013. Ящики пользователей находятся на сервере Exchange, и каких-то проблем с его доступностью, или ошибок в журналах Exchange нет.
Outlook может автоматически переходить в офлайн режим при обрыве связи с сетью / сервером Exchange (после 10 неуспешных попыток подключиться к серверу). Поэтому в первую очередь проверили работу сети (коммутаторы, маршрутизаторы, правила на межсетевых экранах) – везде все работало нормально.
Что еще мы проверяли при диагностике этой проблемы:
Решение проблемы оказалось неожиданным: у всех пользователей, у которых Outlook запускался в офлайн режиме был установлен мессенджер Skype for Business(Lync). Оказалось, что, если на компьютере одновременно запущены Lync и Outlook, то когда вы изменяете настройки Автономного режима, они не сохраняются после закрытия Outlook (Lync каким-то образом блокирует сохранение настройки автономной работы, видимо потому что также держит постоянное подключение с Exchange).
Таким образом, чтобы отключить запуск Outlook в автономном режиме, достаточно закрыть Lync / Skype4B (убедитесь, что в диспетчере задач не осталось его процессов) и отключить автономную работу в Outlook. После этого Lync можно включать.
Если у вас наблюдаются проблемы с поиском по письмам и другим элементам в Outlook (поиск ничего не находит, выдает неполные результаты, не ищет по всем подключенным файлам личных папок *.pst и т.д), рекомендации из этой статьи должны помочь вам решить проблему поиска в Outlook (рекомендации применимы ко всем текущим версиям Outlook 2010, 2013, 2016, 2019 и Outlook 365).
Проверка состояния поискового индекса Outlook
Поиск в Outlook работает на базе службы индексирования Windows. Чтобы выполнить поиск, служба Windows Search должна просканировать содержимое ящика и подключенных PST файлов, и построить индекс всех имеющихся элементов Outlook. Поэтому в первую очередь необходимо проверить состояние индекса Outlook.
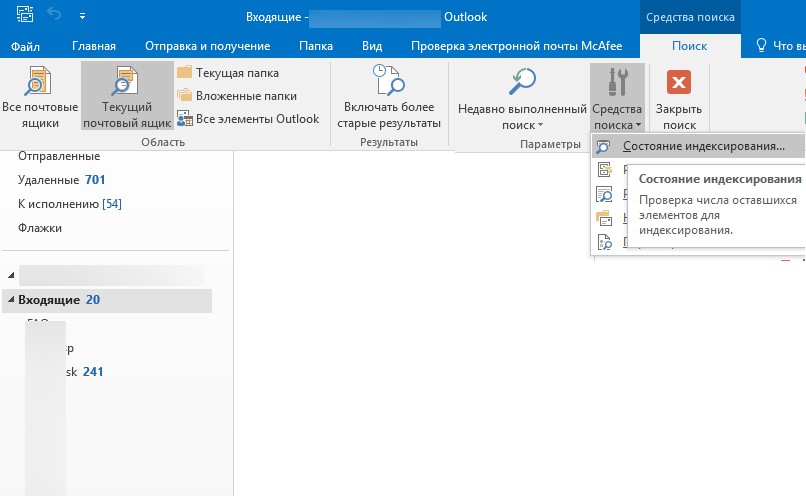
Для этого, перейдите на вкладку Поиск и в разделе Средства поиска выберите элемент Состояния индексирования.
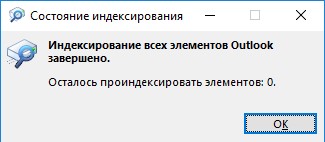
Если с поисковым индексом Outlook все в порядке, в появившемся окне должен отобразится статус:
Однако, если у вас имеются проблемы с поиском, скорее всего статус будет другой:
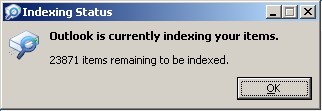
Перестроение поискового индекса Outlook может выполнятся при добавлении нового почтового ящика или файла личных папок (pst), переносе писем между папками и т.д. Если вы выполняли эти действия относительно недавно (до 3-4 часов назад), нужно дождаться окончания индексирования. Если же существенные изменения в конфигурацию не вносились давно, а индексирование до сих пор выполняется – налицо явная проблема с индексом Outlook.
Включить индексирование содержимого Outlook службой поиска Windows
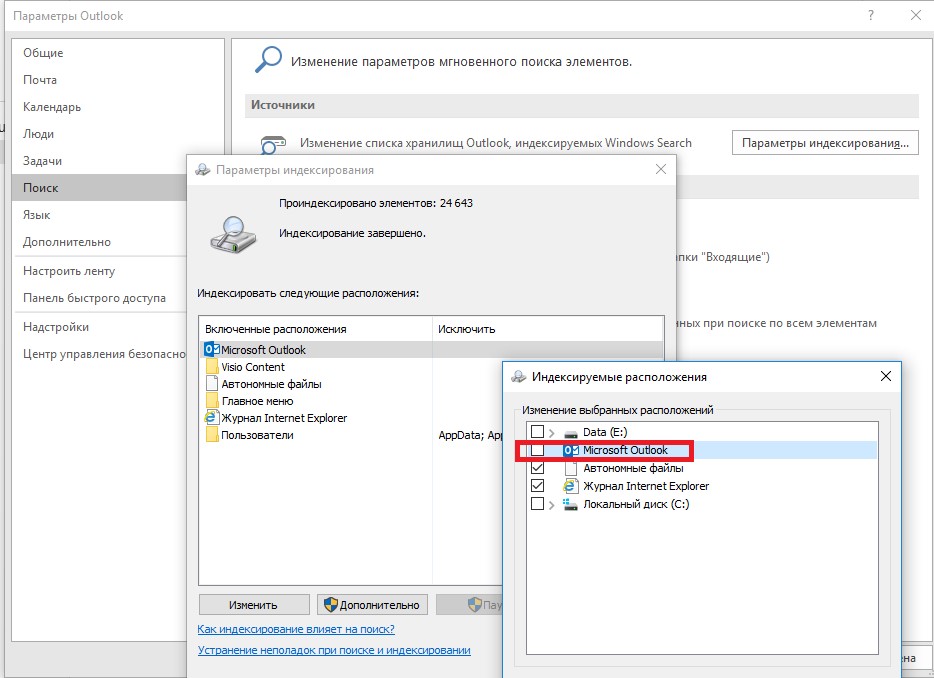
Для решения проблемы нужно временно исключить Outlook из числа элементов, которые сканируются службой индексирования Windows. Для этого:
В свойствах OST и PST файлов проверьте, что разрешена их индексация (это стоит сделать несмотря на то, что их индексирование уже разрешено в параметрах службы поиска Windows). Для этого
Откройте консоль PowerShell с правами администратора и перезапустите службу WSearch:
Restart-Service -Name wsearch –verbose

Теперь нужно в настройках параметров поиска разрешить индексирование Outlook, отключенное ранее. В параметрах индексирования поставьте галку у пункта Microsoft Outlook и сохраните изменения.
Дайте Outlook некоторое время на выполнение полного индексирования (в зависимости от количества, размера ящиков и подключенных PST файлов). Проверьте состояние индекса Outlook как показано выше и попробуйте выполнить поиск.
Сброс/пересоздание поискового индекса Microsoft Outlook
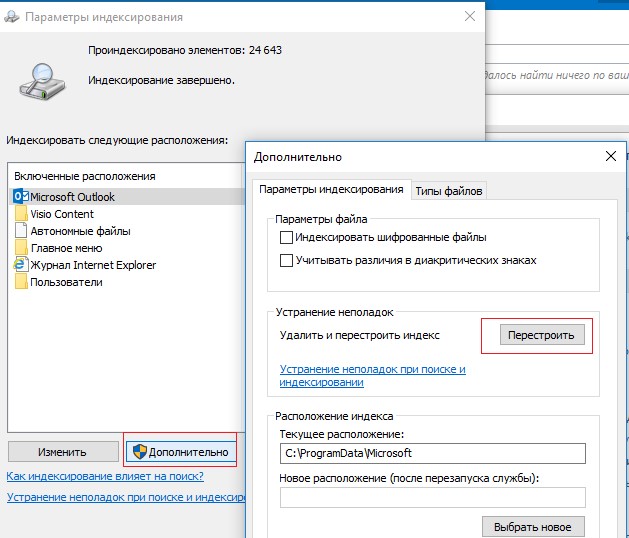
Если поиск так и не заработал, рекомендуется попробовать полностью сбросить индекс службы поиска Windows. Для этого:
Проверьте PST файлы на наличие ошибок
В некоторых случаях служба индексирования не может проиндексировать файлы личных папок (PST) из-за наличия в них логических ошибок или повреждения структуры. Рекомендуется выполнить проверку PST файлов с помощью утилиты scanpst.exe.
Outlook и режим кэширования Exchange
В этом разделе рассмотрим особенности работы поиска в Outlook, если ваш почтовый ящик находится на сервере Exchange. Если в Outlook включен режим кэширования Exchange, то для поиска элементов используется локальный индекс на вашем компьютере. Если режим кэширования Exchange отключен, то для поиска в ящике используется индекс на стороне почтового сервера (обслуживается службой Microsoft Exchange Search Indexer).

Служба поиска MSExchangeSearch выполняет индексацию письма сразу, когда оно попало в почтовую базу на сервере. Если при использовании поискового индекса Exchange ваш Outlook не ищет элементы в ящике, скорее всего есть какие-то проблемы на стороне почтового сервера Exchange. Для диагностики проблем со службой поиска Exchange используется командлет Test-ExchangeSearch/code>.
Чаще всего проблема в том, что закончилось место на дисках (недостаточно места для увеличения размера поискового индекса), либо текущий индексный файл был поврежден и нужно его перестроить. Для сброса поискового индекса в Exchange можно использовать встроенный PowerShell скрипт %PROGRAMFILES%\Microsoft\Exchange Server\V14\Scripts\ResetSearchIndex.ps1
Чтобы сбросить поисковый индекс для конкретной базы, используйте команду:
Также проверьте, включено ли индексирование для проблемной базы почтовых ящиков:
Get-MailboxDatabase mailbox_db_name | Format-Table Name,IndexEnabled
Что еще проверить, если не работает поиск в Outlook?
Что можно еще проверить, если поиск в Outlook не выполняется или возвращает не полные результаты?
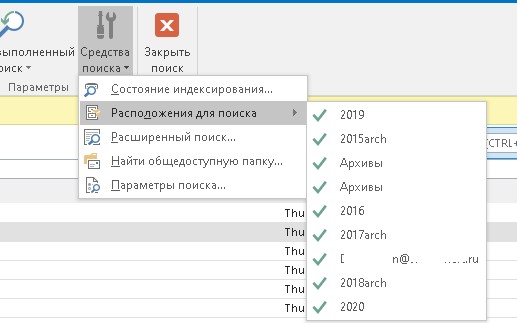
- В меню Outlook выберите Средства поиска -> Расположения для поиска. Убедитесь, чтоб для поиска выбраны все ящики и PST файлы;
- Убедитесь, что в ветке реестра “HKEY_LOCAL_MACHINE\SOFTWARE\Policies\Microsoft\Windows\Windows Search” отсутствует параметр PreventIndexingOutlook = 1. Данный параметр отключает индексирование Outlook службой Windows Search. Он соответствует политике Prevent indexing Microsoft Office Outlook в разделе GPO Computer Configuration -> Administrative Templates -> Windows Components -> Search;
Читайте также: