
Poweredge 1950 обновление bios
Обновлено: 06.07.2024
I'm closing in on purchasing a Dell PowerEdge R710 rack server and am curious to know the difference between Dell's power saving bios setting and their performance bios setting. Should I be concerned about choosing the power saving setting? I'll be using this rack for terminal services and definitely want performance when performance is needed. That being said, for the other 3/4's of the day when employees have gone home I'd prefer it if this server wasn't running at 110%.
Thanks in advance.
10.8k 7 7 gold badges 37 37 silver badges 52 52 bronze badges 1,604 2 2 gold badges 20 20 silver badges 29 29 bronze badges4 Answers 4
I don't know the details but the R710 has a BIOS Power/Performance options page. In it you can select to turn on and off features which will either save power and boost performance.
You can change these settings so I wouldn't worry about it.
1,586 1 1 gold badge 15 15 silver badges 29 29 bronze badgesBelow you can find some relevant pieces of information mentioned in the whitepaper:
Each profile simply enables/disables some BIOS features, the table below provides an overview of the features. This is documentation for 12th generation servers, while the R710 is 11th generation. But I'm quite sure DAPC (Dell Active Power Controller) is similar to what Power saving mode is in the 11th generation servers, but can't confirm.

It goes in depth on the different profiles.
Performance-per-watt (DAPC) profile is the default, and represents an excellent mix of performance balanced with power consumption reduction. Dell Active Power Control (or DAPC), relies on a BIOS-centric power control mechanism which offers excellent power efficiency advantages with minimal performance impact in most environments, and is the CPU Power Management choice for this overall System Profile.
Performance-per-watt (OS), otherwise known as “OS Control”, is similar to the DAPC profile for all sub-options except for the CPU Power Management. The power management scheme used for this profile is called “OS DBPM”, which allows the Operating System to manipulate processor frequencies for higher power efficiency. However, the effectiveness of this profile for reducing overall system power consumption is based on how well the Operating System is able to effectively control hardware resources, so the impacts are mixed across all supported Operating Systems.
Performance profile provides potentially increased performance by maximizing processor frequency and the disabling certain power saving features such as C-states and. Although not optimal for all environments, this is an excellent starting point for performance optimization baseline comparisons.
Dense Configuration enhances reliability features and reduces power consumption at the cost of considerable performance. This profile is targeted for operating environments where enhanced reliability is desired and temperatures may exceed the thresholds encountered in less densely-packed data centers.
There are some performance vs watt comparisons in the paper, i didn't read the analysis, but at first glance it seems that only the DENSE option has significant implications. Someone with more time/technical background might be able to fill in on this.
I haven't been able to solve this one and was wondering if anyone else has run into this:
When trying to update the BIOS to the latest version on a Dell PowerEdge T320 I get the following error:
Dell Firmware Update Fails With “Creation of Dynamic Partition Failed.” Possible cause is USB device.
I found some articles that suggested running an IDRAC reset from the command prompt which I did but that also fails stating that we have no license. however I have successfully updated IDRAC to the latest version and still get the same error.


Are you trying to update the BIOS in a OS or in iDRAC? Have you tied to use the LifeCycle controller to update the BIOS as the system boots? You can get there by punching F10 as it boots up.
Edited Mar 10, 2018 at 04:59 UTC

12 Replies
Are you trying to update the BIOS in a OS or in iDRAC? Have you tied to use the LifeCycle controller to update the BIOS as the system boots? You can get there by punching F10 as it boots up.
Edited Mar 10, 2018 at 04:59 UTC

Welcome to the community!! From what BIOS version are you trying to update and to what version? In the past I have had to reboot the server and reset the inventory to be able to get the BIOS and DRAC to update.

Does your server have an optical drive? If not, try plugging in a USB optical drive and flashing it. I had a VERY similar problem with a T130, and the support was getting ready to send me a new motherboard and for some reason I plugged in a USB optical drive (there is no internal optical drive) and the flash worked perfectly after that, the tech in question said he was going to log it as a bug.

Yes, I used the service tag to get the correct and latest BIOS update.
Specter01101 wrote:
Are you trying to update the BIOS in a OS or in iDRAC? Have you tied to use the LifeCycle controller to update the BIOS as the system boots? You can get there by punching F10 as it boots up.
From within the OS. I will try via the iDRAC as I haven't tried that yet. Thanks.
dbeato wrote:
Welcome to the community!! From what BIOS version are you trying to update and to what version? In the past I have had to reboot the server and reset the inventory to be able to get the BIOS and DRAC to update.
To get the iDRAC update installed I actually had to completely power off the server and drain the power with the power cables unplugged of course and then I was able to get the iDRAC update to go through. Maybe I will try this again for the bios update since the error is similar to the iDRAC update error I was getting before draining power.
BIOS version 2.5.1
Brand Representative for Dell
When you see the “Creation of Dynamic Partition Failed" error when attempting to run a Dell firmware update, you will need to reset the iDRAC from the command prompt in order to resolve the issue. Open a command prompt as administrator and run racadm racreset, which will require that OMSA is installed at host. After that then retry the update and let me know if the error reappears. I see from your post that you tried this and got the license error. It looks like if you manually install srvadmin-idracadm7 it will resolve those license errors, as seen here.
Hope this helps.
Edited Mar 12, 2018 at 17:21 UTC
jsnyder05 wrote:
dbeato wrote:
Welcome to the community!! From what BIOS version are you trying to update and to what version? In the past I have had to reboot the server and reset the inventory to be able to get the BIOS and DRAC to update.
To get the iDRAC update installed I actually had to completely power off the server and drain the power with the power cables unplugged of course and then I was able to get the iDRAC update to go through. Maybe I will try this again for the bios update since the error is similar to the iDRAC update error I was getting before draining power.
I decided I would update my Dell PowerEdge 1950 server to the latest BIOS version and also if possible update the firmware for the RAID card, disks, network adapters and so on.
I thought this would be pretty straightforward, oh how I was wrong! I never knew it would be so hard to actually figure out which tool to download and how to use it!
I'm writing this because I may forget what I did and I assume others will also find it useful..
After spending way too much time figuring out all the different ways, the best way I found is to use Dell Repository Manager..
I'd never heard of Dell Repository Manager before and to be honest it did not sound like what I was looking for. However it's perfect (well not quite but it does the job)!
Because my server is an VMware ESXi server I cannot install Windows or Linux firmware updates from it. So I wanted a CD/DVD that I could boot from with all the BIOS and firmware updates on it.
Dell Repository Manager is a Windows based piece of software (which I installed on my Windows 8 desktop).
Once installed there is a datacenter version for rack, tower and blade servers and a client version for desktops and laptops.
So this can be used to update everything from a Dell PE 1950 rack server, to a M620 blade or even a Dell Vostro laptop!
It then can produce a bootable ISO you can burn to CD or DVD and boot your server from and it even runs through all the BIOS and other firmware updates for you one-by-one automatically, while you have a cup of coffee!
First things first..
1. Download and Install "Dell Repository Manager" on a Windows desktop or server (at least vista/2008 for ISO creation to work)
Note: At time of writing the latest I used was 1.5 A00 (released 12/12/2012)
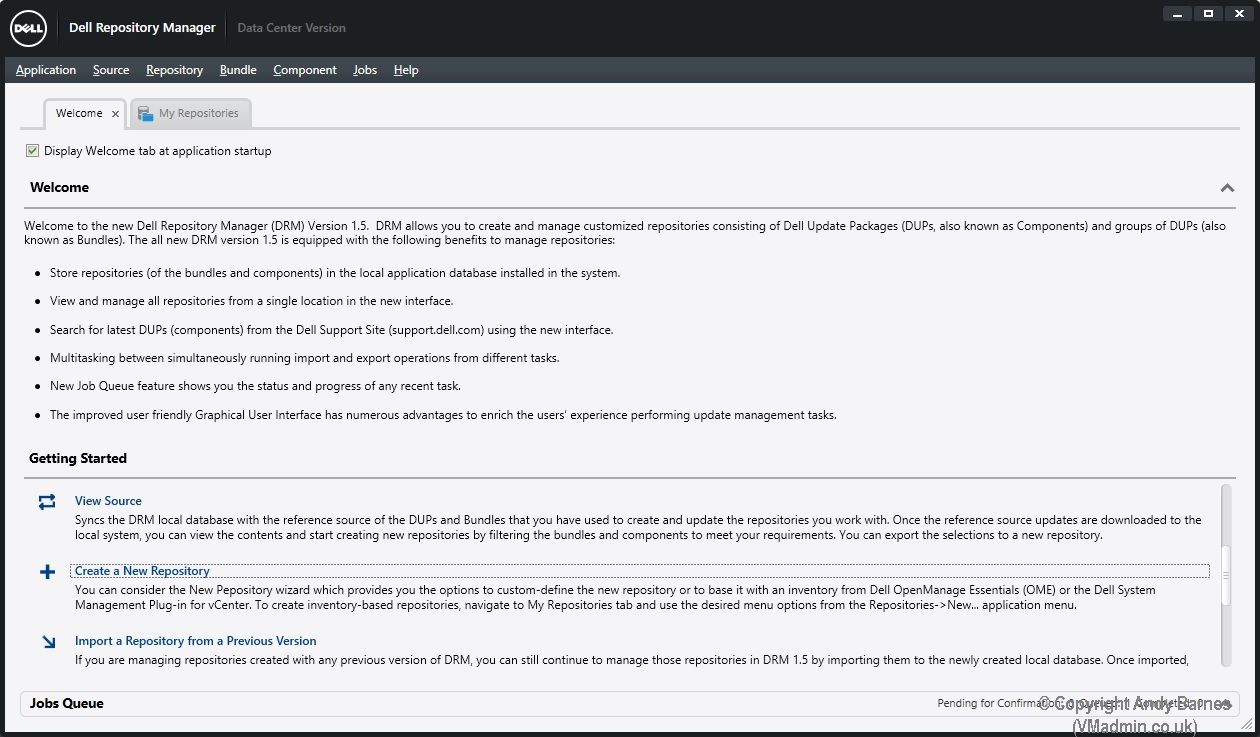
2. Now start the Dell Respoitory Manager Data Center Version
3. Click Create a New Repository
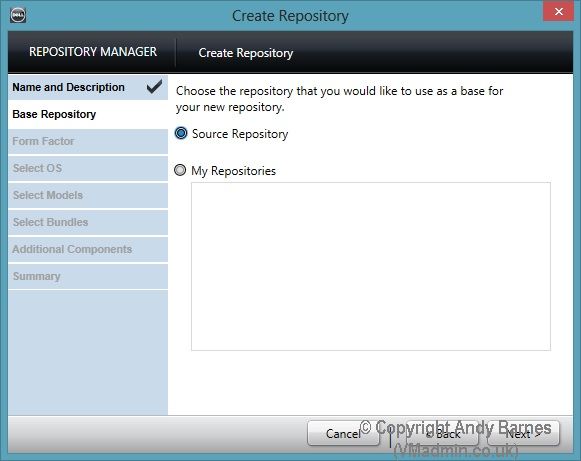
4. Give your repository a name.
As I'm only wanting Dell PE 1950 updates I'll call it 1950!

5. Leave the source repository selected and click Next.
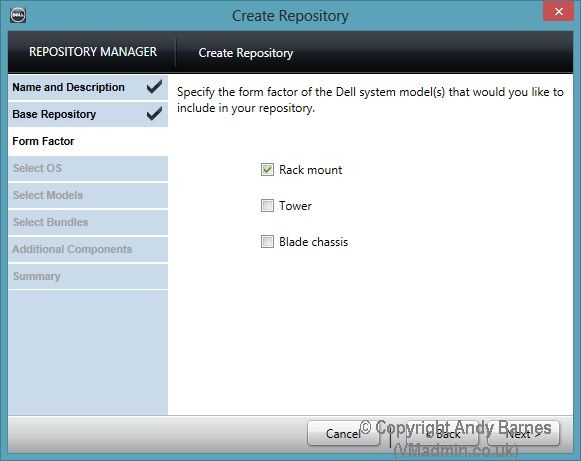
6. Select the form factor your server model belongs to.
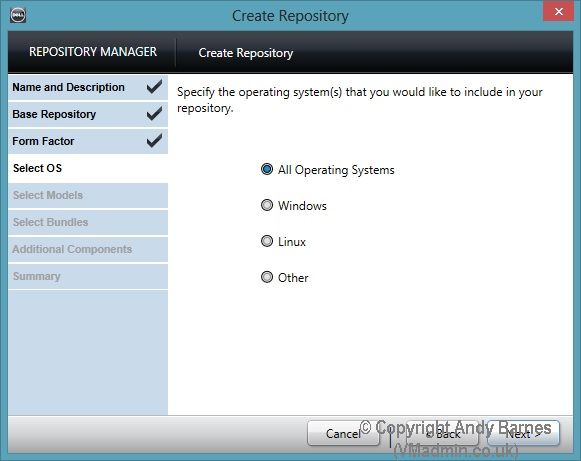
7. Select the OS. Choose all operatings systems.
8. Select the models you want to include on the CD/DVD.
Note: The more models you select will ultimatley result in a larger CD/DVD image
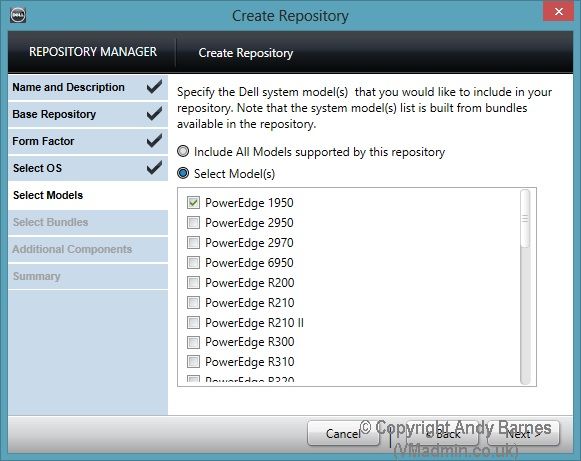
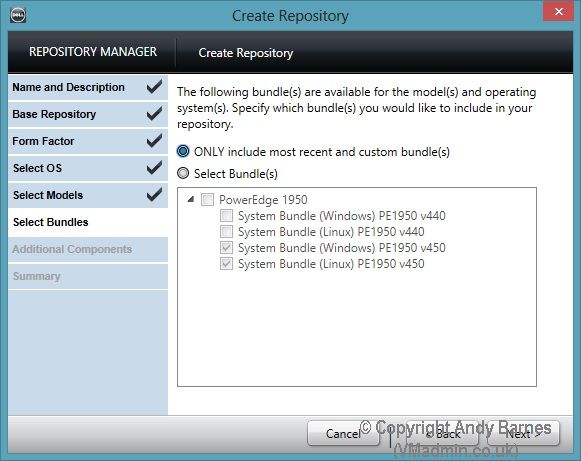
9. Select ONLY include the most recent and custom bundles. Click Next.
10. We are not going to select any additional files. Click Next.

11. Review your repo settings and click Finish.
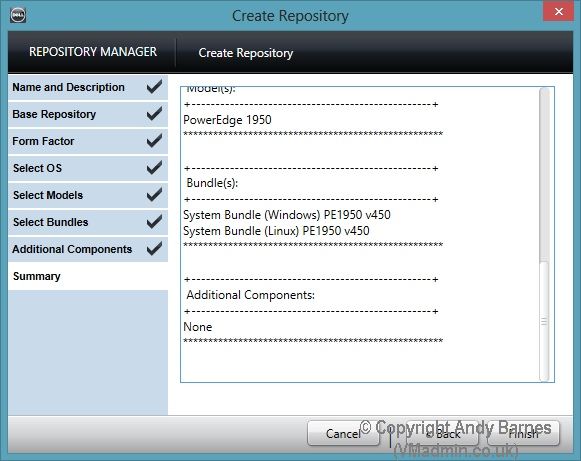
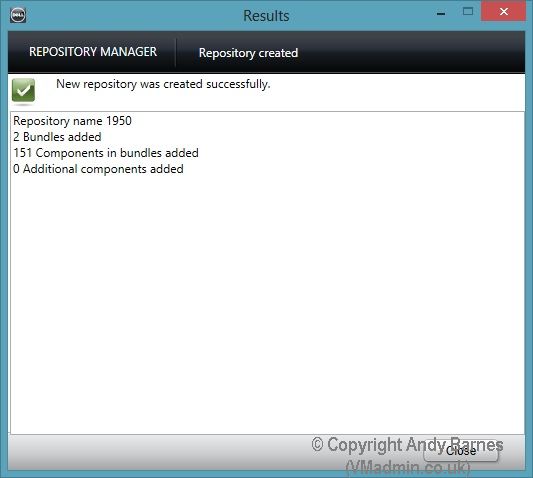
12. Your repository will be created..
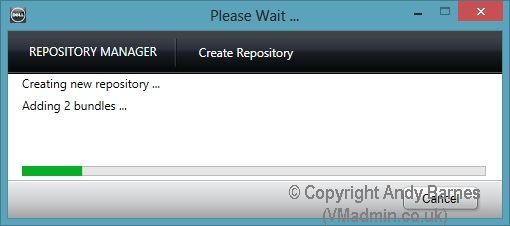
13. Notice the number of components, this is the firmware updates!
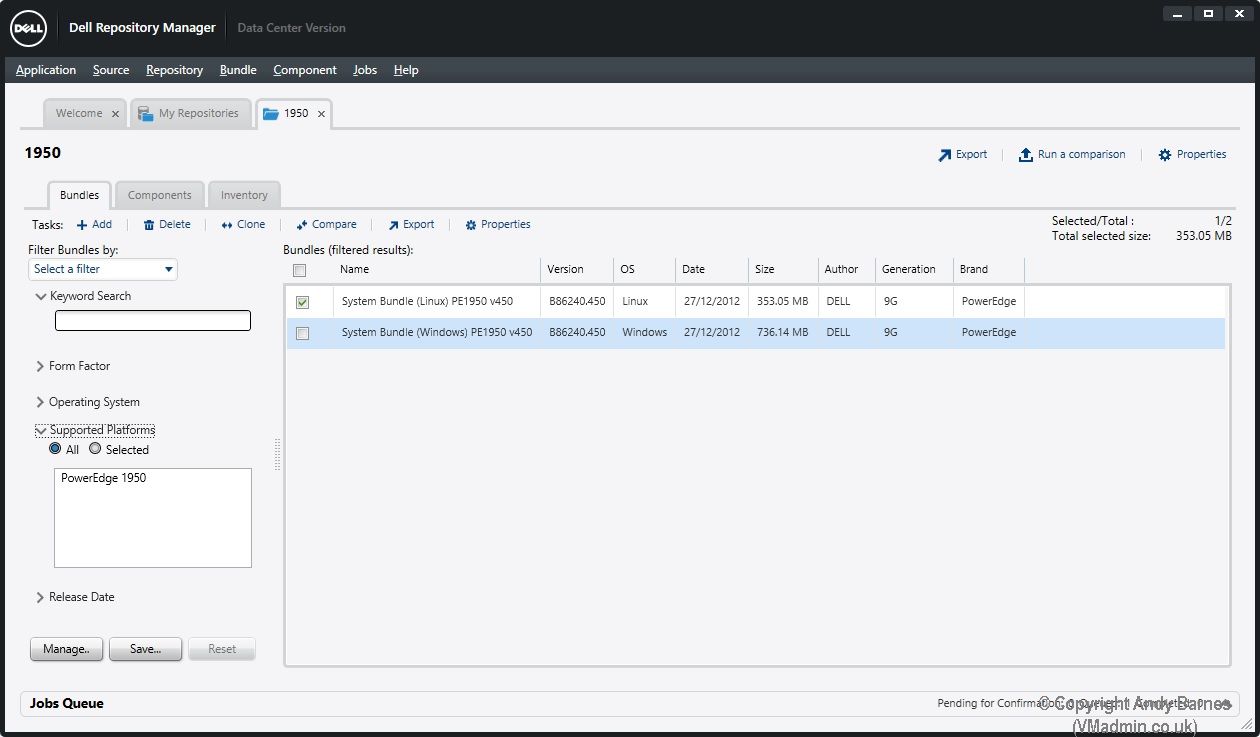
14. Click on your repository and it will open in it's own tab.
15. Select the Linux System Bundle for your server model.
Note: Don't worry yes we are updating an ESXi server (not Linux), by selecting Linux we will create a bootable (linux based) ISO!
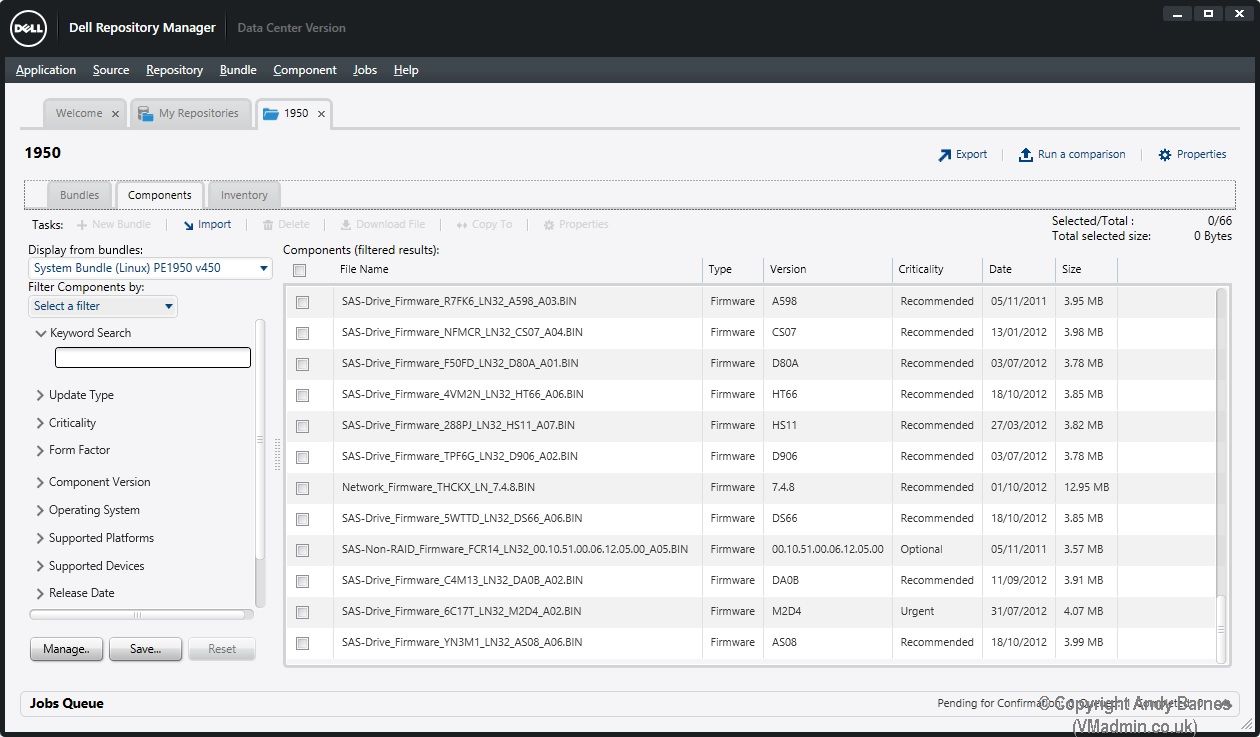
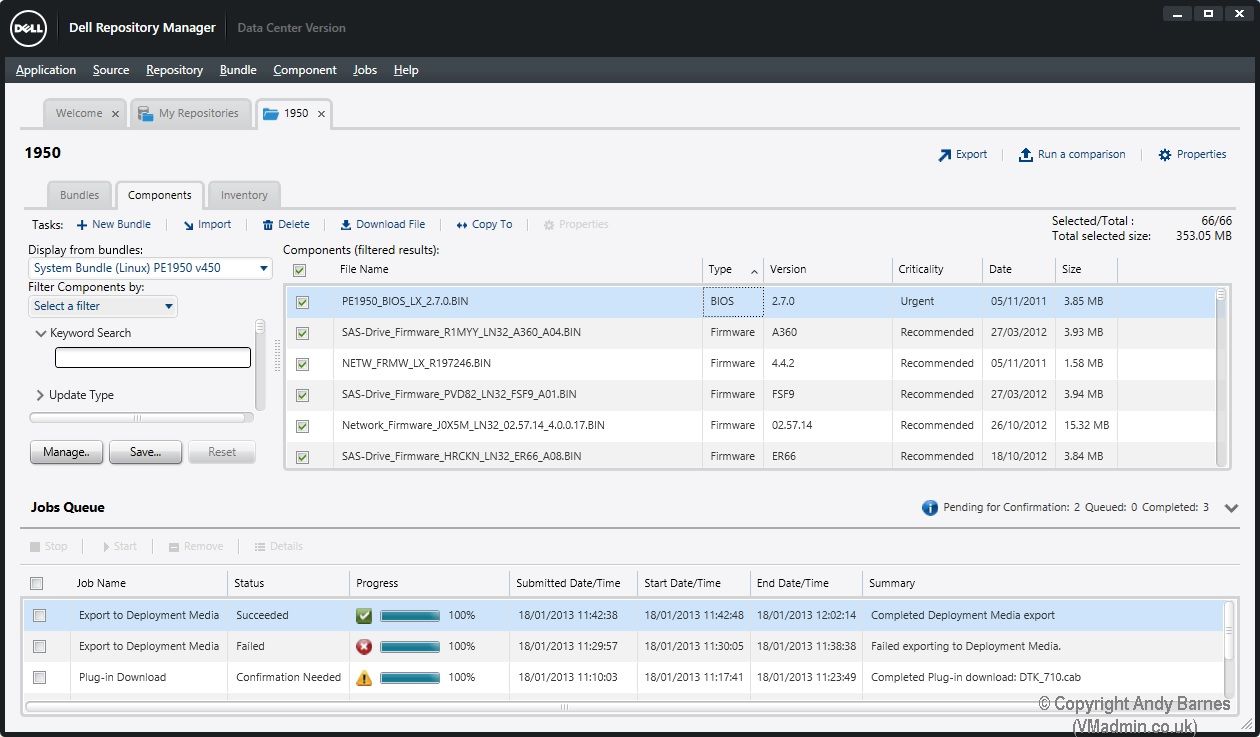
16. If you click on the Components tab you will then see all the individual updates such as the RAID and SAS drive firmware shown here, there should also be a BIOS update.
17. Select all the components (or the ones you want) I did them all!
18. Go back to the "Bundles" tab and Click "Export".
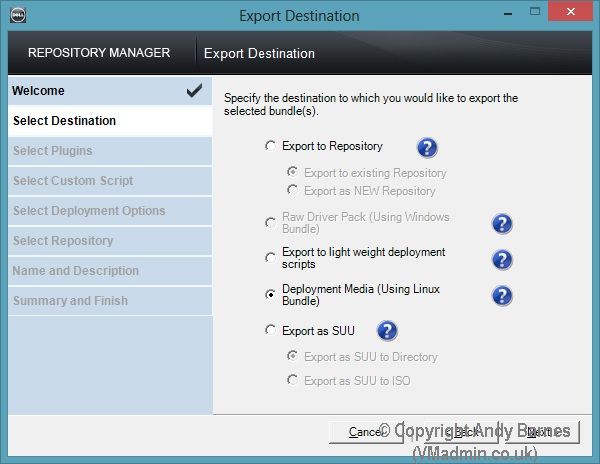
19. We are now going to export all the updates to an ISO. Click Next.
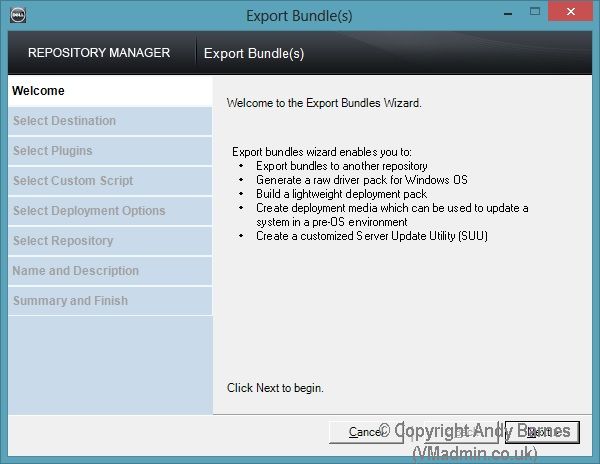
20. Select "Deployment Media (Using Linux Bundle)
Note: This is important to get our bootable ISO.
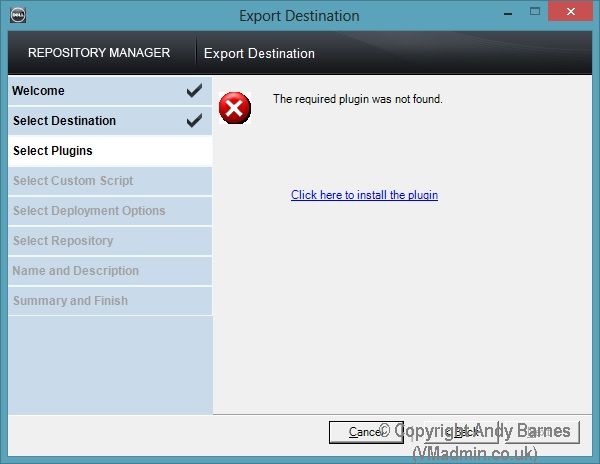
21. You will then get an error message "The required plugin was not found". Click in to install the plugin and wait for it to download and install. This took 2 attempts before it worked for me.
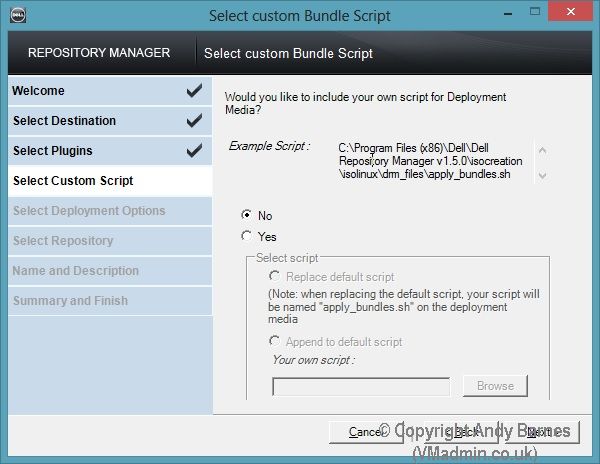
22. Select NO for your own script. It will run it's own script to automatically install all the firmware updates.
23. Review the summary and the location the ISO will be output to. Click Finish.
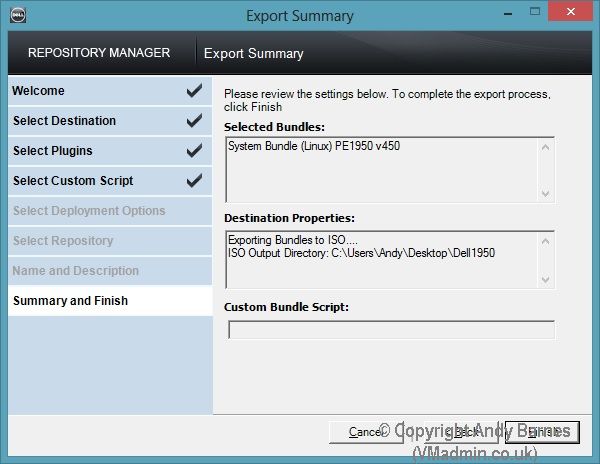
24. In the job queue you will notice a task to export deployment media.
Again this bit also took 2 attempts for me before it produced the ISO, not sure why I just put it down to a crap tool!
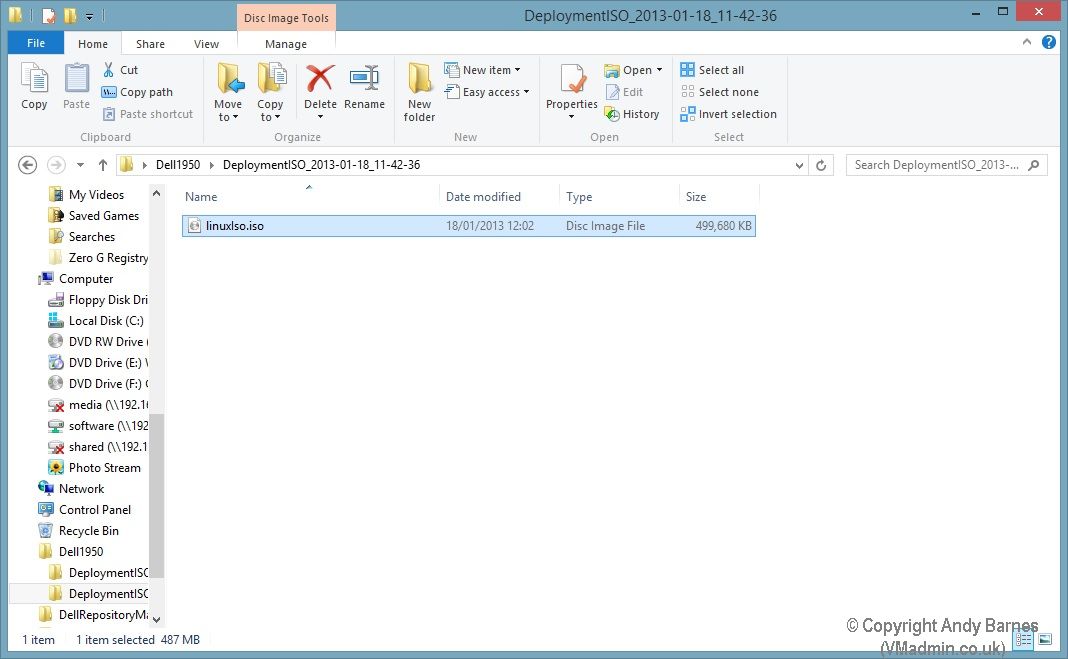
25. Et voilia! We now have a bootable ISO image. For this one server model it's small enough to fit on a CD too.
26. Burn with Windows 7/8 builtin ISO burner or your 3rd party tool to a CD/DVD.
27. As this is an ESXi server we are updating, put your host in maintenance mode, vMotion your VMs to other hosts in the cluster (if you have a cluster) or shutdown the VMs.
Then power off the server and boot from the CD.
28. When it boots from the CD you need to press "1" and it will then run through all the BIOS and firmware updates automatically for you.
I hope you found this useful and it saved you from losing the will to live! :-)
I decided I would update my Dell PowerEdge 1950 server to the latest BIOS version and also if possible update the firmware for the RAID card, disks, network adapters and so on.
I thought this would be pretty straightforward, oh how I was wrong! I never knew it would be so hard to actually figure out which tool to download and how to use it!
I'm writing this because I may forget what I did and I assume others will also find it useful..
After spending way too much time figuring out all the different ways, the best way I found is to use Dell Repository Manager..
I'd never heard of Dell Repository Manager before and to be honest it did not sound like what I was looking for. However it's perfect (well not quite but it does the job)!
Because my server is an VMware ESXi server I cannot install Windows or Linux firmware updates from it. So I wanted a CD/DVD that I could boot from with all the BIOS and firmware updates on it.
Dell Repository Manager is a Windows based piece of software (which I installed on my Windows 8 desktop).
Once installed there is a datacenter version for rack, tower and blade servers and a client version for desktops and laptops.
So this can be used to update everything from a Dell PE 1950 rack server, to a M620 blade or even a Dell Vostro laptop!
It then can produce a bootable ISO you can burn to CD or DVD and boot your server from and it even runs through all the BIOS and other firmware updates for you one-by-one automatically, while you have a cup of coffee!
First things first..
1. Download and Install "Dell Repository Manager" on a Windows desktop or server (at least vista/2008 for ISO creation to work)
Note: At time of writing the latest I used was 1.5 A00 (released 12/12/2012)
2. Now start the Dell Respoitory Manager Data Center Version
3. Click Create a New Repository
4. Give your repository a name.
As I'm only wanting Dell PE 1950 updates I'll call it 1950!
5. Leave the source repository selected and click Next.
6. Select the form factor your server model belongs to.
7. Select the OS. Choose all operatings systems.
8. Select the models you want to include on the CD/DVD.
Note: The more models you select will ultimatley result in a larger CD/DVD image
9. Select ONLY include the most recent and custom bundles. Click Next.
10. We are not going to select any additional files. Click Next.
11. Review your repo settings and click Finish.
12. Your repository will be created..
13. Notice the number of components, this is the firmware updates!
14. Click on your repository and it will open in it's own tab.
15. Select the Linux System Bundle for your server model.
Note: Don't worry yes we are updating an ESXi server (not Linux), by selecting Linux we will create a bootable (linux based) ISO!
16. If you click on the Components tab you will then see all the individual updates such as the RAID and SAS drive firmware shown here, there should also be a BIOS update.
17. Select all the components (or the ones you want) I did them all!
18. Go back to the "Bundles" tab and Click "Export".
19. We are now going to export all the updates to an ISO. Click Next.
20. Select "Deployment Media (Using Linux Bundle)
Note: This is important to get our bootable ISO.
21. You will then get an error message "The required plugin was not found". Click in to install the plugin and wait for it to download and install. This took 2 attempts before it worked for me.
22. Select NO for your own script. It will run it's own script to automatically install all the firmware updates.
23. Review the summary and the location the ISO will be output to. Click Finish.
24. In the job queue you will notice a task to export deployment media.
Again this bit also took 2 attempts for me before it produced the ISO, not sure why I just put it down to a crap tool!
25. Et voilia! We now have a bootable ISO image. For this one server model it's small enough to fit on a CD too.
26. Burn with Windows 7/8 builtin ISO burner or your 3rd party tool to a CD/DVD.
27. As this is an ESXi server we are updating, put your host in maintenance mode, vMotion your VMs to other hosts in the cluster (if you have a cluster) or shutdown the VMs.
Then power off the server and boot from the CD.
28. When it boots from the CD you need to press "1" and it will then run through all the BIOS and firmware updates automatically for you.
I hope you found this useful and it saved you from losing the will to live! :-)
Читайте также: