
Orca linux что это
Обновлено: 03.07.2024
Orca is an Electron app that generates images and reports of Plotly things like plotly.js graphs, dash apps, dashboards from the command line. Additionally, Orca is the backbone of Plotly's Image Server. Orca is also an acronym for Open-source Report Creator App.
Visit plot.ly to learn more or visit the Plotly forum.
Follow @plotlygraphs on Twitter for Orca announcements.
If you have conda installed, you can easily install Orca from the plotly conda channel using:
which makes the orca executable available on the path of current conda environment.
If you have Node.js installed (recommended v8.x), you can easily install Orca using npm as:
which makes the orca executable available in your path.
Method 3: Docker
If no arguments are specified, it starts an Orca server on port 9091. You can publish the port to the outside world the usual way:
If the first argument is graph , it executes the command line application orca graph :
Method 4: Standalone binaries
Alternatively, you can download the standalone Orca binaries corresponding to your operating system from the release page. Then, on
- Unzip the mac-release.zip file.
- Double-click on the orca-X.Y.Z.dmg file. This will open an installation window.
- Drag the orca icon into the Applications folder.
- Open finder and navigate to the Applications/ folder.
- Right-click on the orca icon and select Open from the context menu.
- A password dialog will appear asking for permission to add orca to your system PATH .
- Enter you password and click OK.
- This should open an Installation Succeeded window.
- Open a new terminal and verify that the orca executable is available on your PATH .
- Extract the windows-release.zip file.
- In the release folder, double-click on orca Setup X.Y.Z , this will create an orca icon on your Desktop.
- Right-click on the orca icon and select Properties from the context menu.
- From the Shortcut tab, copy the directory in the Start in field.
- Add this Start in directory to you system PATH (see below).
- Open a new Command Prompt and verify that the orca executable is available on your PATH .
- Create a symbolic link named orca somewhere on your PATH that points to the AppImage.
- Open a new terminal and verify that the orca executable is available on your PATH .
Linux Troubleshooting: Cannot open shared object
The Electron runtime depends a several common system libraries. These libraries are pre-installed in most desktop Linux distributions (e.g. Ubuntu), but are not pre-installed on some server Linux distributions (e.g. Ubuntu Server). If a shared library is missing, you will see an error message like:
These additional dependencies can be satisfied by installing:
- The libgtk2.0-0 and libgconf-2-4 packages from your distribution's software repository.
- The chromium-browser package from your distribution's software repository.
Linux Troubleshooting: Headless server configuration
The Electron runtime requires the presence of an active X11 display server, but many server Linux distributions (e.g. Ubuntu Server) do not include X11 by default. If you do not wish to install X11 on your server, you may install and run orca with Xvfb instead.
On Ubuntu Server, you can install Xvfb like this:
To run orca under Xvfb, replace the symbolic link suggested above with a shell script that runs the orca AppImage executable using the xvfb-run command.
Name this shell script orca and place it somewhere on your system PATH .
From the command line: Unix/MacOS:
generates a PNG from the inputted plotly.js JSON attributes. Or,
generates an SVG from a plotly.js JSON hosted on plot.ly.
To print info about the supported arguments, run:
To call orca from a Python script:
To call orca from an R script:
Using the orca npm module allows developers to build their own Plotly exporting tool. We export two Electron app creator methods run and serve . Both methods return an Electron app object (which is an event listener/emitter).
To create a runner app:
then launch it with electron main.js
Or, to create a server app:
then launch it with electron main.js
Plotly's image server
Plotly's image server is dockerized and deployed here. See the deployment/ README for more info.
If you don't care about exporting EPS or EMF you can skip this section.
The environment you're installing this into may require Poppler for EPS exports and Inkscape for EMF exports.
Poppler installation via Aptitude (used by some *nix/BSD, e.g. Ubuntu)
Poppler installation via Homebrew (third-party package manager for Mac OS X)
Inkscape installation via Aptitude (used by some *nix/BSD, e.g. Ubuntu)
Inkscape installation via Homebrew (third-party package manager for Mac OS X)
See CONTRIBUTING.md. You can also contact us if you would like a specific feature added.
| Tests and Linux builds | Mac OS build | Windows build | Docker build |
|---|
Code released under the MIT © License.
About
Command line application for generating static images of interactive plotly charts

Вступление
Если вы работаете системным администратором / администратором Linux / DevOps / SRE, то, скорее всего, вам придется решать проблемы, связанные с производительностью, в среде Linux. Давайте рассмотрим некоторые из наиболее часто используемых утилит командной строки Linux для диагностики проблем, связанных с сетью и производительностью.1. Top
Когда мы запустим эту команду, откроется интерактивный командный режим. Где верхняя половина будет содержать статистику процессов и использования ресурсов. А нижняя половина содержит список запущенных в данный момент процессов.
2. vmstat
vmstat не должен присутствовать в вашей системе Linux, но не беспокойтесь.
Мы можем легко установить пакет «sysstat»

3. iostat
Команда iostat на Linux позволяет отслеживать статистику использования ЦП и ввода-вывода ( I/O) для всех дисков и файловых систем.
Команды iostat полезны для изменения конфигурации системы, чтобы лучше сбалансировать нагрузку ввода-вывода между физическими дисками.
Эта команда в основном используется системными администраторами Linux.

4. iostat -d
Команда iostat -d используется для мониторинга загрузки устройств ввода / вывода системы, отслеживая время активности устройств в зависимости от их средней скорости передачи данных.
Команда iostat -d используется для отображения отчетов об использовании устройств.

5. lsof
Открытый файл не означает pdf или текстовый файл, он включает файлы на диске или каналы, используемые процессами в фоновом режиме.

Вывод:3
6. tcpdump
Эта команда обычно используется для анализа трафика в Linux, а также во многих других операционных системах.
tcpdump позволяет прослушивать весь входящий и исходящий трафик со всех интерфейсов.
Что еще более важно, он может фильтровать трафик по интерфейсу, хосту, месту назначения или хосту-источнику, типу трафика и многим другим критериям.
Мы также можем сохранить захваченные пакеты в файл для последующего анализа.8. netstat -s
Команда netstat -s вывеодит сетевую статистику, такую как общее количество полученных и переданных пакетов по типу протокола и так далее.
Чтобы вывести статистику только избранных протоколов, таких как TCP или UDP, используйте соответствующие параметры, такие как t и u, вместе с параметром s.

9. ps -ef | grep PID
Команда ps выводит четыре столбца информации для двух минимальных процессов, запущенных в текущей оболочке.

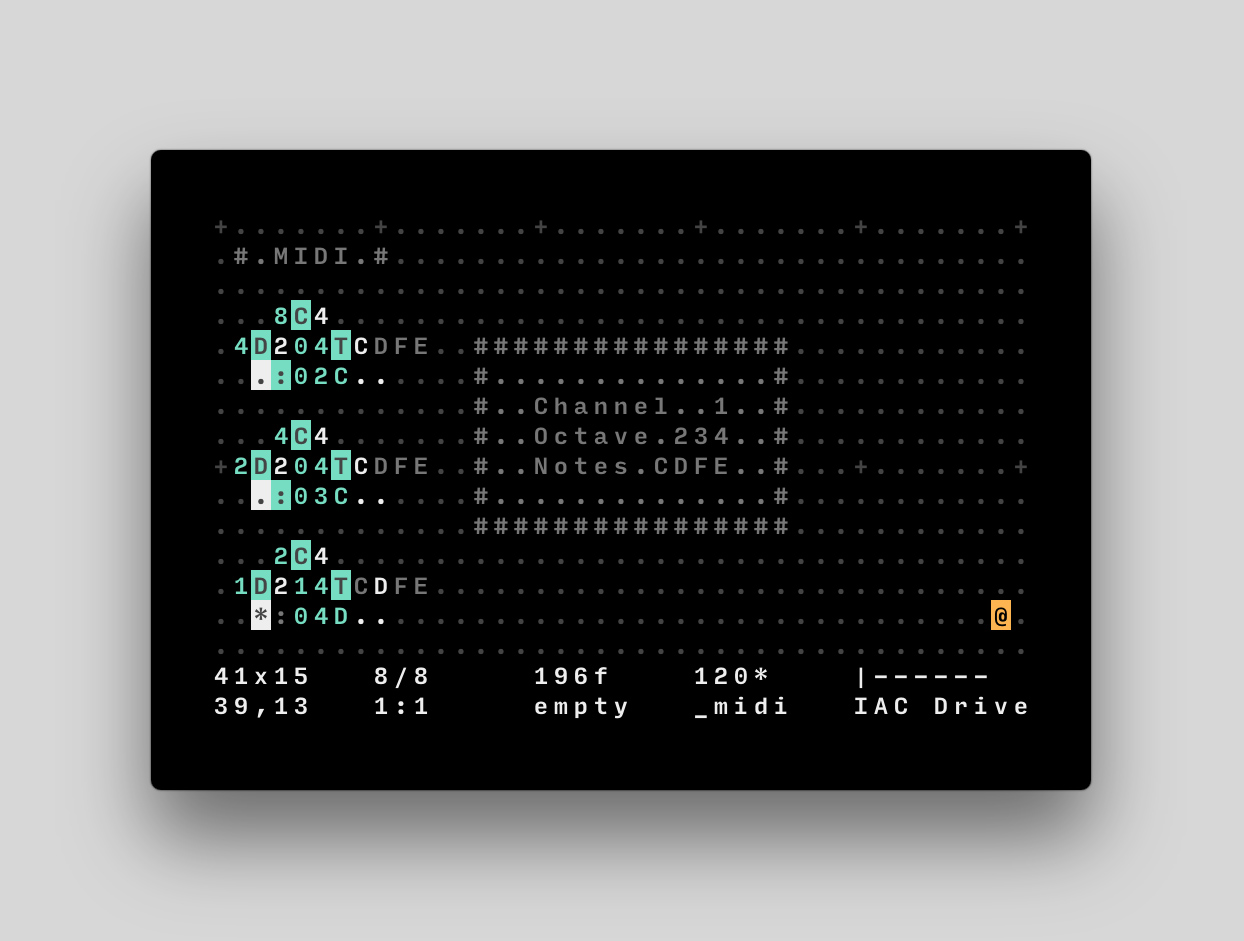
Orca is an esoteric programming language designed to quickly create procedural sequencers, in which every letter of the alphabet is an operation, where lowercase letters operate on bang, uppercase letters operate each frame.
This application is not a synthesizer, but a livecoding environment capable of sending MIDI, OSC & UDP to your audio/visual interfaces, like Ableton, Renoise, VCV Rack or SuperCollider.
If you need help, visit the chatroom, join the forum or watch an tutorial.
-
, available for Linux, Windows and OSX.
- Use in your browser, requires webMidi.
- Use in a terminal, written in C.
- Use on small computers, written in assembly.
- Use on the Monome Norns, written in Lua.
If you wish to use Orca inside of Electron, follow these steps:
To display the list of operators inside of Orca, use CmdOrCtrl+G .
- : midi(channel octave note velocity length): Sends a MIDI note.
- % mono(channel octave note velocity length): Sends monophonic MIDI note.
- ! cc(channel knob value): Sends MIDI control change.
- ? pb(channel value): Sends MIDI pitch bench.
- ; udp: Sends UDP message.
- = osc(path): Sends OSC message.
- $ self: Sends ORCA command.
The MIDI operator : takes up to 5 inputs('channel, 'octave, 'note, velocity, length).
The MONO operator % takes up to 5 inputs('channel, 'octave, 'note, velocity, length).
This operator is very similar to the default Midi operator, but each new note will stop the previously playing note, would its length overlap with the new one. Making certain that only a single note is ever played at once, this is ideal for monophonic analog synthetisers that might struggle to dealing with chords and note overlaps.
The MIDI CC operator ! takes 3 inputs('channel, 'knob, 'value).
It sends a value between 0-127, where the value is calculated as a ratio of 36, over a maximum of 127. For example, !008 , is sending 28, or (8/36)*127 through the first channel, to the control mapped with id0 . You can press enter, with the ! operator selected, to assign it to a controller. By default, the operator sends to CC64 and up, the offset can be changed with the command cc:0 , to set the offset to 0.
The MIDI PB operator ? takes 3 inputs('channel, 'lsb, 'msb).
It sends two different values between 0-127, where the value is calculated as a ratio of 36, over a maximum of 127. For example, ?008 , is sending an MSB of 28, or (8/36)*127 and an LSB of 0 through the first midi channel.
MIDI BANK SELECT / PROGRAM CHANGE
This is a command (see below) rather than an operator and it combines the MIDI program change and bank select functions.
The syntax is pg:channel;msb;lsb;program . Channel is 0-15, msb/lsb/program are 0-127, but program will automatically be translated to 1-128 by the MIDI driver. program typically correspondes to a "patch" selection on a synth. Note that msb may also be identified as "bank" and lsb as "sub" in some applications (like Ableton Live).
msb and lsb can be left blank if you only want to send a simple program change. For example, pg:0;;;63 will set the synth to patch number 64 (without changing the bank)
The UDP operator ; locks each consecutive eastwardly ports. For example, ;hello , will send the string "hello", on bang, to the port 49160 on localhost . In commander, use udp:7777 to select the custom UDP port 7777, and ip:127.0.0.12 to change the target IP. UDP is not available in the browser version of Orca.
You can use the listener.js to test UDP messages. See it in action with udp.orca.
The OSC operator = locks each consecutive eastwardly ports. The first character is used for the path, the following characters are sent as integers using the base36 Table. In commander, use osc:7777 to select the custom OSC port 7777, and ip:127.0.0.12 to change the target IP. OSC is not available in the browser version of Orca.
For example, =1abc will send 10 , 11 and 12 to /1 , via the port 49162 on localhost ; =a123 will send 1 , 2 and 3 , to the path /a . You can use the listener.js to test OSC messages. See it in action with osc.orca or try it with SonicPi.
Some of Orca's features can be controlled externally via UDP though port 49160 , or via its own command-line interface. To activate the command-line prompt, press CmdOrCtrl+K . The prompt can also be used to inject patterns or change settings.
You can quickly inject orca files into the currently active file, by using the command-line prompt — Allowing you to navigate across multiple files like you would a project. Press CmdOrCtrl+L to load multiple orca files, then press CmdOrCtrl+B and type the name of a loaded .orca file to inject it.
| UDP Input | OSC Input | UDP Output | OSC Output |
|---|---|---|---|
| 49160 | None | 49161 | 49162 |
All commands have a shorthand equivalent to their first two characters, for example, write can also be called using wr . You can see the full list of commands here.
Orca operates on a base of 36 increments. Operators using numeric values will typically also operate on letters and convert them into values as per the following table. For instance Do will bang every 24th frame.
| 0 | 1 | 2 | 3 | 4 | 5 | 6 | 7 | 8 | 9 | A | B |
|---|---|---|---|---|---|---|---|---|---|---|---|
| 0 | 1 | 2 | 3 | 4 | 5 | 6 | 7 | 8 | 9 | 10 | 11 |
| C | D | E | F | G | H | I | J | K | L | M | N |
| 12 | 13 | 14 | 15 | 16 | 17 | 18 | 19 | 20 | 21 | 22 | 23 |
| O | P | Q | R | S | T | U | V | W | X | Y | Z |
| 24 | 25 | 26 | 27 | 28 | 29 | 30 | 31 | 32 | 33 | 34 | 35 |
The midi operator interprets any letter above the chromatic scale as a transpose value, for instance 3H , is equivalent to 4A .
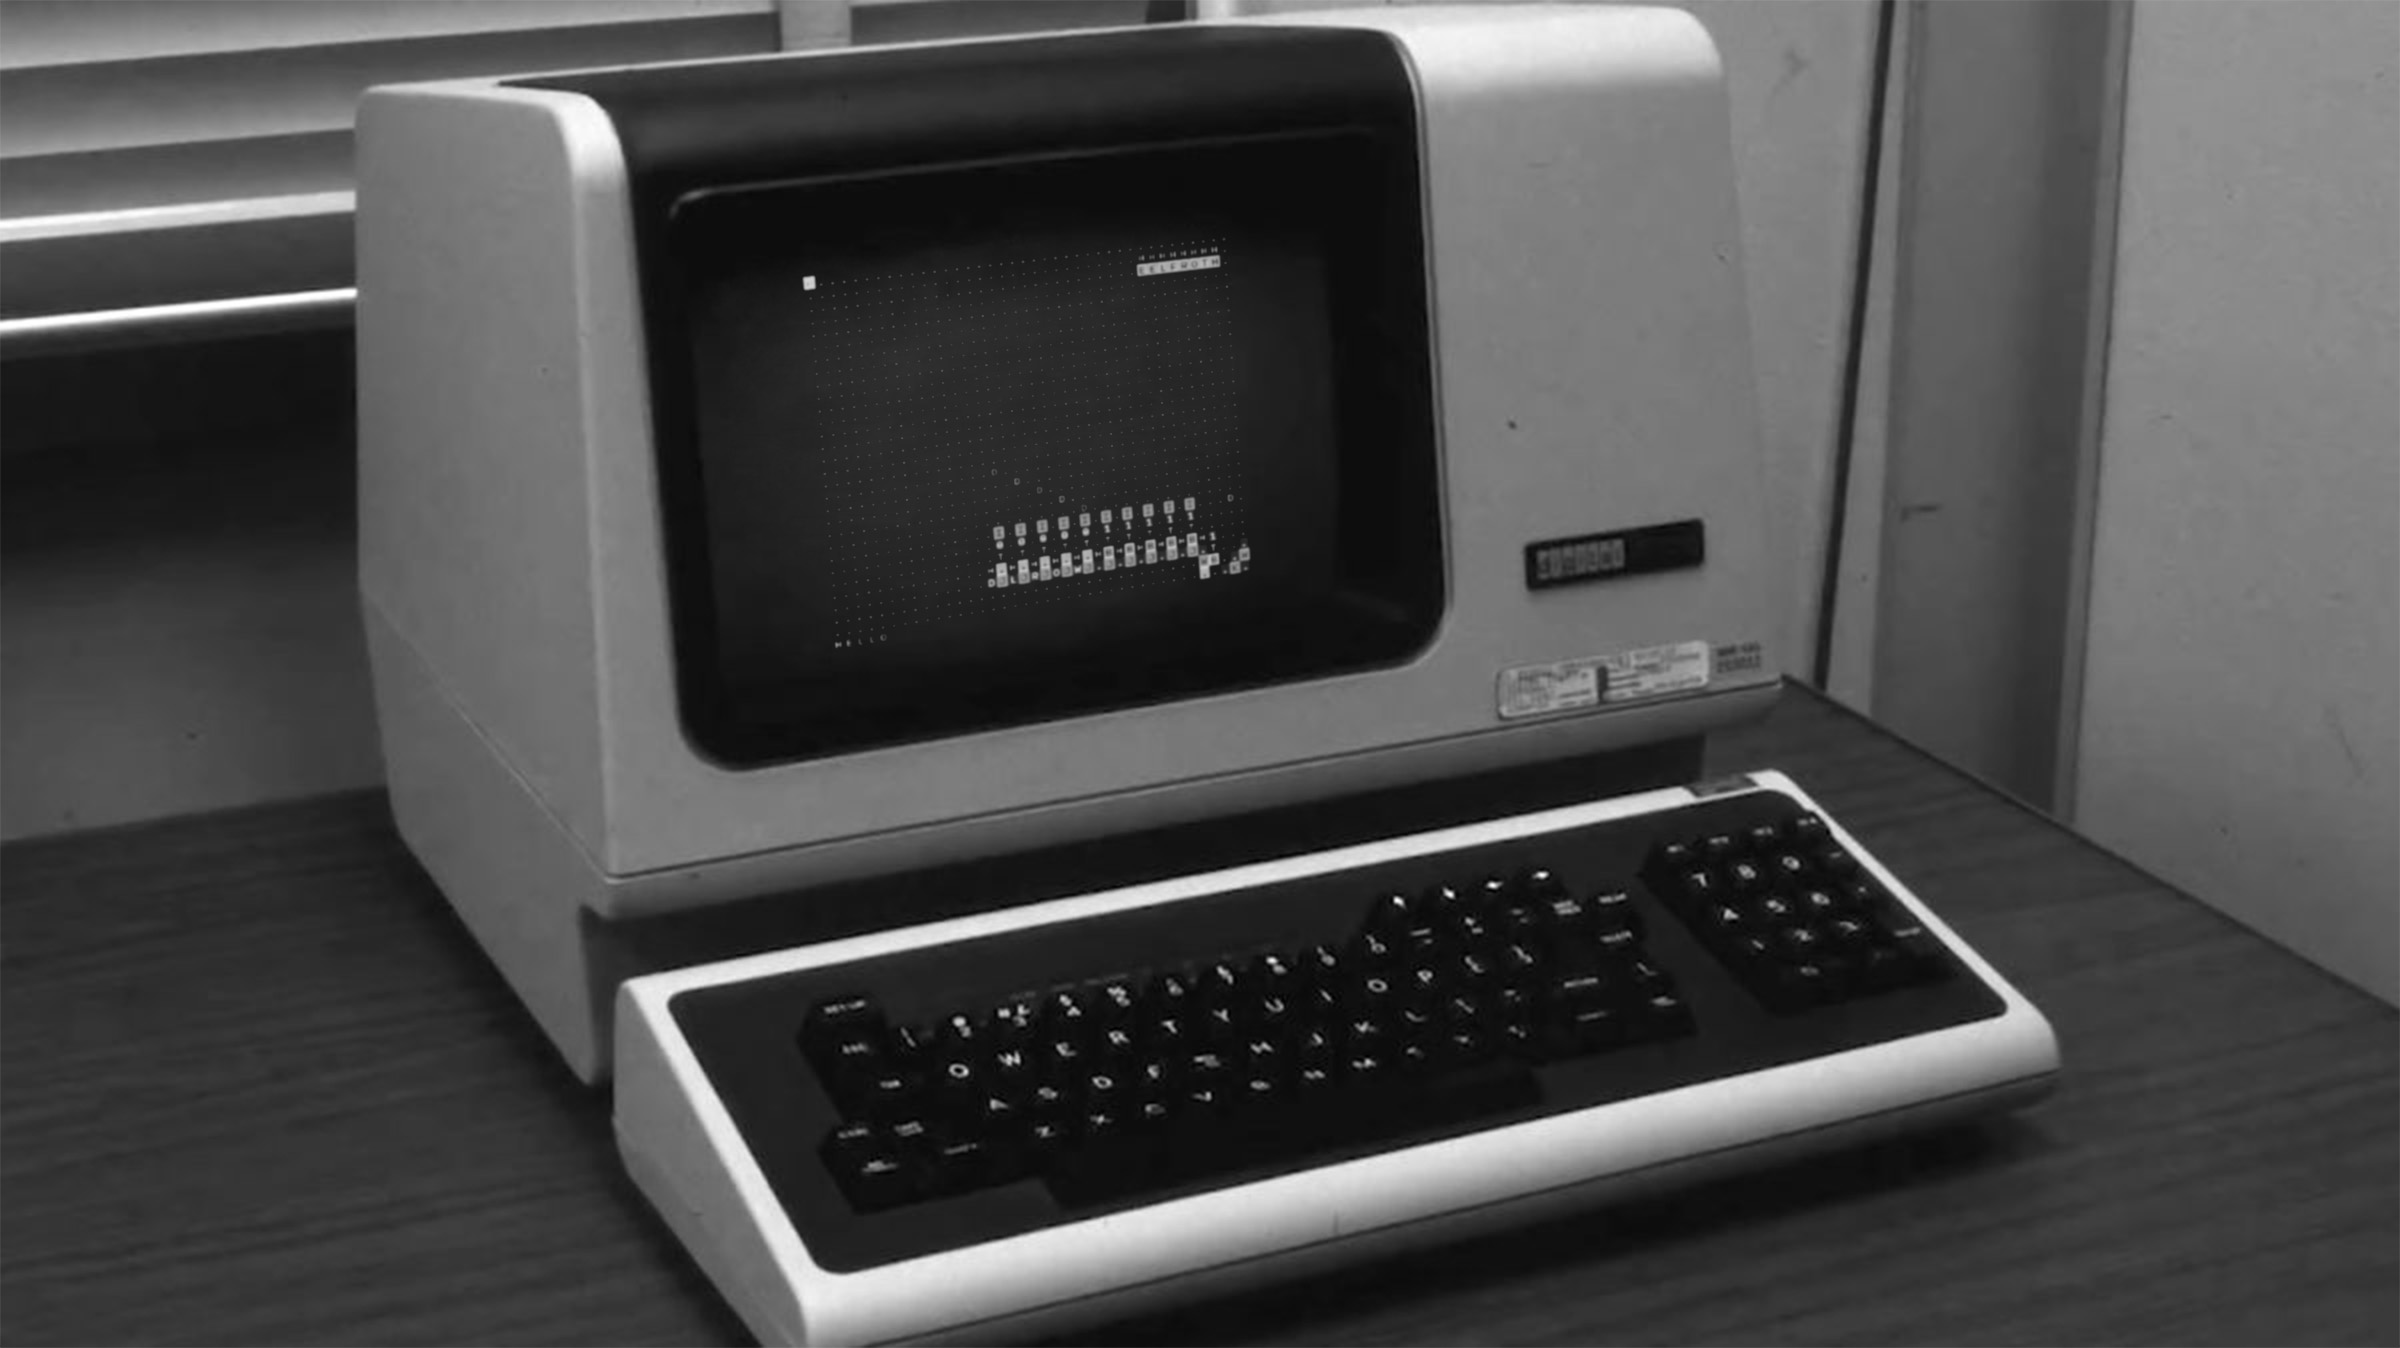
Я случайно открыл Orca Screen Reader из Dash, когда пытался открыть Screenshot. Теперь все, что я печатаю или нажимаю, произнесено вслух.
Как мне это остановить?
Для справки вот скриншот запущенного Orca Screen Reader:

Я подал ошибку о плохом пользовательском опыте, которая является результатом текущего поведения Орки.
Если вам не нужна помощь, вы можете рассмотреть следующие вопросы:
Я говорю это из-за неприятного опыта случайного срабатывания в нескольких случаях. Это подход кувалдой, но я его абсолютно не использую.
Если вы хотите сохранить его, но сейчас он запускается при загрузке, не считая поиска в приложении для поиска выключателя, подумайте и над этим вопросом: как мне остановить запуск orca при входе в систему?
Alt + Super + S также работает, чтобы выключить (или включить) Orca.
Это сочетание клавиш настроено следующим образом.
- Откройте "Системные настройки"
- Выберите "Клавиатура"
- Выберите вкладку "Ярлыки"
- На левой панели выберите "Универсальный доступ"
- На правой панели выберите "Включение или отключение чтения с экрана"
- Введите новую комбинацию клавиш, чтобы включить или выключить Orca.

- Выключить звук
- Откройте терминал
- $ killall orca
- Включите звук снова
Откройте Системные настройки, нажмите кнопку с надписью универсальный доступ, нажмите на вкладку, и на этой вкладке включите и выключите программу чтения с экрана. Или, если программа чтения с экрана была запущена другим способом, включите и снова выключите.
В духе Ubuntu и большей философии открытого исходного кода Linux, согласно которому каждый пользователь должен иметь возможность использовать все программное обеспечение независимо от инвалидности 1, вот несколько всеобъемлющих решений, которые выходят за рамки пользователей, которые не нуждаются или не хотят использовать Orca.
Отключить косатку с помощью клавиш быстрого вызова Alt + Super + S
Согласно официальной документации о доступности, отключение Orca может быть переключено горячими клавишами:
Alt + Super + S
Или используйте один из следующих методов.
Отключить Orca из командной строки
Использование GSettings
Читатель экрана может быть отключен через gsettings с помощью этой команды:
gsettings set org.gnome.desktop.a11y.applications screen-reader-enabled false
Использование Orca
Этот метод полезен для пользователей, которые хотят отключить речь, продолжая использовать другие параметры программы чтения с экрана - braille а также braille-monitor ,
Чтобы перезапустить Orca с отключенной речью, используйте эту команду:
nohup orca -d speech --replace &
nohup а также & были включены, поэтому он будет работать в фоновом режиме, не убивая процесс, если пользователь закрывает терминал.
Эта команда убивает любой запущенный процесс Orca, возможно, с SIGKILL Это означает, что Orca не имеет возможности выдать звуковое подтверждение "Отключение чтения с экрана". Технически это не выключено, хотя, потому что это заменяет это новым процессом Orca, используя предоставленные параметры.
Этот метод можно использовать для отключения или включения любой конкретной опции. Бежать man orca для деталей.
Настройка параметров автозапуска Orca
Администраторы и пользователи могут контролировать, запускается ли Orca при запуске. Это может быть сделано глобально для всех пользователей или для отдельного пользователя в вашей сети. Настройки автозапуска отдельного пользователя имеют приоритет над глобальными настройками.
Простой способ
В вашей рабочей среде, вероятно, есть графический менеджер сеансов, в котором вы можете удалить Orca из списка приложений для запуска. Например:
- Гном
Бежать gnome-session-properties в терминале. - LXDE
Бежать lxsession-default-apps в терминале. - XFCE
Бежать xfce4-session в терминале.
Расширенные методы Изменение настроек автозапуска вручную должно быть доступно каждому через терминал, независимо от среды рабочего стола.
Редактировать файл orca-autostart.desktop в текстовом редакторе или, если он не существует, создайте его в каталоге автозапуска:
- Каталог автозапуска для отдельного пользовательского примера:
/home/mattmurdock/.config/autostart/ - Каталог автозапуска для всех пользователей:
/etc/xdg/autostart/
Если вы не уверены в правильности указанных выше путей, вы можете быстро найти их, запустив locate "orca-autostart.desktop" ,
Чтобы отключить автозапуск Orca, обязательно включите строку NotShowIn=<desktop-environment>; замена <desktop-environment> с одним (и), для которого вы хотите его отключить, за которым следует точка с запятой. 2
Например, чтобы отключить автозапуск Orca в Gnome, XFCE и LXDE, файл должен выглядеть следующим образом:
Читайте также: