
Adobe immersive environment что это
Обновлено: 03.07.2024
Adobe After Effects является цифровые визуальные эффекты , графики движения и композитинга приложений , разработанный компанией Adobe Systems и используется в пост-продакшн процесс создания фильма , видеоигр и телевизионного производства . Помимо прочего, After Effects можно использовать для наложения , трекинга , композитинга и анимации . Он также функционирует как очень простой нелинейный редактор , аудиоредактор и транскодер мультимедиа . В 2019 году программа получила премию Американской киноакадемии за научно-технические достижения.
СОДЕРЖАНИЕ
История
After Effects был первоначально создан Дэвидом Хербстманом, Дэвидом Саймонсом, Дэниелом Уилком, Дэвидом М. Коттером и Расселом Белфером в Company of Science and Art в Провиденсе, Род-Айленд , где были представлены первые две версии программного обеспечения, 1.0 (январь 1993 г.) и 1.1, были выпущены компанией. CoSA вместе с After Effects в июле 1993 года была приобретена корпорацией Aldus Corporation , которая, в свою очередь, была приобретена Adobe в 1994 году, а вместе с ним и PageMaker . Первым новым выпуском After Effects от Adobe была версия 3.0.
Ниже приводится список версий After Effects за последние годы, включая первые две версии, выпущенные CoSA.
Сторонние плагины, скрипты и расширения
Функциональность After Effects может быть расширена за счет различных сторонних интеграций, наиболее распространенными из которых являются подключаемые модули, сценарии и расширения.
Плагины After Effects
Плагины преимущественно написаны на C или C ++ и расширяют функциональные возможности After Effects, позволяя использовать более продвинутые функции, такие как системы частиц, физические движки, 3D-эффекты, а также возможность преодолеть разрыв между After Effects и другим приложением.
Сценарии After Effects
Сценарии After Effects - это серия команд, написанных как на JavaScript, так и на языке ExtendScript .
Сценарии After Effects, в отличие от подключаемых модулей, могут получить доступ только к основным функциям After Effects. Сценарии часто разрабатываются для автоматизации повторяющихся задач, упрощения сложных функций After Effects или для выполнения сложных вычислений, выполнение которых в противном случае заняло бы много времени.
Сценарии также могут использовать некоторые функции, которые напрямую не отображаются через графический интерфейс пользователя.
Расширения After Effects
After Effects Extensions предлагает возможность расширения функциональности After Effects с помощью современных технологий веб-разработки, таких как HTML5 и Node.js, без необходимости использования C ++.
After Effects Extensions используют общую платформу расширяемости Adobe или панели CEP, что означает, что они могут быть созданы для взаимодействия с другими приложениями Adobe CC.
Похожие продукты
- Ядерная бомба - Литейная
- Горение , токсичность и дым - Autodesk
- Движение - Apple Inc.
- Fusion - Blackmagic Design
- Борис КРАСНЫЙ - Boris FX
Программное обеспечение с открытым исходным кодом Blender не предназначено для композитинга, но содержит ограниченную функцию композитинга на основе узлов, которая, помимо прочего, способна создавать базовые эффекты кеинга и размытия.

Недавно Adobe анонсировала обширное обновление для Adobe Camera Raw, Lightroom CC и Lightroom Classic CC, добавив новые профили Adobe RAW и Custom Profiles, из чего можно сделать вывод, что компания Adobe со всей серьезностью относится к редактированию цвета и тональности. Однако это были далеко не все новинки, Adobe также обновила свои приложения для редактирования видео After Effects и Premiere Pro, а также внедрила несколько интересных решений, основанных на применении искусственного интеллекта Adobe Sensei AI специально для Premiere Pro.
«Сегодня требования к видео контенту и скорости его создания достигают таких уровней, о которых мы раньше и предположить не могли. Всё большую роль для видео профессионалов играет фактор скорости работы, поэтому потребность в мощных и эффективных инструментах для творчества никогда не была столь актуальной, – говорит Стивен Уорнер (Steven Warner), вице-президент по цифровому видео и аудио компании Adobe. – Приложения Adobe для видео, такие как Premiere Pro и After Effects, дают им такую мощь, которая в сочетании с сервисам Creative Cloud предоставляет блогерам, медиа-компаниям, кинематографистам и ютуберам готовое решение, чтобы они смогли создавать и публивовать свои видео быстрее, чем когда-либо».
Adobe After Effects
After Effects получила несколько интересных новых функций, в том числе новый инструмент Advanced Puppet для создания сложных движений и мастер-свойства, которые позволяют применять изменения к отдельным эффектам в нескольких версиях композиции.
С помощью мастер-свойств можно создавать композиции, которые позволяют управлять свойствами слоя на временной шкале родительской композиции. Можно применить отдельные значения ко всем версиям композиции или вернуть выбранные изменения на прежние значения. Adobe также добавила Immersive Environment в After Effects, позволяя более эффективно редактировать 360-градусный контент и VR-контент в рамках рабочего процесса.
Adobe Premiere Pro
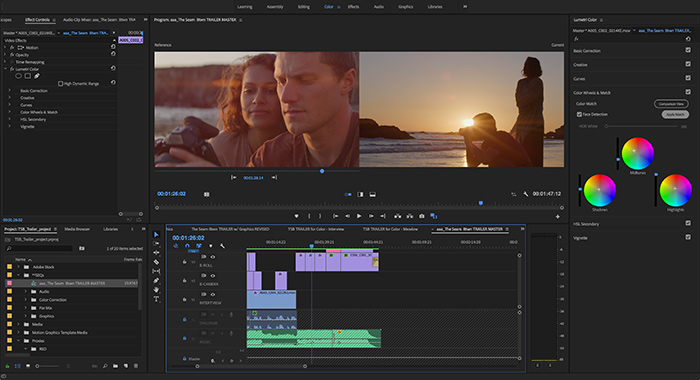
Мастер-свойства и инструмент Advanced Puppet впечатляют. В первую очередь, новая функция Color Match использует Adobe Sensei AI для автоматического применения цветовой обработки одного снимка для другого. Эта функция интегрирована с обнаружением лиц, поэтому Premiere может синхронизировать оттенки кожи там, где это необходимо, а новый сплит-просмотр Split View позволяет отслеживать результаты цветовой коррекции по мере работы, либо в качестве интерактивного слайдера, либо располагая панели рядом одна с другой.
В дополнение к Color Match и Split View, Adobe внедрила технологию искусственного ителлекта Sensei AI для продвинутой работы со звуком. Autoducking автоматически отключит музыку при обнаружении диалога или звуковых эффектов, создавая ключевые кадры прямо на звуковой дорожке, чтобы можно было легко отредактировать автоматическое снижение громкости или переопределить ключевые кадры при необходимости.
Видео демонстрирует новые функции:
Adobe также добавила интеграцию с хостингом Adobe Stock в приложения для покупки видеоматериалов или анимированной графики, а новая панель Learn в Premiere Pro позволит новым пользователям проще и быстрее изучить основные этапы редактирования видео.
Основные новые функции
- Более удобное редактирование цвета и света в Premiere Pro CC – функции Adobe Sensei и Color Match позволяют сравнивать два фрагмента, применяя корректировки Lumetri одного клипа для другого, чтобы достичь визуальной согласованности во всех сценах и во всех проектах.
- Сравните снимки с использованием нового сплит-представления. Создавайте анимацию и графику быстрее в After Effects CC – различные поведения и эффекты в сочетании с анимацией на основе временной шкалы теперь делают творческий процесс более визуальным и интуитивным. Примените изменения к отдельным эффектам в нескольких версиях композиции с помощью одной настройки мастера. Кроме того, с помощью нового инструмента Advanced Puppet могут быть сделаны сложные движения для любой поверхностной сетки.
- Звук редактировать удобнее с аудиосистемами Sensei – автоматическая настройка звука саундтрека вокруг диалога, будь то для отдельного клипа или всего проекта, с автозапусками с поддержкой Sensei, которые теперь доступны в Adobe Premiere Pro.
- Оживить персонажи с помощью Anim Animator – анимация персонажа быстрее и эффективнее с помощью поведенческих библиотек и пользовательских триггеров. Перетащите слои из панели Puppet в панель Triggers, чтобы применить и отредактировать существующее поведение или создать новое.
- Добавьте 360 степеней творчества с улучшенными инструментами для погружения в контент – Adobe Immersive Environment теперь доступна в After Effects CC, что упрощает процесс погружения для более эффективного перемещения по проктам. Новая поддержка платформы Microsoft Windows Mixed Reality предлагает широкий выбор гарнитур для выбора лучших инструментов для работы.
- Совместная работа в Team Projects – для достижения максимальной эффективности сотрудничества в режиме реального времени отображает, когда партнеры по команде находятся в сети, а новые значки указывают, когда проект был обновлен.
- Получите необходимый контент с Adobe Stock – с прямым доступом к миллионам загруженных HD и 4K видео, выберите клипы для создания снимков, заполните пробелы в проектах или обогатите свои сюжеты и истории с помощью разнообразных заставок, видео и графики. Добавьте изюминку к видеоконтенту с помощью профессионально разработанных шаблонов Motion Graphics, включая анимированные титры и графики с редактируемыми эффектами и текстом.
- Поддержка новых пользователей – новичкам Premiere Pro теперь поможет новая панель Learn, которая находится всегда рядом, когда это необходимо.
Чтобы узнать больше обо всех обновлениях, перейдите к блогу Adobe, где есть подробная презентация всех наиболее важных новых функций как в Adobe After Effects CC, так и в Premiere Pro CC. Обновления приложений уже доступны в Creative Cloud.
Составление обзора, Константин Биржаков, 5 апреля 2018 г.
По материалам официального сайта Adobe
Автор обзора не может нести ответственность за достоверность сведений, взятых из открытых источников.
After Effects offers native support for editing your VR 360 and VR 180 videos. You can use a host of dynamic transitions, effects, and titles to edit and enhance the immersive video experience. You can experiment with the different VR 360 and VR 180 tools in After Effects for a seamless post-production workflow.
Work with VR tools in After Effects
When you work with VR, you could run into memory limitations indicated by a banner that states - Requires GPU Acceleration . By default, Adobe video applications require approximately 1GB of memory for every 1K of horizontal resolution when working in VR. In After Effects 2018, you can reduce the requirements, called Aggressive Memory Management . To enable the setting, select Preferences > Previews > GPU Information > Aggressive GPU memory use (for VR) .
The following are tools in After Effects you can use to edit your VR 360 and VR 180 videos:
The VR 360 and VR 180 tools in After Effects automate complex compositions and workflows for a seamless 360 production. These tools provide accurate results and reduce editing time.
Create VR Environment automates the process of comp creation and camera relationship setup. You can use it to automate aspects of VR authoring environment in After Effects.
Work with Create VR Environment
Work with Create VR Environment using the following steps:
To launch Create VR Environment , select Composition > VR > Create VR Environment .
In the Create VR Environment dialog, if you want to create a VR master from scratch, choose the Size of your master (1024x1024 works for most of the VR compositions). Set the Frame Rate and Duration of your VR Master, and click Create VR Master .

In the Composition window, change the view to Custom View 1 and create your immersive video. You can select from the various immersive video and other effects in the Effects & Presets panel.
Once you are ready with your composition, open the Create VR Environment dialog and click Generate VR Output . After Effects creates all the compositions, expressions, and adds cameras and distortions required to create a Cubic Map.
To modify your VR Master and apply the changes to your VR comp, click Refresh VR Output in the Create VR Environment dialog. After Effects deletes all comps and recreates them based on the modifications, you made to your VR master.

- Use 2-node camera : Select the option if you want to use a 2-node camera.
- Use 3D Null camera Control : Select the option if you want to control your SkyBox Camera via a 3D Null layer.
- Center camera : Select the option if you want to center-align the camera.
- I am using 3D plugins : Select the option if you are using 3D plug-ins.
- Use edge blending : Select the option when you use plugins that are not true 3D plug-ins.
Extract Cubemap removes equirectangular distortion from 360-degree footage and extracts six separate camera views. The six camera views are positioned in a cube formation. You can do motion-tracking, object removal, add motion graphics, and vfx to the composition.
Work with Extract Cubemap
Work with Extract Cubemap using the following steps:
To launch VR Extract Cubemap , select Composition > VR > Extract Cubemap .
In the VR Extract Cubemap dialog, select a composition from the drop-down list, choose Conversion Resolution , and click Extract Cubemap .

After Effects generates a cubemap output for your VR composition. Extract Cubemap adds a VR Master Camera along with six more camera views that are attached to the master camera. Six camera faces are also generated that strategically form a cube.


The Adobe Immersive Environment in After Effects allows you to preview how your 360 and 180 degree footage looks like in a VR head-mount display (HMD).
After Effects supports the following VR headsets:
To use your VR headsets, ensure that your system meets the VR system requirements, and install SteamVR application. SteamVR is a virtual reality system that you need whether you are using the HTC Vive or Oculus Rift. For more information, visit the SteamVR support page, and refer to the documentation that came with your headset.
To install Steam, use the following steps:
In Steam, create an account, or log into an existing one.
From within Steam, download and install SteamVR.
If you are using a Windows Mixed Reality HMD, within Steam, download and install Windows Mixed Reality for SteamVR.
From within Steam, click Run Room Setup to set up your room.
For more information, see the Steam documentation: Room Setup and SteamVR Tutorial.
- HTC Vive: Follow the instructions that come with your HTC Vive headset.
- Oculus Rift: For information on downloading and installing Oculus Rift, see the Oculus Rift documentation.
Before you enable Adobe Immersive Environment, ensure that your headsets and controllers are working fine in SteamVR.
In After Effects, select Preferences > Video Preview .
In the Preferences dialog, enable the Enable Mercury Transmit option. In the Video Device section, enable the Adobe Immersive Environment option.
Click the Adobe Immersive Environment menu in the Composition panel and choose the viewing option from the following options:
- Theater Mode (Rectilinear) : Previews the composition as a flat rectangle in an empty room, simulating the view of looking at a movie screen.
- 360 Monoscopic : Previews the composition as a monoscopic 360-degree field of view image.
- 360 Over/Under : Previews the composition as a stereoscopic 360-degree field of view image. Assumes over/under layout in the composition.
- 360 Side-by-Side : Previews the composition as a stereoscopic 360-degree field of view image. Assumes side-by-side layout in the composition.
- 180 Over/Under : Previews the composition as a stereoscopic 180-degree field of view image. Assumes over/under layout in the composition.
- 180 Side-by-Side : Previews the composition as a stereoscopic 180-degree field of view image. Assumes side-by-side layout in the composition.
The Video Preview Preferences options allows you to configure your preferences. To turn off preview to your HMD, disable Adobe Immersive Environment in Preferences > Video Preview .

After Effects offers native support for editing your 360/VR videos. You can use a host of dynamic transitions, effects, and titles to edit and enhance the immersive video experience. You can experiment with the different 360/VR tools in After Effects for a seamless post-production workflow.
Work with VR tools in After Effects
When you work with VR, you could run into memory limitations indicated by a banner that states - Requires GPU Acceleration . By default, Adobe video applications require approximately 1GB of memory for every 1K of horizontal resolution when working in VR. In After Effects 2018, you can reduce the requirements, called Aggressive Memory Management . To enable the setting, select Preferences > Previews > GPU Information > Aggressive GPU memory use (for VR) .
The following are tools in After Effects you can use to edit your 360/VR videos:
The 360/VR tools in After Effects automate complex compositions and workflows for a seamless 360 production. These tools provide accurate results and reduce editing time.
Create VR Environment automates the process of comp creation and camera relationship setup. You can use it to automate aspects of VR authoring environment in After Effects.
Work with Create VR Environment
Work with Create VR Environment using the following steps:
To launch Create VR Environment , select Composition > VR > Create VR Environment .
In the Create VR Environment dialog, if you want to create a VR master from scratch, choose the Size of your master (1024x1024 works for most of the VR compositions). Set the Frame Rate and Duration of your VR Master, and click Create VR Master .
In the Composition window, change the view to Custom View 1 and create your immersive video. You can select from the various immersive video and other effects in the Effects & Presets panel.
Once you are ready with your composition, open the Create VR Environment dialog and click Generate VR Output . After Effects creates all the compositions, expressions, and adds cameras and distortions required to create a Cubic Map.
To modify your VR Master and apply the changes to your VR comp, click Refresh VR Output in the Create VR Environment dialog. After Effects deletes all comps and recreates them based on the modifications, you made to your VR master.
- Use 2-node camera : Select the option if you want to use a 2-node camera.
- Use 3D Null camera Control : Select the option if you want to control your SkyBox Camera via a 3D Null layer.
- Center camera : Select the option if you want to center-align the camera.
- I am using 3D plugins : Select the option if you are using 3D plug-ins.
- Use edge blending : Select the option when you use plugins that are not true 3D plug-ins.
Extract Cubemap removes equirectangular distortion from 360-degree footage and extracts six separate camera views. The six camera views are positioned in a cube formation. You can do motion-tracking, object removal, add motion graphics, and vfx to the composition.
Work with Extract Cubemap
Work with Extract Cubemap using the following steps:
To launch VR Extract Cubemap , select Composition > VR > Extract Cubemap .
In the VR Extract Cubemap dialog, select a composition from the drop-down list, choose Conversion Resolution , and click Extract Cubemap .
After Effects generates a cubemap output for your VR composition. Extract Cubemap adds a VR Master Camera along with six more camera views that are attached to the master camera. Six camera faces are also generated that strategically form a cube.
The Adobe Immersive Environment in After Effects allows you to preview how your 360 and 180 degree footage looks like in a VR head-mount display (HMD).
After Effects supports the following VR headsets:
To use your VR headsets, ensure that your system meets the VR system requirements, and install SteamVR application. SteamVR is a virtual reality system that you need whether you are using the HTC Vive or Oculus Rift. For more information, visit the SteamVR support page, and refer to the documentation that came with your headset.
To install Steam, use the following steps:
In Steam, create an account, or log into an existing one.
From within Steam, download and install SteamVR.
If you are using a Windows Mixed Reality HMD, within Steam, download and install Windows Mixed Reality for SteamVR.
From within Steam, click Run Room Setup to set up your room.
For more information, see the Steam documentation: Room Setup and SteamVR Tutorial.
- HTC Vive: Follow the instructions that come with your HTC Vive headset.
- Oculus Rift: For information on downloading and installing Oculus Rift, see the Oculus Rift documentation.
Before you enable Adobe Immersive Environment, ensure that your headsets and controllers are working fine in SteamVR.
In After Effects, select Preferences > Video Preview .
In the Preferences dialog, enable the Enable Mercury Transmit option. In the Video Device section, enable the Adobe Immersive Environment option.
Click the Adobe Immersive Environment menu in the Composition panel and choose the viewing option from the following options:
- Theater Mode (Rectilinear) : Previews the composition as a flat rectangle in an empty room, simulating the view of looking at a movie screen.
- 360 Monoscopic : Previews the composition as a monoscopic 360-degree field of view image.
- 360 Over/Under : Previews the composition as a stereoscopic 360-degree field of view image. Assumes over/under layout in the composition.
- 360 Side-by-Side : Previews the composition as a stereoscopic 360-degree field of view image. Assumes side-by-side layout in the composition.
- 180 Over/Under : Previews the composition as a stereoscopic 180-degree field of view image. Assumes over/under layout in the composition.
- 180 Side-by-Side : Previews the composition as a stereoscopic 180-degree field of view image. Assumes side-by-side layout in the composition.
The Video Preview Preferences options allows you to configure your preferences. To turn off preview to your HMD, disable Adobe Immersive Environment in Preferences > Video Preview .
Читайте также: