
Clip studio paint как установить материалы
Обновлено: 06.07.2024
Clip Studio Paint breaks your art creation tools into three categories: Pens, Pencils, and Brushes. It’s completely arbitrary, but it is suggested that you organize your tools along those lines just for sanity’s sake.
In this tutorial, I’ll show you how to add a brush, move a brush around to a different category, create and delete a new category, and delete the brush. As a bonus, I’ll also show you the trick for how to add multiple pencils or pens or brushes at once.
Grab a New Brush
First, download the brush/pen/tool/what have you to a directory of your choosing. Remember where it is. This will be important.
Here, I have a pack of brushes I picked up from the DAUB Brushes site, all together in their own directory.
OK, go back to Clip Studio Paint.
Preparing to Add a New Brush
The big trick with this process is that you need to pick where you want to install your brush to before you install it.
First, push “B” to go to the brushes.

On my screen here, you can see I have three tabs named “Watercolor”, “Oil Paint,” and “India Ink.”
Keep in mind: These distinctions are completely arbitrary. They’re ultimately meaningless. You could put pens and pencils in here for all Clip Studio Paint cares. But, for consistency’s sake and your own mental health, I suggest running with this categorization of the tools. Keep the brushes together in one spot, pens in another, and pencils in a third.
For this example, I want to add an ink brush to my tool set. So let me click on the India Ink tab first.
Import the New Brush
To add my new brush to this category, I click on the little button in the upper left corner here with the three lines and the arrow. The documentation refers to it as a “menu,” so we’ll call it the Brush Menu here.
That brings up some possibilities. We want to “Import Sub Tool…”

That will pop open a file picker. Sub tools have “.sut” file extensions. If your Finder is set up to show file extensions, you can read it easily enough, but don’t worry: Any files that aren’t tools will be grayed out in any case, so don’t worry about it.
Also, you can only add one brush at a time this way. You can’t shift click to get a bunch at one time, or CTRL-CLICK to pick other individual tools. Don’t bother trying.
Just pick the one you want and click OPEN. Or just double click the file name.
Magically, your File Picker closes and BAM! your new tool is there at the bottom of the list.

Congratulations on importing your first brush.
Move the Brush Around
Now, you can drag and drop it somewhere else in the list if you want to change the order around.
You can even create a new tab by dragging this brush into an empty spot amongst the tabs. This will create a new family of tools, which will be automatically named after this brush, in particular. You can then right click or CTRL-click on that name to change it if you wish.

You can move the tool to any other tab from that new tab by dragging and dropping it to another tab. And, if it was the only tool in that beginning tab, that tab will disappear. It lost its raison d’etre there.
For those of you who prefer a good animated gif, I give you this:
Deleting Brushes

To get rid of the brush, itself, you can right click or CTRL-CLICK on the brush and choose “Delete sub tool.” You will get a confirmation box before the deed is done. You won’t see one in this example because I once clicked the “Do Not Show Me This Window” option, so it never pops up for me anymore..
If you DELETE a tool like that when it’s the sole tool in a tab, the tab will disappear also. It’s not just moving the tool that will collapse the tab, but also deleting it.
Here, I’ll show you:
Import Tool. Move it to create a new tab. Right Click and delete tool. The tab is now gone along with the brush.
Multiple Brushes
There is a trick to adding multiple brushes at once. You have to open a Finder window on the screen. Here’s where you can CTRL-click individual brushes, or just shift-click to highlight a bunch that are already in a row.
Then, click back to Clip Studio Paint. Now, drag and drop that brush or bunch of brushes to an empty spot in the tab where you want to add them. In the animated GIF below, I have the Finder window inside of Clip Studio Paint’s proscenium of tools, just behind were an image I’d be working on would be. You can also move brushes over to Clip Studio Paint from a window on another monitor, if you have one.
The trick here is that both the Finder window and CSP have to be visible at the same time. If you have that, you can pull this off.
After that, you can move them around to the different tabs if you so choose. Remember: stay organized!
There is no way to delete a group of tools at the same time. At least, none that I know of yet. Leave me a comment if you know that trick.
And that’s how you add, move around, and delete brushes, pens, and pencils.

Hello! My name is Liz Staley and I’m a long-time user of Clip Studio Paint (I started using the program back when it was known as Manga Studio 4!). I was a beta-tester on the Manga Studio 5 program and for Clip Studio Paint, and I have written three books and several video courses about the program. Many of you probably know my name from those books, in fact!
On December 10, 2020 Clip Studio Paint released their 1.10.5 version. In this update are several exciting new features that I’ll be covering over the next few weeks. But this week I’m excited to discuss how to use your Photoshop brushes in Clip Studio Paint! There are also some brand new brush options that we’ll be covering in the final part of this article.
In this article we will cover the following topics:
Exporting brushes from Photoshop
Importing .ABR files to Clip Studio Paint
New CSP Brush Options
Let’s get started!
Exporting Brushes from Photoshop
If you’re a long-time user of Photoshop you likely have a collection of your favorite brushes, either made by you or downloaded from the internet. You can now save these brushes from Photoshop and put them into Clip Studio for your use.
Note that from what I’ve tested so far, this process is not perfect. You will likely still have to tweak the imported brushes a bit after transferring them from PS to CSP. But this process will transfer the brush tip material and basic brush information from one program to the other, making it much faster than having to recreate and resave brush materials!
Exporting your brushes from Photoshop is not a difficult process. For this example, I will be saving the “Wet Media Brushes” presets from Adobe Photoshop CS4. Note that when you save brushes from Photoshop, you will save all the presets that are currently loaded in your brush window. That means that if you save a set of brushes that has 50 tools in it, when you transfer that ABR file to CSP you will be loading 50 brushes. If you want to only save and import a few brushes at a time, you will have to change your loaded brushes to just those tools.
From the brush menu in Photoshop, click on “Save Brushes…” as shown above to save the current brush presets to a file. Select the location to save the brushes and type in a file name. Once you’ve completed this step you will have an .abr file that contains your PS brushes, and that is what we’ll use to move these tools to Clip Studio in the next section.
Importing .ABR files to Clip Studio Paint
Importing tools into CSP is just about one of the easiest things you can do! There are two ways to do it, so I’ll share both of those here. The first way is the “long way” - which is really just a few clicks, and the second is my preferred way of importing tools that aren’t coming from the CSP Assets menu!
First you’ll need to decide what overall category of tool that you want to put your PS tools in. For this article, since I’m using brushes that are supposed to imitate wet media, I’m going to choose the “Brush” category. Then in the Subtool window, click on the three horizontal lines in the top left corner to bring up the menu, as shown below, and then click on “Import sub tool…”
Navigate to where you saved your brushes and select the ABR file you want to import. You can see in the following screenshot that I’m selecting the “Wet Media Brushes” abr file I created earlier.
Click on Open and CSP will go to work. If importing multiple tools at once, CSP will create a new subtool group to put the brushes in, as shown below.
Click on the file of tools to import and, while continuing to hold down the mouse button, drag the file into the Sub Tool window. When you’re in the correct spot the cursor will turn into a “+” symbol. Release the mouse button and CSP will import the tools. In the following screenshot you can see the Sumi-e category made in my Decoration tool.
Again, this process is not perfect. You may need to adjust the settings in the Sub Tool Detail menu to get the precise look you’re going for (like changing the opacity and such for a watercolor effect).
Now that we know how easy it is to import Photoshop brushes to CSP, let’s discuss the new brush options in this update.
New CSP Brush Options
There are a few new brush options in this update, so let’s explore them now!
Color Jitter
One of the new brush options in this Clip Studio update is called “Color Jitter” and they produce some truly unique effects! To get to these options, select the sub tool that you want to change the look of and then click on the icon that looks like a little wrench in the bottom right of the Tool Property menu. This icon is indicated by the arrow in the following image.
In the Sub Tool Detail window you will find all the options for personalizing brushes in Clip Studio Paint. The new options for this update are under “Color Jitter” on the left side of the window. Click on it and you will see the options in the image below.
These new options are called “Change brush tip color” and “Randomize per stroke”. You can turn the settings for either one or both by clicking on the checkbox to the left of the option name to activate it. Then use the sliders or the number entry for each option to change the settings.
Each of these new options can control hue, saturation, or luminosity. The image below shows each of the “Change brush tip color” options for a brush turned up to the highest setting to illustrate what the setting does.
As you can see, the Hue setting introduces more colors into the brush tip. The intensity of these colors depend on the base color that you set, too! If you choose a very bright and saturated color for your “brush color” then the tip colors will be very saturated. If you choose a desaturated color as your active color, the random colors will be desaturated. Keep an eye on the brush stroke preview at the top of the Sub tool detail options window to see how the colors change as you choose different active colors.
The saturation option produces a stroke that has differing levers of saturation. In the example stroke above, all the dots in the brush stroke are blue, but some are desaturated to the point of being gray or white, while some are the full saturation of the blue color chosen as my brush color.
Luminosity controls how dark the color gets. Though I’ve used the same blue as my brush color in all the above examples, this stroke has dots that vary from blue to black instead of blue to white!
The Randomize Per Stroke settings have a very different effect, because they change every time you put down a new stroke of your drawing tool. The following image shows these options at their highest settings.
These options are in the same vein as the Change Brush Tip Color, but CSP picks a random amount with each stroke of the tool instead of changing the brush tip as the stroke is made. Each of the color blocks above was made by putting down multiple overlapping strokes of this brush.
By clicking on the icon to the right of each option’s slider, you can also pair each setting to certain parameters such as pen pressure, tilt, velocity, and random.
Brush Tip Shape Flip Horizontal and Flip Vertical
Another new option for brushes can be found under the Brush Tip option in Sub Tool Detail. These options are to Flip the brush tip shape horizontal or vertical in different ways, which is useful for a lot of Decoration tools and spray brushes to get more variety. The dropdown for each of these options can be changed individually for both Horizontal and Vertical. The example below shows some of the options for the Flip Horizontal using a lace brush.
If you’re looking for a lot of variety in your brush tip shapes, these are great options!
Texture Brightness/Contrast and Texture Mode
The final new options we’re going to look at are under the “Texture” heading on the left side of the Sub tool detail window. If you’ve never played with these options, they’re a great way to add, well, texture to your strokes! Unless you’re using a tool that already has a texture applied to it, you’ll need to load a texture first before you can play with the new settings. If there is no texture already set, the box next to the first option in Texture will say “None”, click on that word to select a texture from the installed Materials to apply it to the tool.
Once you’ve selected a texture from the Material library and head back to the Sub Tool Detail screen, you will see that all the texture options are now lit up. The options that have been added to this feature are Brightness, Contrast, and Texture mode, which are now new ways that the texture can interact with your stroke color and brush tip shape. In the image below I’ve used the same tool and color for each stroke, but have changed the texture setting.
Note how different each stroke looks just from changing one option! Remember that you can test the changes you’re making while you’re changing them by having a new canvas open and doing “test swatches” as you change the settings. I love doing this so I can see what an option does to the look of my brush! Being able to change so many parameters to get exactly the look you want from your tools is amazing and really lets you customize your drawings to match your style.
Conclusion
New brush options and the ability to import Photoshop brushes are just the tip of the iceberg for the new updates to Clip Studio Paint with version 1.10.5, but they are definitely the updates that I’ve been most excited about. These open up even more options for creating and customizing your tools and creating a look that is uniquely yours for your art!
You can use and install materials in Clip Studio Paint. You can find brushes, textures, color sets, gradient sets, and even animations! There are a lot to choose from in their Assets app and I do recommend you to use it, in case you’re feeling like trying and experimenting with new things.
I like to use their materials when I want to add textures to my drawings. There are a lot of textures, with different shapes and feels to choose from and it’s actually even fun to just spend some time and try them out and see the different results we can get!
How can you install and use these materials in Clip Studio? It is actually very easy! Just look for the material you want and download it. You can now find your new material on the ‘Material Menu’ to the right side of your screen and it’s ready to use!
Of course, there’s a lot more to it than this and if you’re still not used to Clip Studio Paint, I describe in detail and guide you through how to use the Asset app, create an account for it, search, download and use your materials!
How To Install Materials In Clip Studio Paint
Installing Materials in Clip Studio Paint is very easy. Mainly because you don’t need to install them per se. When browsing materials in the Clip Studio Asset store, just pick the one you want and click download.
The material should be ready to use right away in the material tab. There are different types of materials that you can use, from brushes and textures to auto-actions and 3D models. Some of these need an extra step to start using. For example, to use a downloaded brush, you need to drag it from the material tab to a brush/pen tab of your choice.
Otherwise, most of these materials you just need to drag them to your canvas and then edit and use them as you want!
To open this app, you just need to click its icon on the top bar of Clip Studio. When you do, a new window will appear.

It is important to note that this Asset app is fairly recent, so if you can’t see it on the software, update Clip Studio Paint so you can have access to it. Usually, Clip Studio updates automatically and will promptly open a window asking if you want to visit a page with all the new updates. Either way, if you need to update Clip Studio just go here and download the latest update.
It is worth to mention that if you’re not a fan of the app itself, you can also visit the website on your browser. It works pretty much the same way and you can download the materials from there.
Don’t forget that for both the app or the website you need to create an account and login to be able to download any material.
Downloading Additional Materials From Clip Studio Assets
Before we go into how you exactly use these materials, let’s go through a step by step of how to search and download your materials as well as some extra and useful information about the Assets app.
As I mentioned, before starting to search for materials, it’s better to create an account and log in, since the app will ask you for it once you try to download something. So, go to the top bar of the app and click the ‘Login’ button.
It will open up a small window. Now choose ‘Register Account…’ and follow the steps. Once you’re done, go to the app again and log in! Now your username should appear at the top along with how much cloud storage you have. Users get 10gb of cloud storage for free, so you can back up your files and materials!

Now you’re set to search for new materials! For that, look to the left of the app and click on ‘Clip Studio Assets’. A vast array of materials will appear to choose from. If you’re looking for something specific, you can just write it on the search bar. For example, if you’re just looking for brushes, type ‘Brush’ and the app will show you only materials tagged as it!
You can also mark materials that you liked as favorites, by clicking on the star. This way you can go back to these very easily on your Favorites page.

Note that there are both free and paid assets. The paid ones are called Gold Items and Gold is the currency used in Clip Studio Assets. To get it, you need to buy it. Simply go to ‘Account -> Point Service’.
When you find something you liked and want to use, click on it. You’ll be redirected to a new page. Most of these materials are made by Japanese users and they’re written in Japanese. If you don’t know the language but want to understand the descriptions you can click the ‘View Translation’ button.
To the right of the page, you’ll see right away a red download button. Click on it and your material should be ready to use on Clip Studio Paint right away! To access your new material, simply go to the Material Tab and look on the ‘Download’ folder. If you can’t see what you just downloaded right away, close the tab and go back to it again so it refreshes.

You might wonder if you can use these materials for commercial use and the answer is, yes! All of these materials can be used for both commercial and non-commercial use! You can’t share or sell them though. If you want to share these materials with a friend, send them a link of the material so they can download and use as well.
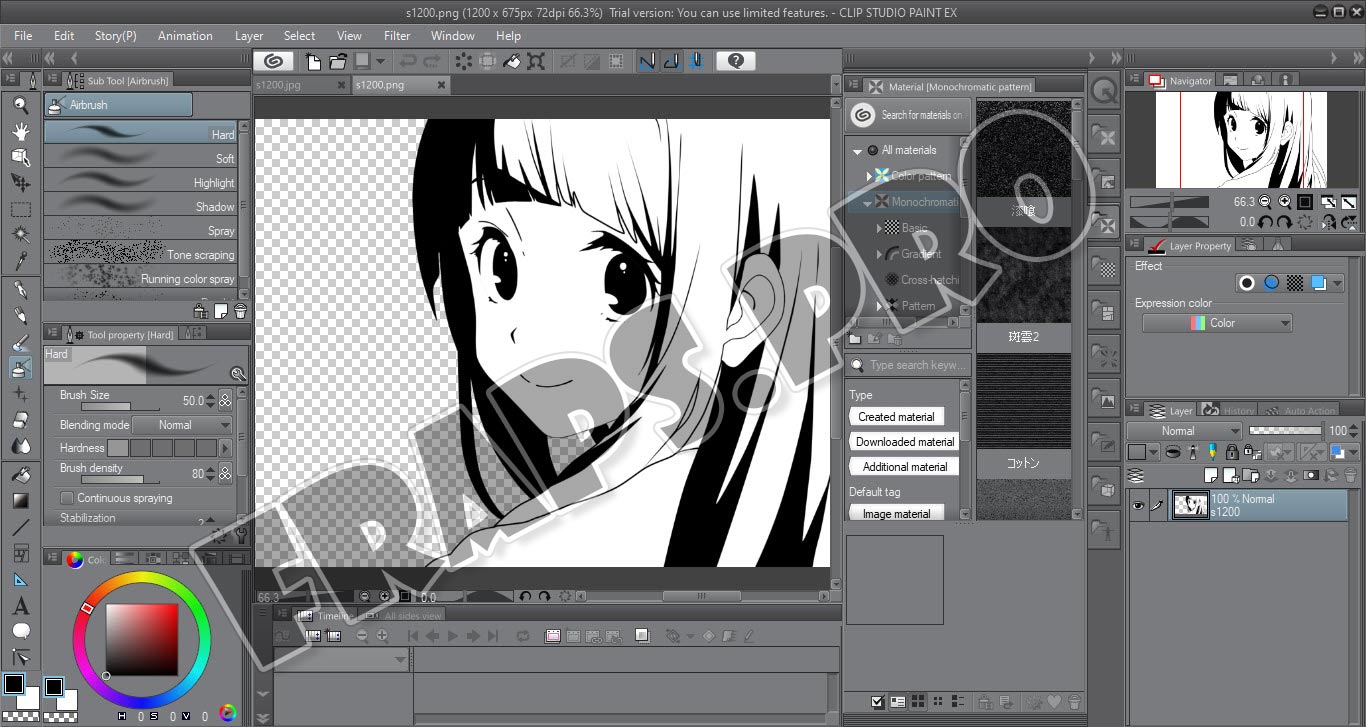
Using The Material Palette Menu
The Material palette menu is located on the right side of your screen and at first glance, it might seem a lot to take on! But it really isn’t, it’s just there’s a lot of information thrown at us, but the menu is very easy to use and understand.
Before even opening this menu, you might notice many different little tabs on the screen. These are each folder with different kinds of materials in them. For example, if you’re looking for 3D material, open the tab with the cube.

This will open and show you all the 3D assets you have and can use. Furthermore, inside each category, the folders are divided and organized in different types of assets, for example, ‘Pose’, ‘Background’, ‘Small Object’, etc.
Clip Studio has their materials very well organized so you can find anything you need, very easily and quickly! Also, you can find specific materials by searching for their tag. Below the categories, there are some suggested tags that you can look for and you can also type the keywords you need.
The tags are very useful to use, especially if you decided to add your own tags to downloaded or registered materials.
Finally, when you select a material, it will show you the details on the bottom of the menu. Below that, you have some tools to organize your materials. For example, you can create new folders, change how you view the materials, open the material properties (here you can add or change tags, change name and others) and even delete materials you don’t need or want anymore.

Overall it is very easy to use. You should have quite some materials already installed even before downloading or registering your own materials. So take a look and have some fun experimenting with all the assets!
Registering Materials
You might want to make your own brushes or textures and others. You can very easily do so. If you want to create your own brushes, I recommend taking a look at this step-by-step guide on how to make your own brush that I wrote. It is very simple and actually fun to experiment and create new and different brushes!
But giving you a general idea of how to register a material, simply create what you want on your canvas. When you’re finished go to ‘Edit -> Register Material…’ you can register them as images, templates or animations, depending on what you’re doing.
When selecting one of them, a new window will appear. This window is very similar to the one you see when opening a material property. Here you can name your creation, add tags to it, choose which folder of materials it’s going to and others.

Once you’re done with all the settings, click Ok and your creation should appear on the Material Menu now!
Using Materials In Clip Studio Paint
Depending on what kind of material you want to use, you might have to import them to your canvas differently. Let’s go over different types of materials and how to use them!
Image Materials
This includes all image materials in the “Image Material” section, Color Patterns, Monochromatic Patterns, Manga Materials, and even 3D Materials.
To use them simply click on the material you want to use and drag it directly to the canvas or to the layers section. When doing so, it will create a new layer with the material you chose.
You can also select multiple materials and drag them to your canvas. This will also create one layer for each material you just added. You can then edit them as you wish!
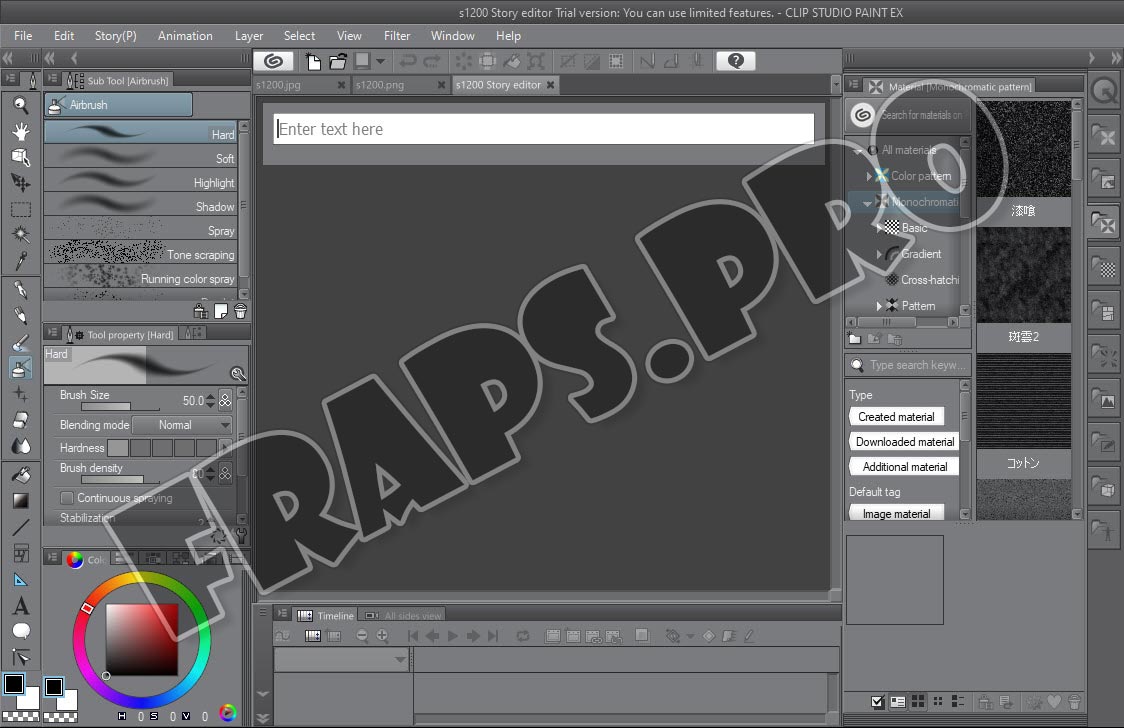
Animation Materials
- Be sure you have the Timeline showing! If the timeline is disabled, you can’t open the animation you want.
- Choose the frame where you want the animation to start. Even though you can move the animation around, it’s easier to choose the right frame right away and then drag the material to the canvas.
When pasting the material, it will both paste in the canvas and timeline. It is also worth to note that if the frame rate you’re using is different from the one in the material, the one from the material will be maintained. This means that the number of frames on your timeline might change!
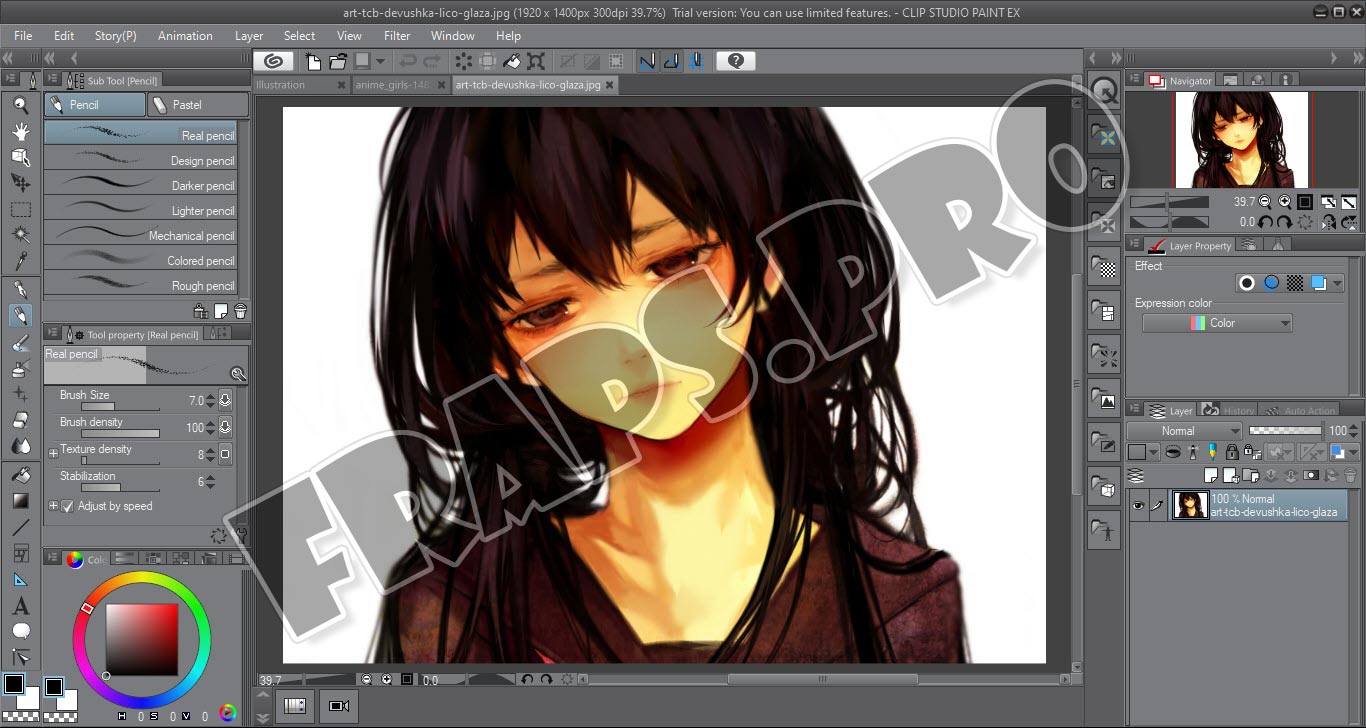
Sub Tools
When importing brushes material into Clip Studio, it will work differently. They will appear on the Materials menu, but as opposed as with both cases above, here you can simply drag them to the canvas and use.
You want to be able to use it as a brush. For that, open one of the brushes tabs, now select the brush you want to use from the material menu and drag it to the brush tab you have opened.

It is now ready to use as a brush and you can even change some of its settings. If you want to add more than one brush, feel free to select more than one and drag all of them at the same time!
Color Sets
To import and use downloaded Color sets, simply select them and drag them to the Color Set Palette. They should be ready to use once you do so! If you want to change to different Color Sets, simply select the top bar to change and use different color sets.
Clip Studio Paint already has quite some sets available that you can use and the ones you add will show next to the pre-existing ones.

Auto Action Sets
Auto-Actions are groups of small actions that you can record and save for later use. For example, if you’re making the same action over and over again, instead of having to repeat it every single time, you can make an Auto Action of it, select it and play it.
This way, Clip Studio will make the action for you, making the whole process quicker! Clip Studio Paint already has default Auto Actions that you can use. To access it, look for the History Window and Auto Action should be right next to it.

To use downloaded Auto Actions, simply select them from the Material Menu and drag them to the Auto Action Palette. It should now be ready to use!
Gradient Sets
You can find several Gradients and even packs of Gradients in Clip Studio Asset app that you can download and use on your work. To add them and use them is very similar to what you do with brushes.
Go to your toolbar and select the Gradient Tool, right below the Paint Bucket. You’ll notice that Clip Studio already offers you some Gradient sets that you can use and customize as you want.

From the Material Menu, select the Gradient Sets you downloaded and drag it to the Gradient Palette. You can use your new gradients!
Workspace Material
You can find on the Asset app or website several workspace materials. This is basically people’s way of organizing their screen and Clip Studio’s workplace. You can download these and have your menus and tabs organized differently if you feel yours isn’t fully optimized or you don’t like how menus are distributed.
Personally, I like to move things around as I like. But sometimes it can be refreshing to try different things!
To load a Workspace, select it from the Material Menu and then drag it to the canvas. When you do so, a window will appear with the Workplace settings. From here you can choose what to load. Click Ok.
The new workspace should appear and it will ask you to confirm. You can then go to Window -> Workspace and you’ll notice the one you just loaded shows up there. Here you can change the workspace you’re using!
If you want to revert to your old workspace go to Window -> Workspace -> Workspace.
Каждый из нас, хоть однажды, задумывался о рисовании и не просто рисовании, а рисовании на ПК. Как раз об этом и пойдет речь в нашем сегодняшнем материале. Мы расскажем о программе под названием Clip Studio Paint Pro EX 1.10.6 (раньше именовалась Manga Studio EX), ну а в самом конце статьи вы сможете бесплатно и без регистрации скачать ее полную русскую версию.
Описание
Сначала давайте разберемся, что собой являет крякнутое приложение «Клип Студио Пейнт», в котором можно рисовать аниме и добавлять к ним анимацию. Данный графический редактор предназначен для создания рисунков, но не просто рисунков, а в стиле аниме. Именно под этот тип рисования здесь все заточено. Мало того, если вам нужно разрабатывать именно такие картинки, лучшие программы просто не найти.
В следующем разделе этой статьи мы поговорим о функционале ПО. Здесь же только скажем, что тут есть очень много разных возможностей, например, разложение картинки на слои для удобного редактирования, широкий набор инструментов для работы с цветом и так далее.
Единственное, о чем вам следует знать, перед тем как перейти к работе с программой, это о необходимости наличия графического планшета.
Возможности
Как и во всех других случаях, давайте разберемся с возможностями программы, о которой сегодня говорим:
- Все нужные инструменты для рисования аниме.
- Широкий набор графических возможностей, позволяющих реализовать все то, что только может придумать автор.
- Поддержка оптимизации картинки под веб.
- Несколько дополнительных приложений, позволяющих придать персонажу анимации, экспортировать его в 3D-модель и так далее.
- Для работы с нашим проектом мы можем импортировать графику любого типа, а готовый результат можно сохранить также в любом формате.
Данным списком возможностей наш софт не ограничивается, но с остальными функциями вы будете уже разбираться сами, когда программа будет установлена и готова к работе.
Как пользоваться
Теперь давайте постепенно разбираться, как работать с данным приложением.
Как скачать
Изначально мы должны будем скачать и установить Clip Paint Studio Pro EX. Для этого прокручиваем страницу вниз и находим кнопку, по которой и сможем загрузить дистрибутив. Установка также не должно вызывать проблем, а если таковая появится, напишите нам об этом в комментариях.
Работаем с программой
Теперь, когда мы установили приложение на свой компьютер или ноутбук, давайте кратко рассмотрим, как им пользоваться:
- В первую очередь, воспользовавшись функционалом главного меню, создаем холст. Это будет просто новый документ выбранного размера. При этом единицы измерения могут быть как процентами, так и пикселями или сантиметрами.
- Дальше погружаемся в творческий процесс и создаем нашего сказочного персонажа.
- Наличие данного этапа будет зависит от ваших целей. Но, если нужно, придаем анимацию нашему герою.
- В результате нам остается только экспортировать готовый результат.
Хотелось отметить, что в программе «Клип Студио Пейнт» вы можете работать с несколькими источниками освещения и огромными возможностями по визуализации готового результата.
Как удалить
Если вам понадобится удалить программу, которую мы только что установились, поступаем следующим образом:
- Открываем панель управления Windows.
- Выбираем ссылку для перехода к инструменту деинсталляции.
- Находим нашу программу и удаляем ее, выбрав нужный пункт из контекстного меню.
- Следуя подсказкам пошагового мастера, убираем ПО с ПК.
Как видите, все очень просто.
Плюсы и минусы
Как вы знаете, у любой программы, работающей под управлением операционной системы Microsoft Windows, есть ряд характерных положительных и отрицательных особенностей. Не обошлось без них и в нашем случае.
- Симпатичный пользовательский интерфейс, в котором легко разобраться.
- Программа изобилует огромным количеством различных функций для удобного рисования аниме.
- Существует версия данного приложения и для Андроид-телефона.
- Присутствует русификатор.
- Можно отдельно устанавливать кисти (Brushes).
- Пользовательский интерфейс полностью русифицирован.
- На первый взгляд, программа может показаться довольно сложной, однако это так, пока вы не посмотрите хотя бы один обучающий ролик.
Кстати, о видео, в бесплатном доступе существует огромное количество видеоуроков, позволяющих разобраться с программой на 100%.
Аналоги
Если вам интересно, то можно выбрать другие приложения, позволяющее рисовать аниме:
- Artweaver.
- Paint Tool SAI.
- Adobe Photoshop.
- CorelDRAW.
- Adobe Illustrator.
Однако, каждая из этих программ на порядок уступает Clip Paint Studio Pro EX.
Системные требования
Для максимально плавной работы софта, о котором мы сегодня говорим, необходим компьютер, соответствующий следующим техническим параметрам:
- ЦП: x2 от 1.8 ГГц.
- ОЗУ: от 2 Гб.
- Дисковое пространство: от 180 Мб.
- Видеоадаптер: от 512 Мб.

Загрузка и активация
Что же друзья, теперь нам остается только перейти к скачиванию последней русской версии Clip Paint Studio Pro EX и серийного номера к ней. Для того чтобы получить приложение без триала, вам необходимо всего лишь воспользоваться кнопкой, имеющейся ниже.
| Релиз: | 1.10.6 |
| Разработчик: | CELSYS |
| Дата выхода: | 2021 |
| Операционная система: | Windows XP, 7, 8, 10 |
| Локализация: | Русский |
| Стоимость: | Код активации (Crack) |
| Размер: | 378 Мб |
Видеоурок
Если у вас есть пара минут свободного времени, рекомендуем начать знакомство CSP как раз с помощью данного гайда.
Читайте также: