
Excel pie of pie как модифицировать
Обновлено: 07.07.2024


For example, if you have several companies that operate on the market, you can represent a part of every company on the market as a slice.

This data contains five slices that fall below 10%.
To make smaller slices more visible in a pie chart, Microsoft Excel provides the Pie of Pie and Bar of Pie chart sub-types. Each of these chart sub-types separates the smaller slices from the main pie chart and displays them in a supplementary pie or stacked bar chart. To create a Pie of Pie or Bar of Pie chart, follow these steps:
1. Select the data range (in this example, B3:C12).
2. On the Insert tab, in the Charts group, click the Insert Pie or Doughnut Chart button:
In the Insert Pie or Doughnut Chart dropdown list, choose the Pie of Pie chart or the Bar of Pie chart.

3. Right-click in the chart area and select Format Data Series. in the popup menu:
4. On the Format Data Series pane, in the Series Options tab, select which data to display in the second pie (in this example, the second pie shows all values less than 10%):

There are several ways to choose which categories (slices) to display in the secondary pie or bar chart:

- Split series by Position (enter the number of positions moved to the secondary chart)
- Split series by Value (the values less than the specified moved to the secondary chart)
- Split series by Percentage Value (the values less than the specified percentage moved to the secondary chart)
- Split series by Custom (drag and drop categories between to charts)
- Pie Explosion detaches the slice from the primary chart and moves it closer to the secondary chart
- Gap Width controls the distance between charts
- Second Plot Size specifies the relative size of the second chart.
If you have any questions or suggestions, please feel free to ask OfficeToolTips team.

For example, if you have several companies that operate on the market, you can represent a part of every company on the market as a slice.

This data contains five slices that fall below 10%.
To make smaller slices more visible in a pie chart, Excel provides the Pie of Pie (see above) and Bar of Pie (see below) chart sub-types.

Each of these chart sub-types separates the smaller slices from the main pie chart and displays them in an additional pie or stacked bar chart. To create a Pie of Pie or Bar of Pie chart, follow these steps:
1. Select the data range (in this example A4:B13).
2. On the Insert tab, in the Charts group, choose the Pie button:

Choose Pie of Pie or Bar of Pie

3. Right-click in the chart area. In the popup menu select Format Data Series.
4. In the Format Data Series dialog box, on the Series Options tab, select which data can displayed in second pie (in this example, in the second pie we displayed all values less than 10%):

You can then make any other adjustments to get the look you desire.
If you have any questions or suggestions, please feel free to ask OfficeToolTips team.
To make parts of a pie chart stand out without changing the underlying data, you can pull out an individual slice, pull the whole pie apart, or enlarge or stack whole sections by using a pie or bar of pie chart.
To emphasize an individual slice of a pie chart, you can move it back from the rest of the pie chart by doing the following:
Click the pie chart.
Double-click the slice you want to pull out, and then drag that slice away from the center of the chart.
Pull the whole pie apart
The quickest way to pull all of the slices out of a pie chart is to click the pie chart and then drag away from the center of the chart.
To more precisely control the expansion, follow these steps:
Right-click the pie chart, then click Format Data Series.
Drag the Pie Explosion slider to increase the separation, or enter a number in the percentage box.

Tip: You can also give your pie chart a different perspective by Rotating a chart.
Draw attention to small slices in a pie-of-pie or bar-of-pie chart
Pie-of-pie and bar-of-pie charts make it easier to see small slices of a pie chart. These chart types separate the smaller slices from the main pie chart and display them in a secondary pie—or stacked bar chart.
with a pie-of-pie chart after:
If you don’t indicate how many data points should appear in the secondary pie or stack, the chart will automatically include the three smallest. In this example, that is 3%, 3%, and 4%.
Follow these steps to do it yourself:
Right-click the chart and then click Change Series Chart Type.
Click Pie, and then click Pie of Pie or Bar of Pie.

To change what displays in the secondary pie, click the piece of pie you’re expanding, and then in the Split Series By box of the Format Data Series pane—click the type of data to display in the secondary chart.

To change how many data points appear in the secondary chart, you have two options:
If you’re splitting the series by position: in the Values in second plot box, enter the number of positions you want (such as 3 if you want the 3 smallest).
If you’re splitting the series by value or percent value: in the Values less than box, type a different number. In the example above—with 3%, 3%, and 4%—you might enter 5%.
The left chart is always the main chart, and the secondary chart is always to its right. You can’t rearrange them.
Connector lines will add automatically. You can remove them or change the connector styles.
In Excel, the percentages in the data labels may be rounded. If so, they likely won't add up to 100. To fix this, change the number of decimal places specified for percentages on the Number tab of the Format Cells box (Home tab > Number group, > Dialog Box Launcher ).
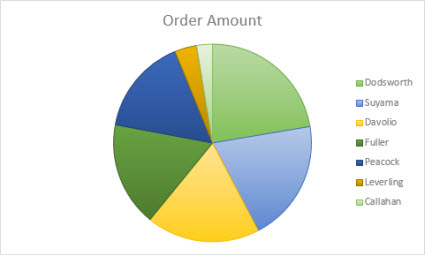
Pie charts are a popular way to show how much individual amounts—such as quarterly sales figures—contribute to a total amount—such as annual sales.
Pick your program
(Or, skip down to learn more about pie charts.)
Note: The screen shots for this article were taken in Office 2016. If you're using an earlier Office version your experience might be slightly different, but the steps will be the same.
Excel
In your spreadsheet, select the data to use for your pie chart.
For more information about how pie chart data should be arranged, see Data for pie charts.
Click Insert > Insert Pie or Doughnut Chart, and then pick the chart you want.

Click the chart and then click the icons next to the chart to add finishing touches:

To show, hide, or format things like axis titles or data labels, click Chart Elements .
To quickly change the color or style of the chart, use the Chart Styles .

To show or hide data in your chart click Chart Filters .

PowerPoint
Click Insert > Chart > Pie, and then pick the pie chart you want to add to your slide.

Note: If your screen size is reduced, the Chart button may appear smaller:
In the spreadsheet that appears, replace the placeholder data with your own information.

For more information about how to arrange pie chart data, see Data for pie charts.
When you’ve finished, close the spreadsheet.
Click the chart and then click the icons next to the chart to add finishing touches:
To show, hide, or format things like axis titles or data labels, click Chart Elements .
To quickly change the color or style of the chart, use the Chart Styles .
To show or hide data in your chart click Chart Filters .
Click Insert > Chart.

Note: If your screen size is reduced, the Chart button may appear smaller:
Click Pie and then double-click the pie chart you want.

In the spreadsheet that appears, replace the placeholder data with your own information.

For more information about how pie chart data should be arranged, see Data for pie charts.
When you’ve finished, close the spreadsheet.
Click the chart and then click the icons next to the chart to add finishing touches:
To show, hide, or format things like axis titles or data labels, click Chart Elements .
To quickly change the color or style of the chart, use the Chart Styles .
To show or hide data in your chart click Chart Filters .

To arrange the chart and text in your document, click the Layout Options button .
Data for pie charts
Pie charts can convert one column or row of spreadsheet data into a pie chart. Each slice of pie (data point) shows the size or percentage of that slice relative to the whole pie.
Pie charts work best when:
You have only one data series.
None of the data values are zero or less than zero.
You have no more than seven categories, because more than seven slices can make a chart hard to read.
Tip: If your data won’t work in a pie chart, try a bar chart, column chart, or line chart.
Other types of pie charts
In addition to 3-D pie charts, you can create a pie of pie or bar of pie chart. These charts show smaller values pulled out into a secondary pie or stacked bar chart, which makes them easier to distinguish. To switch to one of these pie charts, click the chart, and then on the Chart Tools Design tab, click Change Chart Type. When the Change Chart Type gallery opens, pick the one you want.
Читайте также: