
Weight paint blender это
Обновлено: 05.07.2024

Before we start, please take a quick look at the following resources:
Blender Fundamentals - Introduction to Rigging
Blender Fundamentals - Character Rigging Blender 2.80 Fundamentals - Armature
Blender 2.80 Fundamentals - Character Rigging
Blender 2.80 Fundamentals - Vertex Groups [More info later in the guide]
Blender 2.80 Fundamentals - Bone Layers
Blender 2.80 Fundamentals - Copy Limit Constraint [OPTIONAL]
Blender 2.80 Fundamentals - Inverse Kinematics (IK) [OPTIONAL]
If the Gfycat demos are too fast, you can right click them to change speed.
IMPORTANT:
There is a known bug in Blender that occurs when attempting to Undo (CTRL+Z) in Weight Paint mode or Sculpt mode.
- Demo: Undo Bug
- Bug Reported
Workaround: After adjusting the brush values (Weight, Radius, or Strength), switch to a different paint brush (Add, Subtract, Mix, etc.), and then switch back to your previous paint brush.
- Undo should now work as expected.
If you have MMD Tools add-on active, it will conflict with Rigify's Generate Rig functionality.
- MMD Tools Reported Bug
- If you plan to use Rigify's Generate Rig function, make sure to disable the MMD Tools add-on before using the Rigify armature.
For beginners, I recommend starting with rigging character models that don't have face bones, like a masked character:
After you've mastered the basic body rigging, you can then move on to Face Rigging.
[Explained later in SECTION 8]
Here are different types of Objects you may encounter in Blender:
We will focus on only 2 Object Types:
- Armature Object
- Mesh Object
A rigged 3D character model contains 2 essential things:
- Skeleton (Armature Object)
- 3D Model (Mesh Object)

The 3D model is the Child.
The Skeleton is the Parent.
Wherever the Skeleton moves, the 3D model follows.
In Blender, you parent the Mesh Object to the Armature Object, then you can continue with the Weighting or Weight Painting process (explained later).
Select children first, then select the parent last.
Hotkey: CTRL + P [Opens the Parent Menu]
[ Object ]
[ Armature Deform ]
[ Armature Deform with Empty Groups ]
[ Armature Deform with Automatic Weights ]
[Armature Deform with Envelope Weights]
[ Bone ]
Great for simply attaching something to a bone:
-- Glasses --> Head Bone
-- Gun --> Thigh Bone
-- Knife --> Calf Bone
No weights or vertex groups needed.


A 3D model can be a single Mesh Object
- this is common with low-poly character models.
A 3D model can be composed of multiple Mesh Objects
- this is common with high-poly models with optional clothing, weapons, etc.
You can parent multiple Mesh Objects (Head, Arms, Legs, Clothing, etc.) to a single Armature Object.

What is the purpose of Vertex Groups?
- Vertex Groups can be used for organizing and making it easier to Select/Deselect vertices/faces on a Mesh.
[Example: If your character is a singleMesh Object, you can assign different parts of the character (Hat, Weapon, Jewelry, Clothing, etc.) into their own Vertex Groups, which will make it easier to separate them later as their own Mesh Objects.] - Vertex Groups can be used for physics simulation/collisions.
[Example: Assign vertices from clothing, hair, or breasts to react to physics] - Vertex Groups can be used as Bone Vertex Groups for rigging/weight painting.
- streamable.com/n73te
[Example: Assign vertices from the character's left upperarm to the Vertex Group "upperarm_L" (bone name) with a weight value from 1 to 0 or 100% to 0%]
Weight influence 100%(Red) - 0%(Blue)
This will be explained later in the guide.

How to Prepare/Clean the 3D model before rigging?
Example 1: [Symmetry]
If you have a symmetricalMesh Object that has a few non-symmetrical vertices, use Snap to Symmetry.
- The Snap to Symmetry tool lets you snap a mesh vertices to their mirrored neighbors.
- Useful when dealing with meshes which are mostly symmetrical, but have vertices which have been moved enough that Blender does not detect them as mirrored (when X Mirror option is enabled for example).
- This can be caused by accident when editing without X Mirror enabled. Sometimes models imported from other applications are asymmetrical enough that mirror fails too.
- This is also a good option to use after removing overlapping/double vertices with Remove Doubles or Merge by Distance.
WARNING: The Symmetrize tool is not as safe as Snap to Symmetry, and it may destroy mesh or UV data.
Related Question

You can also tell if an Object's transform hasn't been applied by looking at the location of the Object Origin (Origin Point).
According to some reports, Mesh Objects with dimensions smaller than 1m (1 Meter = 1 Blender Unit) may fail with Automatic Weights.

Make sure the bones are inside the mesh, otherwise you will get the following error with Automatic Weights:
- Bone Heat Weighting: failed to find solution for one or more bones

- Don't forget to adjust your bone rolls.
- In Example 3, you will want to join all the Mesh Objects together before rigging, to avoid the seams.
- Select all the Mesh Objects and join them together CTRL+J.
- Afterwards, in [Edit Mode], select the seams (overlapping vertices) and Remove Doubles or Merge by Distance.
- Later in the guide, you will learn how to separate the Mesh Objects.
-
or Merge By Distance [Show Normal Direction] [Set Normals from Faces]
- Check for Loose Geometry or Non-manifolds (loose vertices/edges/faces) [CTRL+SHIFT+ALT+M]
- [Demo1] [Demo2] [Demo3]
-
Check if your character Mesh Object has:
- Overlapping mesh parts:
- armor, clothing, hair, tactical gear, ammo pockets, holstered sword - Internal mesh parts:
- eye balls and teeth
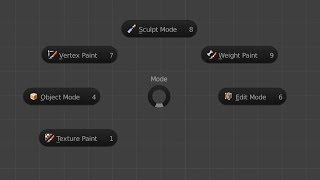
How to properly switch to Weight Paint mode?
- Blender 2.7
- Demo: [Blender 2.7]
- While the Armature is in Pose Mode, select a Bone.
- Then select your Mesh Object and switch it to Weight Paint Mode.
- Weight Paint Mode will now allow you to pose your selected Bone while weight painting the Mesh Object to it.
- While in Weight Paint Mode, you can select bones with RIGHTCLICK. - Blender 2.8
- Demo: [Blender 2.8]
- While in Object Mode, select the Armature Object first, and the Mesh Object last.
- Then switch to Weight Paint Mode.
- While in Weight Paint Mode, you can select individual bones with CTRL+LEFTCLICK, or select multiple bones with SHIFT+LEFTCLICK
- You won't be able to select bones properly while Face or Vertex Selection Masking is enabled. More details in [SECTION 7].

Method: [Weight Painting]
- Weight Painting is recommended for high quality rigging.
- Make weight painting in Blender 2.8 similar to Blender 2.7 by disabling Lock Object Modes (Optional).
- Right click video to change speed.
Weight Paint - Vertex Selection Masking
Weight Paint - Face Selection Masking (Bug Fixed in Blender 2.81)
- Select a Face or Vertex: CTRL+LEFTCLICK
- Select multiple Faces or Vertices: SHIFT+LEFTCLICK
Method: [Vertex Weights Panel]
The Vertex Weights panel is only available while Vertex Selection Masking is enabled.
You can open the Vertex Weights panel with the N key.
You will only be able to view/edit the weights of individual vertices, one vertex at a time.
This is a great way to troubleshoot weighting issues:
- [Example 1] [Example 2]
You can also copy the weight values from one vertex to another:
- [Demo]
Method: [Automatic Weights]
It's a quick way to weight the mesh object(s) to the bones in the Armature.
It's not always perfect.
If you take a look at the Vertex Groups, weight values will have already been generated for each bone (Bone Vertex Group).
Fixing Automatic Weights Demo:
- Right click video to change speed.
- Vertex Weights Panel [INFO]
View Clipping Region:
- Use View Clipping Region to easily work in difficult areas in a 3D model.
- Demo: View Clipping Region and Weight Paint [Starts at 04:10]
- Blender 2.8 Shortcut: Alt + B
Method: [Assign Automatic from Bones]
[Blender 2.7 Demo]
Similar to Automatic Weights, except it is for individual bones.
Method: [Transfer Weights]
Great for clothes or other loose parts.
Method: [Parent to Bone]
- First select the Mesh Object
- and then the Armature Object.
- Switch to Pose Mode and select a Bone.
- Press CTRL+P.
- Set Parent to Bone
Great for simply attaching something to a bone:
-- Glasses --> Head Bone
-- Gun --> Thigh Bone
-- Knife --> Calf Bone
No weights or vertex groups needed.


Rigging and Weight Painting Videos:
- [Blender 2.80] Blender 2.8 3D Female Bone Positioning (Hips, Breasts, Shoulders, Hands, Feet, Spine)
- [Blender 2.80] Blender 2.8 Weight Painting mini-tutorial (and how to undo a "neck fix")
- Mostly Weight Painting - [Blender 2.78] Blender Human Meta-Rig. Clear HD tutorial
- Excellent tips for preparing the mesh and setting up bones and rolls - [Blender 2.77] Blender: Weight Painting (Part 1 of 2)
- Vertex Group tips, Weight Painting tips - [Blender 2.76] How To Rig A Simple Female Character In Blender 2 .76
- Rigging with metarig, fixing bone rolls, custom IK controls, custom foot roll controls, Automatic Weights, breast physics - [Blender 2.69] Simple rigging of a character in Blender
- Setting up a custom rig from scratch with IK controls, custom bone shapes, and Automatic Weights Work In Progress.
Extra Resources:
- Fundamentals of bones, deformation, vertex groups, weight painting

Want to rig some free models?
Try these.
Please don't throw away any of these valuable texture maps!
Submit 3D Models and Resources:


Common Mistakes Made in Blender

Rip Your Favorite 3D Game Character Models FREE

Dec 4 2019
Swapped [Section 6] and [Section 7]
- Added how to properly select bones in Weight Paint Mode.
- Added how to select faces or vertices in Weight Paint Mode.
Oct 25 2019
Updated: How to Prepare/Clean the 3D model before Rigging?
- added info about Snap to Symmetry
Important: If you plan to use Rigify, check this page for the Bone Positioning Guide:
- wiki.blender.jp/Extensions:2.6…
According to some reports, Automatic Weights may not work properly for Mesh Objects with dimensions smaller than 1m (1 Meter = 1 Blender Unit)
May 19 2019
Update:
Added Transfer Weights demo for Blender 2.7.
Mar 28 2019
Update:
Added an easier alternative to rigging: Shape Keys
- Shape Keys are also known as Flexes or Morph Targets.
Feb 21 2019
Update:
Added Demonstration for Armature Deform with Empty Groups
Feb 14 2019
Update:
Added details of the different Parenting options and Rigging options
- Armature Deform, Empty Groups, Automatic Weights, etc.
Added explanation and Demo for Vertex Groups
Added explanation and Demo for Assign Automatic from Bones
i am in weight paint,i have the bone selected, and it doesnt let me paint. am i doing something wrong with the vertex groups?
74.5k 9 9 gold badges 72 72 silver badges 173 173 bronze badges $\begingroup$ Does this happen for all the brushes? Does the add brush work? $\endgroup$4 Answers 4
I was having this same issue. I realized I was trying to paint onto a mirrored section without having actually "applied" the mirror modifier. I am very new at Blender, but thought I'd share in case anyone else falls in the same hole.

If you look at the image you posted, at the top left corner, on the tools panel, you have weight set at zero. It has to be above zero to be able to weight paint.

The bone wont be connected to the mesh that you are attempting to paint - that's why. otherwise it would work, or perhaps it isn't connected in the correct fashion.
if it moves: it's connected. ( it probably is )
attempt the same thing on other meshes, delete the bone - re-add it. try things that would usually fix a computer:
Turn it on + off ( delete it and re-add it ) Try on other meshes.

Well for starters your weight is set to zero. That is the amount of influence you want your mesh to have. So it would bring down the values to zero. However, if you want to lower the value then you are on the right on.
However I think your main issue is that you don't have the correct object in weight paint mode. It seems the ears are in weight paint mode but ont the rest of the mesh. Make sure to either make them part of the same object by sellecting both and hitting "CTRL+J" or, parent the body to the armature by sellecting the mesh THEN the armature an hitting "Shift+P."
I am trying to remove some weight. I left click to add it, but I cannot figure out how to remove it.

4 Answers 4
From the Manual on blend mode:
Subtract: In this blend mode the specified weight is subtracted from the vertex weights. The strength determines which fraction of the weight gets removed per stroke. However the brush will not paint weight values below 0.0.
Lighten: In this blend mode the specified weight value is interpreted as the target weight very similar to the Mix Blend mode. But only weights below the target weight are affected. Weights above the target weight remain unchanged.
Blur: tries to smooth out the weighting of adjacent vertices. In this mode the Weight Value is ignored. The strength defines how effectively the blur is applied.

You can enter edit mode, select the part(s) of the mesh where you need the weight changed (you can press C and also paint select) and in the Data panel (the button with the triangle) in the Properties context under Vertex Groups, set the weight slider to 0 and press Assign.
Paint zero weight to effectively remove it (zero weight has no effect) If you want to remove the vertex from the group you can run the "Clean" tool, or manually select and remove the vertices from the group.
See: Weight Paint Mode -> 3D View Header -> Weights -> Clean

You can erase with draw brush. Change the weight parameter.
- 0.0: Deep eraser
- 0.3: Shallow eraser
- 0.7: Shallow brush
- 1.0: Deep brush
*Precautions: Weight paint does not wet only vertex. Clicking on the vertex makes it dark. Mirror side is not wet. Weight values is recorded on the vertex data of the target mesh. Vertex data is made only of the number of bones. When is it? Setting armature to parent. (with Automatic weight or with Empty group)
Please select together the target mesh and the bones in the order goes to the weight painting mode. Operation: Shift + Click Selection of the bones. can be released by Shift + Double Click . This operation looks confusing. When you paint the weight value is easy to understand and see while switching the object mode and weight painting mode in the Ctrl + Tab .
I can't select a bone on weightpaint. I have done some work with out a problems and just like that it stopped working.
In weight paint I can select a bone and it will show me the weight which is associated, have but I can't move it and rotate it, the armature is just orange-outlined.
How can i fix this? Keep in mined that I already tried opening and closing Blender


6 Answers 6
An orange outline indicates object mode selection for the armature. You want the armature in pose mode (blue select outline) before you start weight painting so that you can select and move the bones while you paint.
- Select the armature and go into pose mode.
- Select the mesh and go into weight paint mode.
When weight painting, the action mouse button setting makes a difference.
If you are using Select with Right -
If you are using Select with Left -
While weight painting and the armature is in pose mode, G / S / R works with the active bone, not the object being painted.
52.4k 3 3 gold badges 47 47 silver badges 154 154 bronze badges $\begingroup$ @gordie that appears to me as a bug. Weight painting a GP should work the same as a mesh. $\endgroup$ $\begingroup$ Turns out this is an unimplemented feature waiting to be worked on. $\endgroup$ $\begingroup$ These steps worked for me: 1. Select the armature and go into pose mode. 2. Shift + Select(LMB) the mesh and go into weight paint mode.(select both the armature and mesh) 3. Ctrl + LMB on bone to see the weight paint of that bone. Found this solution here $\endgroup$
Deselect the options shown below. It worked for me.

edit, found the problem, i had the paint mask set to face selection for painting (basically the mode that lets you only paint on areas that are selected in edit mode first) - with this mode on you can't select bones so you need to turn it off first, control click the bone you want to weight paint, then turn the paint mask back on
Two things. Make sure that your armature is in "Pose Mode." Select the armature and set it to pose, then hold shift and select the mesh also. Then go straight into weight pain. If that doesn't work there is a bug where Blender does not let you select bones if you started the file with an older version of Blender. You then must start a new file in Blender and append everything. You can select multiple items at once and append them all at once so it's not as tedious.

Solved my issue. I was not able to select any bones to paint in Weight mode, blender (2.8) because my model was HIDDEN inside EDIT mode.
Had the same type of problem, in Paint Mode bone wouldn't select even with Ctrl . In Pose Mode bones wont selected, maybe something is wrong with Blender.
Читайте также: