
Как установить ubuntu на virtualbox mac os
Обновлено: 04.07.2024
Есть много веских причин для интереса к Linux. Как и Mac macOS, он имеет наследие Unix (или, по крайней мере, клон Unix под названием GNU). Некоторые рабочие столы Linux, такие как Ubuntu Unity, по своей природе похожи на пользовательский интерфейс Aqua (тот, который используется в macOS).
Linux также невероятно универсален и предназначен для работы на любых устройствах, от мобильных телефонов до суперкомпьютеров. Это делает его идеальным для установки на старые компьютеры, такие как старые MacBook из поликарбоната. Они даже не будут работать с последней версией Mac OS X, не говоря уже о macOS. Но они будут работать с новейшей версией Ubuntu Linux, не потревожившись.
Разработчики любят Linux и не зря. Если вы увлекаетесь программированием, может быть здорово перейти на Linux. Оказывается, что macOS (во многих отношениях) лучше, чем Windows, для разработки программного обеспечения, но в Linux работать еще удобнее.
Его природа с открытым исходным кодом обеспечивает свободный доступ к коду, а программы и решения часто просто «подходят» (не волнуйтесь, позже вы узнаете, что такое apt).
Apple Macs делают отличные Linux-машины. Вы можете установить его на любой Mac с процессором Intel, и если вы используете одну из более крупных версий, у вас не возникнет проблем с процессом установки.
Получите это: вы даже можете установить Ubuntu Linux на PowerPC Mac (старый тип с использованием процессоров G5). И мы не говорим о старой версии Linux. Мы говорим об Ubuntu 16.04 (или даже о последней бета-версии 16.10). Оба доступны в виде файлов изображений PowerPC благодаря довольно активной поддержке сообщества и требуют использования старых компьютеров G5 Mac в качестве серверов.
Смотрите также:
Сравнение Parallels, VMware, VirtualBox и Boot Camp
Обзор Parallels Desktop для Mac
Как установить Linux на Mac: какую версию Linux выбрать
Первое, что вам нужно знать, это то, что существуют разные версии Linux. Они известны как «дистрибутивы», и каждый предлагает свой опыт. Какой из них вы выберете, зависит от того, какой опыт вы хотите. Вот некоторые из них на выбор:
- Ubuntu. Это самый популярный выбор для начинающих, и он использует интерфейс рабочего стола под названием Unity, который очень похож на macOS. Это, пожалуй, лучшее место для начала.
- Linux Mint. Это вызвало волну в последнее время и является отличной альтернативой Ubuntu. Вы можете выбрать целый ряд рабочих столов (Cinnamon или MATE являются наиболее популярными). В то время как Unity ощущается как OS X, Mint чувствует себя немного больше как Windows.
- Kubuntu. Это объединяет версию Linux для Ubuntu с другим рабочим столом под названием KDE Plasma. Рабочий стол, как правило, считается более мощным и, безусловно, имеет гораздо больше функций.
- Debian. Это немного сложнее в настройке, чем Ubuntu или Mint. Но Debian предлагает множество функций и широко используется в серверном программном обеспечении.
- Fedora. Это имеет тенденцию быть на переднем крае технологии, и вы часто найдете здесь функции, которые выходят в другие дистрибутивы (и даже macOS) в дальнейшем. Хотя много сбоев и не очень хорошо для начинающих.
Мы рекомендуем начать с Ubuntu, но довольно просто установить все разные версии Linux, и ничто не мешает вам попробовать все три (и более), прежде чем выбрать ту, которая вам нужна.
Как установить Linux на Mac: используйте программное обеспечение для виртуализации
- Загрузите дистрибутив Linux и сохраните его в папке «Загрузки». Файл будет иметь расширение .iso. Нажмите здесь, если вы хотите скачать Ubuntu.
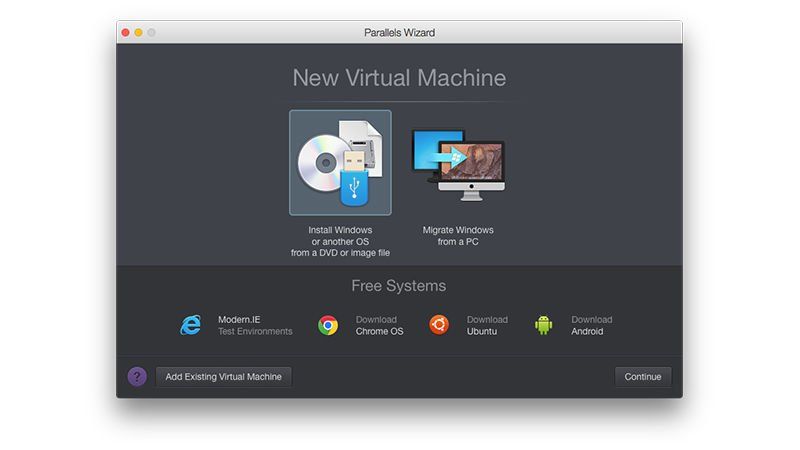
- Откройте Parallels Desktop и выберите «Файл»> «Создать».
- Выберите Установить Windows или другую ОС с DVD или файла образа. Нажмите Продолжить.
- Parallels автоматически находит все совместимые файлы ISO в вашей системе. Выделите Ubuntu Linux (или тот, который вы хотите установить) и нажмите «Продолжить».
- Заполните поля Полное имя, Имя пользователя, Пароль и Подтверждение пароля. Нажмите Продолжить.
- Файл виртуализации будет сохранен в папке «Пользователи» по умолчанию. Нажмите Location, если вы хотите изменить его, в противном случае просто нажмите Continue.
Parallels установит Linux в виртуальной среде. Нажмите его в Parallels Desktop Control Center, чтобы начать его использовать.
Как установить Linux на Mac: замена OS X / macOS на Linux
Вот как можно установить Linux на Mac:

Когда вы устанавливаете Linux на ваш Mac, он удаляет все установки OS X, включая раздел восстановления. Если вы хотите переустановить OS X, вам придется создать диск восстановления OS X с помощью джойстика.
How To Install Different Linux Distributions On Mac OS Mojave
Jul 28, 2019 · 8 min read

This is a very basic walkthrough tutorial on how to install Ubuntu 18.04, or different Linux Distributions, on your Mac OS using Virtual Box.
It’s very important to note that at the time of writing this, it is July 2019 and these steps might differ as different versions of VirtualBox and Ubuntu are released.
There are few reasons why you’ll want to do this, but my main reason is to able to install and use Ubuntu without having to partition my hard drive and install Ubuntu locally on my computer.
There are ways to install Ubuntu natively on your computer, but this method allows you to use both at the same time.
This is also so that I can complete the Linux Foundation Certified SysAdmin (LFCS).

To m a ke sure you have the requirements for this, you just need:
- Mac OS Mojave
- 2 GB RAM that can be dedicated
- 10 GB of storage (although that can be tweaked)
-
— A virtualizer that runs virtual machines — The Linux OS we’ll be running in VirtualBox
Basically open-source software that allows us to run multiple different Operating Systems on top of our Mac OS, including Windows, Linux and even Mac OS with Virtual Machines, which are just emulations (which are close to native running) of operating systems.
VirtualBox is also a Hypervisor.
Also known as a Virtual Machine Monitor, which can either be software, firmware, or hardware that allows Operating Systems to run on top of it. In this case VirtualBox is a Type 2 Hypervisor, which sits on top of an OS and allows you to run other Operating Systems.
Our first step to installing Ubuntu on our Mac OS is to install VirtualBox.

Download VirtualBox for OS X Hosts.

Make sure to Double click the VirtualBox.pkg file.


If you run VirtualBox now, you should see the following:

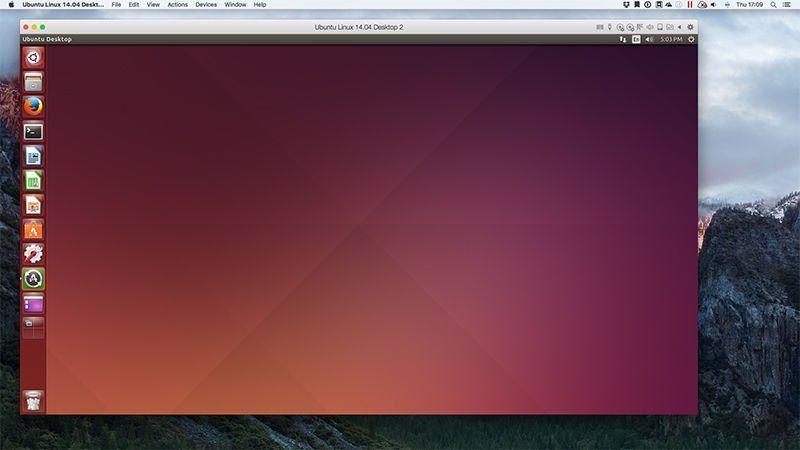
You’ll want to click on Ubuntu Desktop.

What Is LTS?
Here you’ll be presented with a couple of options, but you’ll want to download Ubuntu 18.04.2 LTS. LTS stands for Long-Term Support, which means this release will be supported by the developers of Ubuntu for a while.

Once downloaded, the file will probably sit in your downloads as ubuntu-18.04.2-desktop-amd64.iso . This is our image archive file of the operating system, which we’ll need later.
Next, we’ll want to create a new machine in Virtual Box by clicking on New, or going to Machine > New, or doing ⌘ + N.
Once the prompt opens, give it a Name (if you start typing ubuntu, it will automatically convert the version to Ubuntu 64-bit), and set the Memory to 2048 MB (2GB). Make sure you set the Hard Disk option to Create a virtual hard disk now. Leave the rest of the options as is and click Create button.

This will then prompt us to define the settings for our new virtual hard disk.
Set the File size will be set to 10.00GB to give the Ubuntu file enough space to work with, the Hard disk file type to VDI to make an image formatted for VirtualBox, and allow the Storage on physical hard disk to be Dynamically allocated. Once done, click the Create button.

Once your new machine settings are setup, you should see the following:

Notice we haven’t touched our ubuntu-18.04.2-desktop-amd64.iso file yet. This is the next step. Right click on our new machine and go to Start > Normal Start or select the machine and just click the Green Start Arrow Icon. We’ll soon be prompted with the following, where we’ll now select our file, and click Start.

Ubuntu will start but we might get this tiny screen at start.

To temporary fix this before we configure our display setting in Ubuntu directly, click the fifth icon from bottom right and go to Virtual Screen 1 > Scale to 200% (autoscaled output).

We should see something slightly bigger, where you can now click Install Ubuntu.

NOTE: If at any time you need to get out of the Virtual Machine / Ubuntu, just press the left ⌘ twice.
The next prompt will ask you what your keyboard setting might be. I’ve set them to English (US). Once you’ve selected your option, click the Continue button.

Just to get those alert prompts at the top out of the way, click the x button.

For the sake of this walkthrough, we’ll go with the Normal Installation and Download updates while installing Ubuntu. Click the Continue button.

This next step might look scary but there is nothing for Ubuntu to delete except for what the size and storage we allocated it. Select Erase disk and install Ubuntu, and click the Install now button.

You’ll also be prompted to confirm your selection with the following prompt, just click the Continue button.

Next we’ll select our location for the timezone, type and set your location, click the Continue button.

Lastly, we’ll give our name, our computer name, username, and give it a password.

The installation will wrap up and you’ll just need to restart.
Small note when you get to this screen, you’ll need to press Enter for things to restart.

It’ll finish loading and then the login will present itself. Enter your credentials and let Ubuntu load up.
When you get to the Desktop, you’ll be presented with What’s new in Ubuntu, and the screen resolution is still very small.
The last thing we’re going to do is fix the screen resolution in the settings by going to the 9 dots in the bottom left and searching for Settings.

Once settings shows up, scroll to the bottom with the left sidebar until you see Devices and click on it.

It will be hard to see but select the new resolution from the dropdown.

It will prompt you the top right to apply these changes, but unfortunately you can’t click Apply because it’s not within the view of the resolution of the window. To get access it to, double-click the top navigation bar where it says Displays, and then drag the window from right to left until you see the Apply button.

The resolution will change, and you’ll be prompted to confirm if you want to keep these changes. If it doesn’t fit your screen, leave it for a few seconds and it will reset back, otherwise click Keep Changes.

There we go, we’ve fully set up Ubuntu 18.04 with VirtualBox on Mac OS.

Now you can use Ubuntu on Mac OS, install whatever apps you want, and still have access to you native OS controls and more.
If you got value from this, and/or if you think this can be improved, please let me know in the comments.
Please share it on twitter 🐦 or other social media platforms. Thanks again for reading. 🙏
Please also follow me on twitter: @codingwithmanny and instagram at @codingwithmanny.
One last thing I will say, is you feel like contributing to other Open-Source projects, consider contributing the Ubuntu to keep it free and allow other developers to work on it to make it better.

Источник: iMore
С помощью виртуализации вы можете устанавливать и использовать на своем Mac различные операционные системы, включая Windows и Linux. Для последнего мы рекомендуем использовать последнюю версию Parallels или VirtualBox с открытым исходным кодом. Вот посмотрите, как установить и использовать Linux, используя каждый вариант.
Что такое виртуализация?
Как я отмечал в предыдущем посте, виртуализация программного обеспечения позволяет моделировать аппаратную среду и запускать несколько операционных систем на одном компьютере. При этом эти виртуальные машины могут использовать преимущества аппаратных компонентов компьютера, таких как оперативная память и хранилище, в полной изоляции от основной операционной системы.
Тем, кто хочет установить Linux на свой Mac посредством виртуализации, мы рекомендуем использовать последнюю версию Parallels или VirtualBox с открытым исходным кодом. Первый вариант предлагает более простое в установке решение, но вы должны заплатить за него после 14-дневной бесплатной пробной версии. Последний является бесплатным и с открытым исходным кодом, но его сложнее установить. В любом случае каждое решение выполнит свою работу.
Установка Linux через Parallels
Используя Parallels 15 для Mac, вы можете установить копию Linux на свой компьютер, следуя приведенным ниже инструкциям. Эти шаги предполагают, что Parallels уже установлен на вашем компьютере.

- Введите свой недавно созданный пароль в поле Parallels Tools.
- Нажмите Ok.

Теперь вы можете использовать Ubuntu Linux на своем Mac с помощью Parallels.
Установка Linux через VirtualBox
Чтобы установить виртуальную копию Linux на ваш Mac с помощью VirtualBox с открытым исходным кодом, сделайте следующее. Эти шаги предполагают, что VirtualBox уже установлен на вашем компьютере:
- Нажмите Новый в VirtualBox.
- Добавить имя для вашей виртуальной копии Linux.
- выбирать Linux как тип установки.
- Выберите версию Linux использовать.
- Нажмите Продолжать


После завершения загрузки этого файла вернитесь в VirtualBox.
- Выделите Linux в левой части VirtualBox Manager.
- выбирать Начинать.
- Нажать на Файл Значок на всплывающем экране.
- Выбирать Добавлять вверху слева.


Оттуда, следуя онлайн-инструкциям, предоставленным Ubuntu, чтобы завершить установку.
Отрегулируйте настройки
В зависимости от версии и возраста вашего Mac вам может потребоваться изменить настройки VirtualBox для Linux, чтобы увеличить окно. Для этого вы должны сначала выйти из установки Linux. Оттуда:
- Выделите Виртуальная установка Linux на главном экране VirtualBox.
- выбирать Настройки.
- Выбирать Отображать.
- Изменять Масштаб от 100% до 200%.
- Нажмите Ok.

Теперь вы можете изменить размер экрана для вашей установки Linux и начать использовать операционную систему на вашем Mac.

Что выбрать?
Установив Linux через Parallels и VirtualBox на моем MacBook Pro, я могу сказать, что через Parallels этот процесс проще. Как вы можете видеть выше, для установки Linux через Parallels требуется гораздо меньше шагов. Однако результат будет таким же после установки операционной системы.
Если вы уже используете Parallels на своем Mac (например, для использования Windows), вам следует продолжать использовать его для Linux. Процесс прост и понятен. Однако, если вы ищете бесплатное решение или новичок в виртуализации, подумайте о VirtualBox. Просто войдите в него, знайте, что вам нужно будет выполнить еще несколько шагов.
Вопросов?
У вас есть вопросы? Дайте нам знать в комментариях ниже.
Мы можем получать комиссию за покупки, используя наши ссылки. Узнать больше.
![[Update] Apple прекратит выпуск iMac Pro, когда его запасы закончатся](https://www.imore.com/sites/imore.com/files/styles/w300h225crop/public/field/image/2018/03/imac-pro-birds-eye.jpg)
[Update] Apple прекратит выпуск iMac Pro, когда его запасы закончатся
Apple изменила список iMac Pro на своем веб-сайте, чтобы заявить, что он продается «пока имеются в наличии», и доступна только одна конфигурация. Apple подтвердила, что прекратит выпуск iMac Pro, как только его запасы закончатся.
We'll setup Virtualbox Guest Additions, networks, and SSH.
We may want to install the Virtualbox Guest Additions to enable features like shared folders, etc. Via guest additions, we can access local files in our host machine.

- In Mac OS X, open Finder and browse to Applications folder.
- Right-click on the Virtualbox icon and select "Show Package Contents"
Now we want to setup the networks so that we can SSH from our Mac OS X into the Ubuntu. Our Ubuntu will be able to reach the Internet and see other Virtualbox machines as well.

-
To enable static IP addresses on our VirtualBox VMs, we'll first need to setup a Host-only network. The Host-only network is a virtual network provided by VirtualBox that is visible only to the Host OS and its virtual machines. This can be used to create a network containing the host and a set of virtual machines, without the need for the host's physical network interface. Instead, a virtual network interface (similar to a loopback interface) is created on the host, providing connectivity among virtual machines and the host.
In main Preferences of Virtualbox, under Network, add the Host-only network vboxnet0.


-
Adapter 1 is NAT - for Internet connectivity
When a guest machine is set-up in this mode, then outside world will never be able to communicate with the Guest machine directly. When the guest machine sends an IP packet to some remote machine, VirtualBox's NAT Engine will receive the packet and extracts the TCP/IP segments, and change the IP address to the IP address of the HOST machine. So, the outside world only see the IP address of the Host machine. When a reply is sent, then it will be received by the HOST machine and resend to the Guest Machine.

Note that eth1 has no default gateway specified while eth0 will get a default gateway from dhcp.
Now we want to access our
/Documents/SharedVM folder of Mac OSX inside of Ubuntu.
Since the Virtualbox's console is not so convenient, we want to access the Guest OS via SSH.
- We need to shutdown Ubuntu VM and open the Preferences of the Ubuntu VM
- Go to "Shared Folder" and click on "+"
- In the first line of the popup select the folder (
Ph.D. / Golden Gate Ave, San Francisco / Seoul National Univ / Carnegie Mellon / UC Berkeley / DevOps / Deep Learning / Visualization
Sponsor Open Source development activities and free contents for everyone.
Читайте также: