
Ubuntu dbeaver не запускается
Обновлено: 07.07.2024
Here at Bobcares, we have seen several such Ubuntu related installations as part of our Server Management Services for web hosts and online service providers.
Today we’ll see how to install DBeaver on Ubuntu.
A few facts about DBeaver
DBeaver CE is a free and open-source SQL client that is mainly designed for Developers, SQL programmers, Analysts, and Database administrators.
Moreover, it supports any database which has a JDBC driver. However, if you need support for non-JDBC data sources then you can consider using DBeaver Enterprise Edition.
DBeaver is based on the Eclipse platform and is a good workbench tool for building SQL queries, editing, and transferring data, viewing trees of objects, and a lot more.
Install DBeaver on Ubuntu 20.04/18.04/16.04 and Debian 10/9
1. Install Java on Ubuntu / Debian
To install java and set as default Java on your Ubuntu 20.04/18.04/16.04, run the below command.
Make sure to confirm the version.
Install OpenJDK on Debian 10/9
The default Java development and runtime available on Debian 10/9 repository is OpenJDK. So install it by running the below command.
Make sure to check the Java version.
2. Add Debian repository and Install DBeaver CE
Run the below commands to add the DBeaver repository to your Debian / Ubuntu.
Update the apt list and install DBeaver CE after adding the repo.
You can check the DBeaver version by running,
3. Prepare Database Server
First, you would need to create a database and database user to connect to, before you launch and configure the DBeaver.
Install MariaDB on Debian
1. First, update the system apt index
2. Then import the MariaDB gpg key and add the repository
3. After that, install MariaDB 10.4 on Debian 10 (Buster) by running the commands.
4. Now its time to secure the MariaDB server. So run the secure script to set the root password and remove the test database and disable remote root user login.
You will be prompted with the below questions. Make sure to answer them.
Make sure to provide a username and password to access the MySQL console.
Install MariaDB on Ubuntu
For installing MariaDB 10.4 on Ubuntu, you need to add MariaDB repository to the system.
1. First, install software-properties-common if missing
2. Then to import the MariaDB gpg key, run the below command to add Repository Key to the system.
3. Now add the apt repository
4. Now install MariaDB Server on Ubuntu by running the below commands.
Now you will be asked for the MariaDB root password, so enter it.
Press <Ok> to confirm the new password and install MariaDB.
You will be prompted with the below questions. Make sure to answer them.
After installation, the service must start automatically.
Now log into the MySQL shell as root user and create a test database to connect from the DBeaver Database tool as shown below.
4. Launching DBeaver
Now its time to launch the DBeaver. You can either do it from your terminal or Applications Launcher for your Desktop Environment.
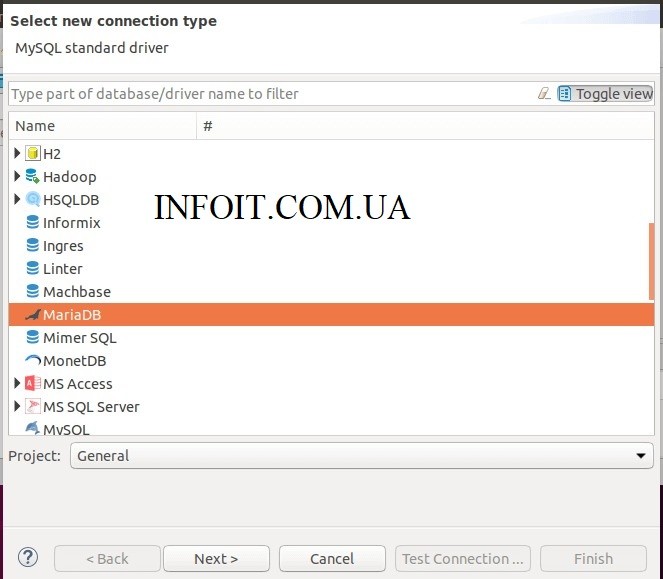
1. First, create a new database connection – Specify database type.
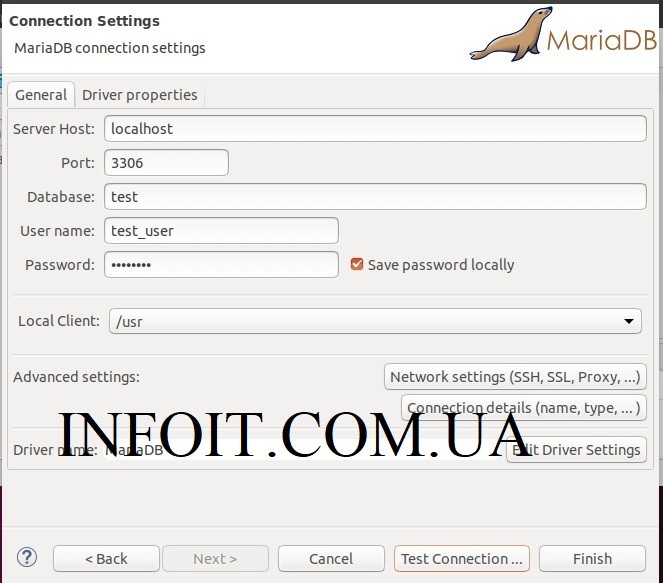
2. Now provide the database access details – Server, database user
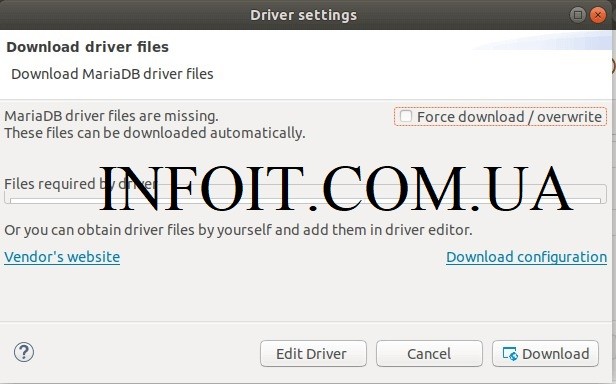
3. Finally, click “Test Connection” to verify the connection. When you are asked to download the MariaDB connection driver, please agree by clicking the Download button.
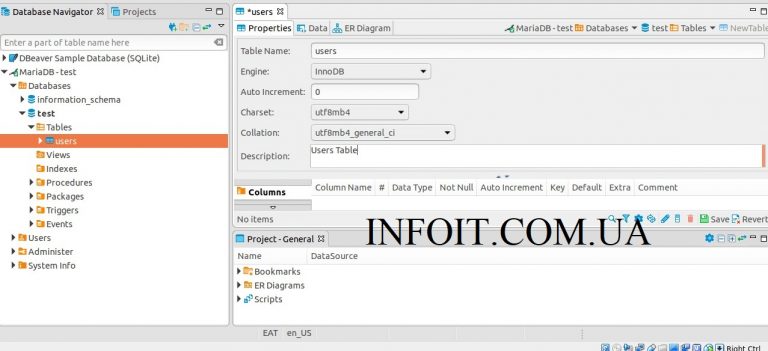
Finally, the connection test should return success. As a result, you should now see the database created earlier under the MariaDB connection profile. Now you can manage your database, tables, triggers, Procedures, Views, Events, etc using DBeaver.
[Need any further assistance with Ubuntu queries? – We are here to help you.]
Conclusion
In today’s writeup, we saw how our Support Engineers install DBeaver on Ubuntu.
Related posts:
PREVENT YOUR SERVER FROM CRASHING!
Never again lose customers to poor server speed! Let us help you.
Our server experts will monitor & maintain your server 24/7 so that it remains lightning fast and secure.
Как установить DBeaver в Fedora 32/31/30 и CentOS 7/8
Выполните несколько шагов, описанных ниже, чтобы установить и настроить DBeaver в Fedora 30/29 и CentOS 7/8.
Шаг 1. Установите Java
Основным требованием для запуска DBeaver является Java. Убедитесь, что в вашей системе CentOS 7/8 и Fedora 30/29 установлена Java. Последний выпуск DBeaver поддерживает Java 11 LTS.
Для Java 11 в CentOS 7 / Fedora 29: Установите Java 11 в CentOS 7 / Fedora
Подтвердите установленную версию Java.
Шаг 2: Загрузите и установите DBeaver
После установки Java загрузите последний пакет RPe для DBeaver.
Установите пакет с помощью rpm / dnf или менеджера пакетов yum.
Шаг 3: Подготовьте сервер базы данных
Перед запуском и настройкой службы DBeaver может потребоваться создать базу данных и пользователя базы данных для подключения. Для этой демонстрации я буду использовать сервер базы данных MariaDB.
Получив сервер базы данных, войдите в оболочку MySQL от имени пользователя root и создайте тестовую базу данных для подключения из инструмента базы данных DBeaver.
Шаг 4: Запуск DBeaver
Вы можете запустить DBeaver из своего терминала или из Панели запуска приложений для своего рабочего стола.
3. CНажмите « Проверить соединение», чтобы проверить соединение. Когда вас попросят скачать драйвер подключения mariadb, пожалуйста, согласитесь, нажав Download кнопку.
Ваш тест соединения должен затем вернуть успех.
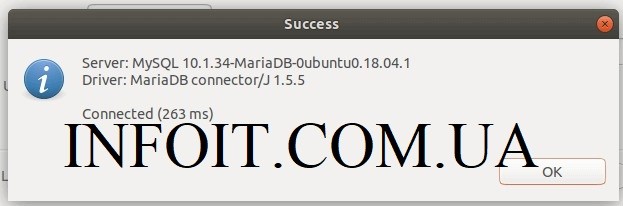
Теперь вы должны увидеть базу данных, созданную ранее в профиле подключения MariaDB.
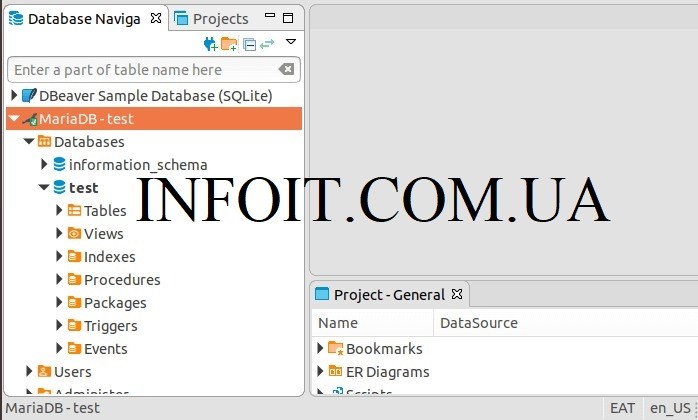
Теперь вы можете управлять своей базой данных, таблицами, триггерами, процедурами, представлениями, событиями и т. Д. С помощью DBeaver.
Вы научились устанавливать DBeaver на рабочую станцию Fedora & CentOS. Наслаждайтесь использованием редактора SQL, предоставляемого DBeaver, для генерации и тестирования SQL-запросов в графическом интерфейсе, а не в CLI.
Running DBeaver shows the loading screen but then the application doesn't start.
Steps to reproduce, if exist:
The problem can be reproduced just running DBeaver, using the launcher or snap run dbeaver-ce from the command line.
Include any warning/errors/backtraces from the logs
The text was updated successfully, but these errors were encountered:
Hi, just tried with 7.1.3, same behaviour (shows the loading panel, then exits).
meddario commented Aug 3, 2020
Hi @uslss, is there some specific test I can do / additional information that I should provide to help debug this? Thanks!
meddario commented Aug 19, 2020
Hi, tested again with 7.1.4, same result:
besides the tests reported above, on the pc where I was experiencing the problem (with Ubuntu 20.04) I switched to the .deb version, which always worked perfectly.
Today I tried to install the DBeaver snap on another (older) pc, this time running:
Applying the same workaround fixed the problem on this pc. No more errors and square fonts.
I'll let you know if the same works also on the 20.04 pc.
meddario commented Oct 10, 2020
i can confirm that the workaround above fixes the problem in Ubuntu 20.04 too.
hamraa commented Oct 11, 2020
the workaround also work for me
illetschko commented Oct 15, 2020
Yes, clearing the font cache worked for me too.
Thanks for the hint.
(Ubuntu 20.04)
If above workaround does not work, try remove font cache from snap folder:
/home/USER/snap/dbeaver-ce/common/.cache/fontconfig
It is works for Manjaro installation.
tasuki commented Mar 15, 2021
What the hell. thank you a whole bunch! I never would've figured this by myself!
thalesvon commented Apr 27, 2021
Hi,
besides the tests reported above, on the pc where I was experiencing the problem (with Ubuntu 20.04) I switched to the .deb version, which always worked perfectly.
Today I tried to install the DBeaver snap on another (older) pc, this time running:
I'll let you know if the same works also on the 20.04 pc.
This also worked for me!
Turns out I messed things up when installing new fonts.
conrad96 commented Sep 6, 2021
snap 2.51.4
snapd 2.51.4
series 16
ubuntu 20.04
kernel 5.11.0-27-generic
Closed 2 months ago .
The community reviewed whether to reopen this question 2 months ago and left it closed:
Original close reason(s) were not resolved
I have Dbeaver installed and I have a connection to a PostgreSQL database on a remote server.
I'd like to export this database to my local PC but when I go to Tools -> Backup database I see an error
Client home is not specified for connection
What should I specify and where? I can't find anything about it in the documentation.

7 Answers 7
I use Windows 7, so maybe it doesn't work the same way, but it is worth a try. First you have to install your local postgresql server. When this is done, it's quite simple, just make a rightclick on your PostgreSQL connection and then click on "Edit Connection". Here you can choose your local client.
I must say, I've search long enough for this on my own. Hope it helps.
And it is my first post, so sorry if I did something wrong.
Screenshot Server Connection:

Screenshot Edit Settings:


Versions installed with brew are located in /usr/local/bin/postgres .
So within DBeaver you'll want to edit the DB connection properties to reflect the below screenshot. You'll be prompted to reconnect to your DB, but then you should be good to go.
Читайте также: