
Display format premiere pro что
Обновлено: 05.07.2024
Learn about the latest video, audio, and still-image formats that are supported by Adobe Premiere Pro.
Some filename extensions—such as MOV, AVI, and MXF denote container file formats rather than denoting specific audio, video, or image data formats. Container files can contain data encoded using various compression and encoding schemes. Premiere Pro can import these container files, but the ability to import the data that they contain depends on the codecs (specifically, decoders) installed.
Sequence size
Video and still-image files that you want to import must not be more than the maximum dimensions allowed. The maximum sequence frame size in pixels is 10,240×8,192 (width x height). If you attempt to set one of the Frame Size dimensions higher than this limit in the Sequence Settings dialog box, Premiere Pro resets the value to the maximum.
Still image and movie size
The maximum frame size to import still images and movies is 256 megapixels, with a maximum dimension of 32,768 pixels in either direction. For example, an image that is 16,000×16,000 pixels is acceptable, as is one that is 32,000×8,000, but an image that is 35,000×10,000 pixels cannot be used.
Adobe Premiere Pro supports several audio and video formats, making your post-production workflows compatible with the latest broadcast formats.
Apple video compression format.
Apple ProRes is a high-quality codec and is widely-used as an acquisition, production and delivery format. Adobe has collaborated with Apple to provide editors, artists, and post-production professionals with comprehensive ProRes workflows for Premiere Pro and After Effects. Support for ProRes on macOS and Windows streamlines video production and simplifies final output, including server-based remote rendering with Adobe Media Encoder.
Canon Cinema RAW Light (.crm) files created by cameras such as the Canon EOS C200
- ARRIRAW
- P2 Movie: Panasonic OP1b variant of MXF video in AVC-Intra LT and AVC-LongG, Panasonic Op-Atom variant of MXF video in DV, DVCPRO, DVCPRO 50, DVCPRO HD, AVC-Intra
- X-OCN footage produced by cameras such as the Sony F5, F55, or Sony Venice with the AXS-R7 add-on
- Sony XDCAM HD 18/25/35 (4:2:0)
- Sony XDCAM HD 50 (4:2:2)
- AVC-LongGOP
- XAVC Intra
- XAVC LongGOP
- XAVC QFHD Long GOP 4:2:2
- JPEG2000
- IMX 30/40/50
- XDCAM EX
Not all QuickTime codecs are supported by default. Some codecs require third-party components.
Premiere Pro lets you work with a wide range of native media formats from the latest DSLR cameras without transcoding or file rewrapping.
The media formats listed here are supported for directly importing and editing with Premiere Pro. The required codecs are built in to Premiere Pro, and supported on both Mac OS and Windows systems unless stated otherwise.
Premiere Pro provides built-in support for the ARRI AMIRA camera, with appropriate color LUTs applied as master clips on import.
Premiere Pro provides the ability to import ALEXA LF (Large Footage) file format.
You can work natively with Canon XF and Canon RAW footage, including footage from Canon Cinema EOS C300, C500, EOS R5, and EOS-1D X Mark III cameras.
Premiere Pro lets you import and edit QuickTime formats natively including Apple ProRes and MOV files that Canon 5D and 7D cameras capture. You can clip metadata without any transcoding, rewrapping, or logging and transferring required.
Premiere Pro lets you import and edit uncompressed CinemaDNG media from the following cameras:
- Blackmagic Cinema Camera
- Blackmagic Pocket Cinema Camera
- Convergent Design Odyssey7Q
When working with CinemaDNG media, you can access the Source Settings and edit the metadata parameters. CinemaDNG can be debayered on a supported GPU for extreme playback performance.
You can native import and edit media from the following cameras/camera codec formats:
- Panasonic AVC Ultra
- Panasonic AVCi 200
- Panasonic AVC Ultra Long GOP (Group of Pictures)
- Panasonic P2 cameras and across multiple P2 cards
You can also view Panasonic Camera acquisition metadata in Premiere Pro's Metadata panel. This provides an easier starting point for grading.
The following metadata fields are now available for supported Panasonic cameras:
- Camera Manufacturer
- Camera Model
- Video Codec
- Video Bit Rate
- ISO Sensitivity
- White Balance Color Temperature
- Capture Gamma
- Capture Gamut
You can natively import and edit Phantom Cine media shot on Vision Research Phantom cameras.
Premiere Pro supports working natively with RED Digital Cinema (R3D) footage from the following cameras & codec formats:
- Color Science like REDcolor2, REDgamma2, and REDlogFilm
- RED ONE
- RED EPIC
- RED Scarlet-X cameras with support for RED Rocket
- Red Dragon including RED Dragon 6K
- RED Komodo
RED format clips use the GPU (OpenCL and CUDA) for debayering for an improved and faster playback performance.
You can import and edit media from the following cameras directly, without rewrapping or transcoding:
- Sony XDCAM
- Sony XDCAM 50
- Sony XAVC
- Sony XAVC LongGOP (Group of Pictures)
- Sony XAVC-S
- Sony A7S Mark III
- Sony SStP
- Sony RAW (F65, F55, F5, FS700 cameras)
- Sony Venice V3
- Sony Venice V4
You can browse the imported clips using the Media Browser and organize them using camera metadata.

To learn more about working directly with native camera formats, see this video tutorial.
Premiere Pro supports 8bpc (4 bytes per pixel) and 16bpc (8 bytes per pixel) still-image files.
Learn about applying timecode to video in Premiere Pro, choosing the display format, and different ways of viewing the timecode.
Many camcorders and high-end video decks record timecode, which marks specific frames with unique addresses. Timecode is important whenever you want to capture the same frames that were identified or captured previously, as in the following tasks:
You want to log clips before you capture them.
You plan to capture clips using batch (automated) capture.
You want to recapture clips because the original files became corrupted or were deleted.
You plan to export sequences to another system by using EDL.
You’re using a system in which you edit quickly with low-resolution captures, and later recapture the clips at full resolution and quality for the final version.
You plan to synchronize captured video with audio recorded separately.
Unlike the numbers on time counters found in home VCRs, timecode is recorded onto videotape as part of the video signal. If footage lacks timecode, you can add it by copying it with a camera or deck that writes timecode. You can then log or capture the video from that device.
For best results, timecode should run continuously from the beginning to the end of the tape; it shouldn’t restart from zero anywhere in the middle. In editing, if you log a capture in a point such as 00:00:01:09 but that number occurs on the tape two or three times because of timecode restarts, Premiere Pro can’t be certain which 00:00:01:09 is the place to start its capture. It can easily capture the wrong clips from tapes with discontinuous timecode.
To ensure unbroken timecode, either shoot it continuously or stripe your tape with it before shooting.
To ensure that you always shoot continuous timecode, record at least 5 seconds of extra video past the end of the action in any shot. If you review a clip in the camera, be sure to rewind the tape back into that 5-second margin before recording again. Your camcorder reads the timecode from the frame on which you stop and begins recording timecode with the next frame number when you start your next shot. Be careful; if you leave a gap between the last frame of the previous shot and the first frame of the next, the camcorder begins writing timecode at 00:00:00:00 again.
By default, Premiere Pro displays the timecode for any clip that was originally written to the source medium. If a frame has timecode 00:00:10:00 on tape, the timecode displayed for it after it has been captured is 00:00:10:00. Source timecode often makes logging clips easy. Source timecode is shown for a clip regardless of the timebase of the sequences in which it is used. When the timebase of the clip differs from the timebase of the sequence, source timecode can make logging footage easier. For example, a clip shot in 24p has a timebase of 30 fps and 30 fps timecode. Premiere Pro shows the original 30 fps timecode for that clip, even though it is used in a sequence with a timebase of 23.976. However, you can change this default to instead show the timecode for every clip starting at 00:00:00:00.
Also, you can determine how Premiere Pro displays the frame count when a Frames or Feet And Frames display is chosen for a panel. You can make the frame count for every clip start at 0 or at 1, or you can have it converted from the source timecode. If a frame in a 30-fps clip has a source timecode of 00:00:10:00 the Timecode Conversion option gives this frame number 300. Premiere Pro converts 10 seconds at the 30-fps frame rate to 300 frames.
Timelines and sequences are also integrally linked, since a sequence is essentially a representation of content within the Timeline. Double-click a sequence in the Project panel, and it opens in the Timeline.
Customizing the Timeline
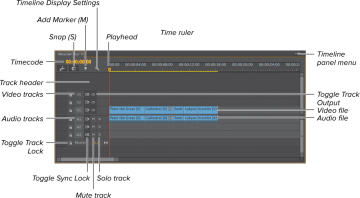
The Premiere Pro Timeline panel.
By default, Premiere Pro sequences start at the timecode 00:00:00:00. To change this, choose Start Time from the Timeline panel menu and, in the dialog that appears, select a different starting timecode.
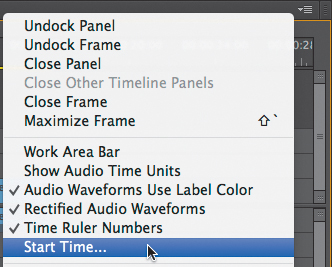
Click here to choose a new starting timecode for your sequence.
Customizing track height
To expand or minimize all tracks
- To expand all tracks, click the Timeline Display Settings button to open the Settings menu, and choose Expand All Tracks .
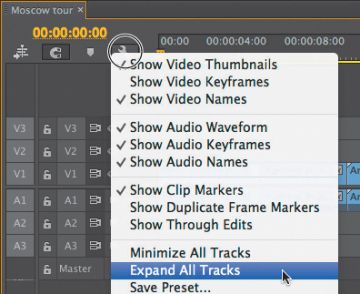
Using the Settings menu to expand or minimize all tracks.
Premiere Pro expands all tracks . Already we can see a lot more information.
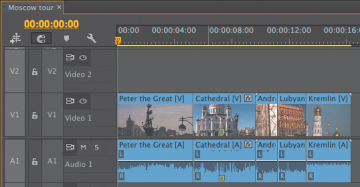
Expanding all tracks to see more information.
Premiere Pro minimizes all tracks.
To expand or minimize all video or audio tracks
- On the right edge of the Timeline, grab one of the edges of the vertical zoom bar for either the audio or video tracks .
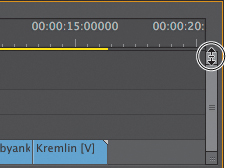
Grab one of the edges of the vertical zoom bar.
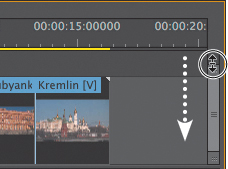
Drag inward to expand the tracks; drag outward to minimize the tracks.
To adjust the height of individual tracks
Do one of the following:
-
In the track header area of the Timeline, position the pointer at the top of the track that you want to expand, until the height adjustment pointer appears . Drag upward to expand the track and downward to minimize the track.
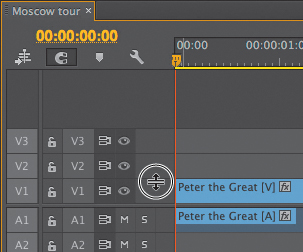
Hover your mouse at the top of the track until the height adjustment pointer appears.
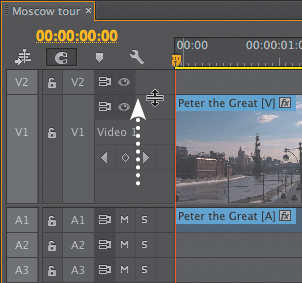
Drag up.
Customizing video tracks
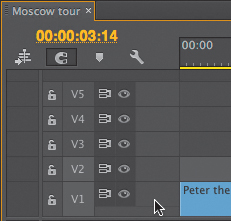
Video thumbnails are representations of the clip content . You can see them because they were enabled by default, and they became visible when you expanded the track.
You can turn thumbnails on and off even when the video track is expanded, and you can control the appearance of the thumbnails using the procedures described in the following tasks.
To enable and disable video thumbnails
- To enable thumbnails, click the Timeline Display Settings button to open the Settings menu, and choose Show Video Thumbnails . When the menu item shows a check mark, the thumbnails are enabled.
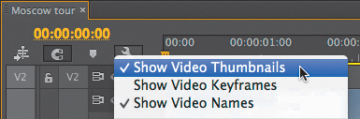
Showing video thumbnails in the Settings menu.
To control thumbnail appearance
Click the panel menu in the upper-right corner of the Timeline . Select one of the following:
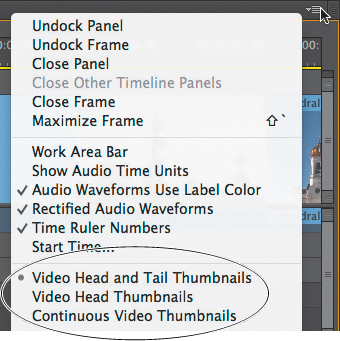
Choose one of these three options for thumbnail display.
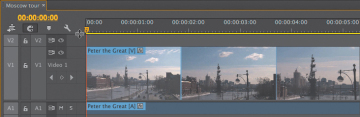
- Video Head and Tail Thumbnails. Shows thumbnails of the first frame and the last frame, with blank space in between .
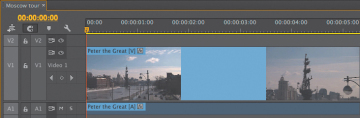
Head and tail thumbnails.
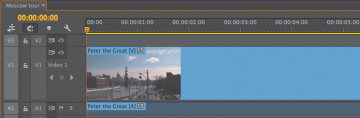
Head thumbnail.
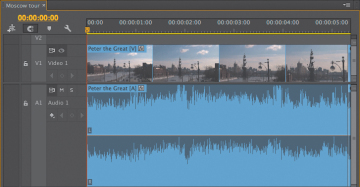
Continuous video thumbnails.
Once a track is expanded, the name of the track appears in the track header. You can customize this by right-clicking the track name and choosing Rename .
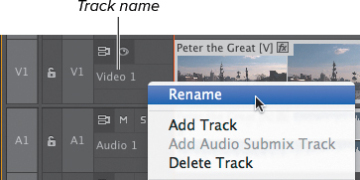
Renaming the track.
Customizing audio tracks
To switch to the traditional waveform display
From the panel menu in the upper-right corner of the Timeline panel, choose Rectified Audio Waveforms so that the check mark disappears .
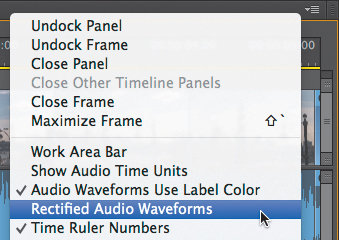
Disabling rectified audio waveforms in the panel menu.
Premiere Pro returns to the traditional waveform view .
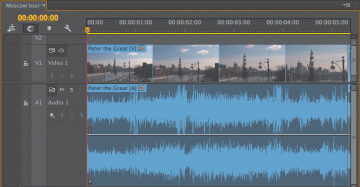
The traditional waveform style.
By default, audio waveforms are displayed in the color of the label. You can change the waveform color to green by deselecting Audio Waveforms Use Label Color .
Читайте также: