
Плагин для создания glitch в after effects
Обновлено: 15.08.2024
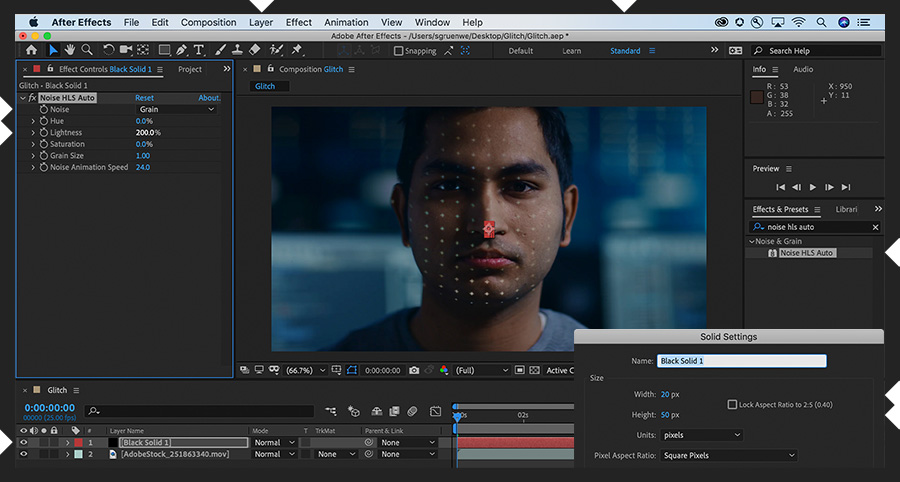
This sample file is an Adobe Stock asset you can use to practice what you learn in this tutorial. If you want to use the sample file beyond this tutorial, you can purchase a license on Adobe Stock. Check out the ReadMe file in the folder for the terms that apply to your use of this sample file.
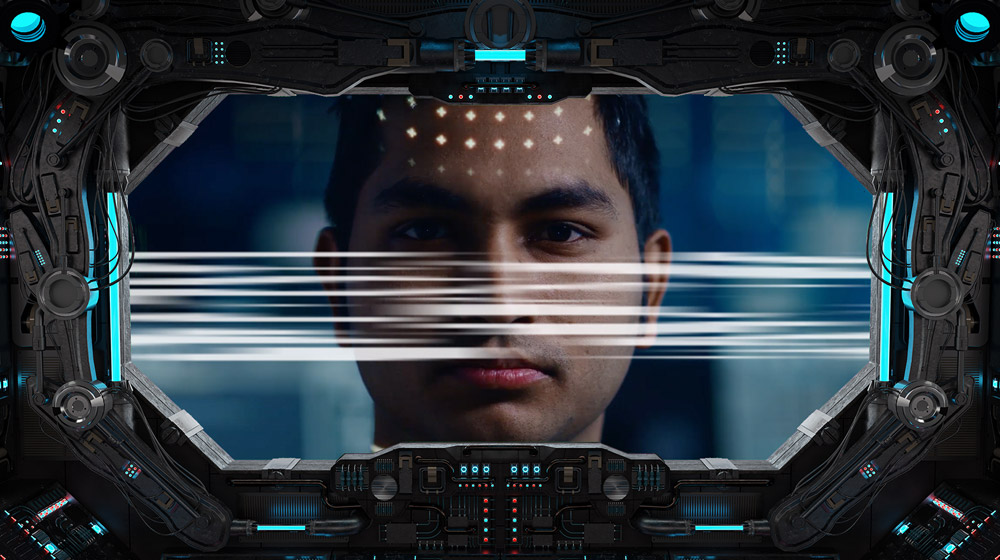
There are countless ways to give your footage a distressed look, depending on whether you want to simulate retro-looking television static or create futuristic, signal-jamming interference caused by hostile space aliens. This project uses Noise, Transform, and Wave Warp effects as well as some wiggle expressions in After Effects.
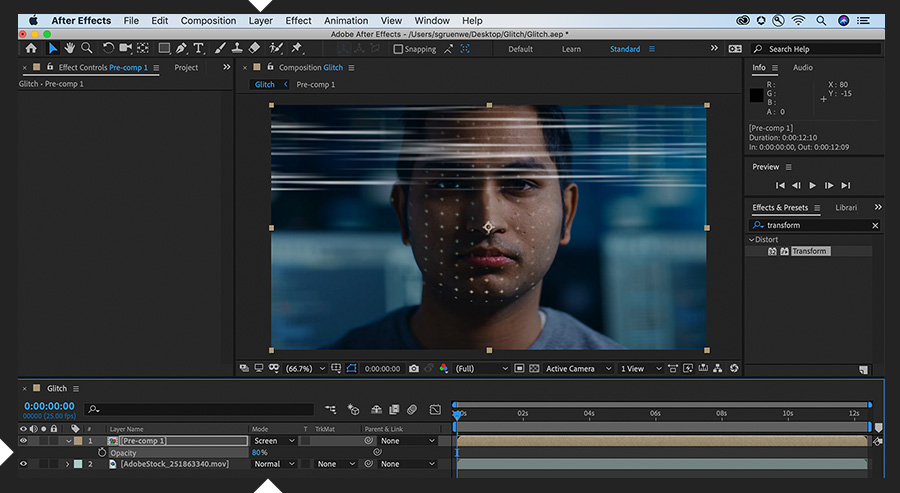
Starting in the Standard workspace, import your footage and place it in a new composition. Create a new solid (Layer > New > Solid), make the dimensions small, choose black as the color, and click OK. Apply the Noise HLS Auto effect to the solid, setting Noise to Grain and increasing Lightness considerably (1000%).
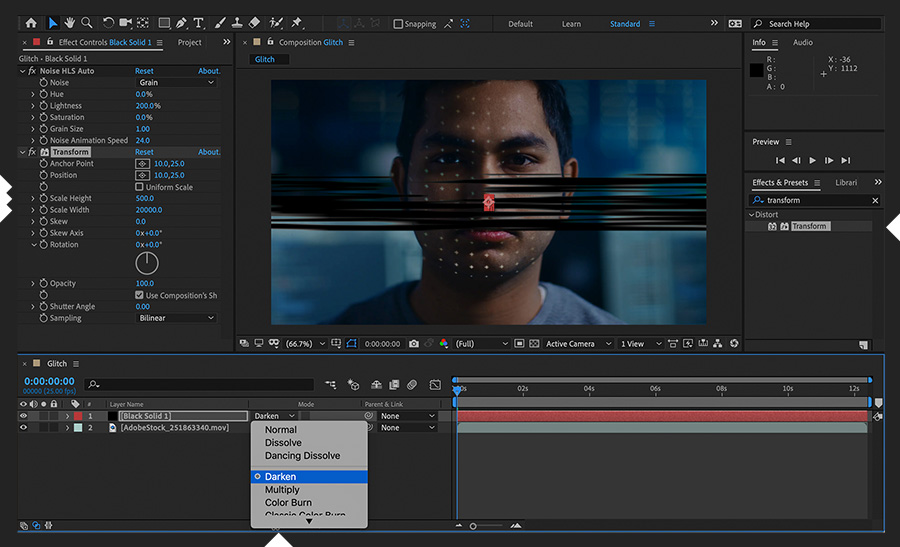
Apply the Transform effect to the solid, unchecking Uniform Scale and setting large values for Scale Height and Scale Width to stretch the solid across the image. In the Timeline panel, set the solid layer’s blend mode to Darken.
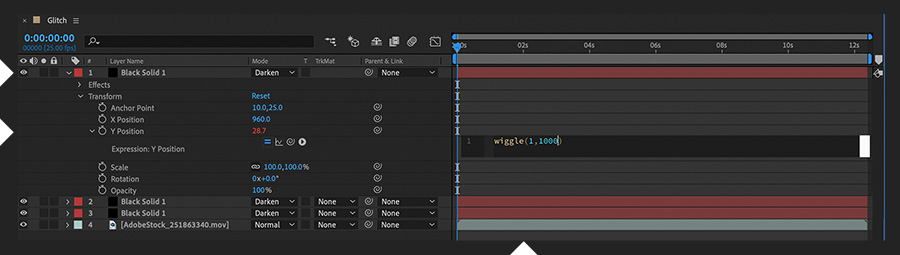
Drill down on the solid layer’s Transform properties. Right-click the word “Position” and choose Separate Dimensions to reveal independent X and Y Position settings. Click away to deselect both values. Option/Alt-click the stopwatch next to Y Position and enter the expression wiggle (1,1000). Click away to accept that entry. Finally, select the solid layer and press Command/Control+D twice to add two copies below it to the composition.
Select all three solid layers and choose Layer > Pre-compose. Accept the default settings in the Pre-compose dialog box and click OK. Set the precomp layer’s blend mode to Screen. Reduce its Opacity if you like. Preview the results.
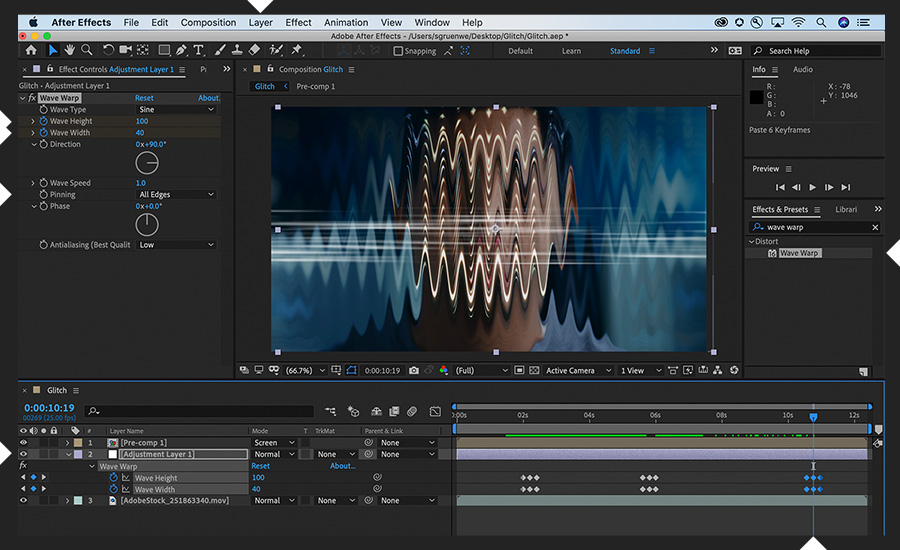
That’s it for the static noise. To show a momentary visual glitch too, add an adjustment layer to the composition (Layer > New > Adjustment Layer) and position it between the precomp and footage layers. Apply the Wave Warp effect to the adjustment layer. In the Effect Controls panel, set Pinning to All Edges. Keyframe Wave Height and Wave Width so they each spike briefly (over the span of just a few frames) from zero to a large value before returning back to zero. Try setting three keyframes in a row, so the middle one contains the high value and the others are zero. Paste copies of the keyframe trio elsewhere in the timeline to repeat this glitch effect.
Play with these effects to achieve very different results. For example, to achieve the look of poor reception (“snow”) from the days of analog television, change the Width and Height settings for all three solids (Layer > Solid Settings) in the precomp to match the comp and then delete the Transform effect from each solid layer.
With Adobe Stock, you have access to more than 100 million high-quality, royalty-free images including photos, graphics, videos, and templates to jump-start your creative projects. Try Adobe Stock and get 10 free images.
Читайте также: