
Lastpass ubuntu как установить
Обновлено: 04.07.2024
LastPass is a virtual vault which helps you protect all your passwords and manage them effortlessly. LastPass also offers some features like form-filling, generate password, store digital records and many more. Applications like LastPass becoming more and more important in today’s tech savvy world. Many of us face difficulty in remembering passwords from various accounts across social media, Ecommerce and other websites. LastPass makes this task little bit easier by storing all our passwords in a vault.
So before going into the installation process let’s have a looks at some of the best LastPass features.
- Auto Form-Filler
If you have saved your Ecommerce password in LastPass vault then at the time of purchase LastPass will automatically fill all the details like payment method and shipping details to make the process a bit easier.
- Generate Passwords
LastPass offers built-in password generator which helps you creates strong passwords that protects against hacking.
- Cross-Platform Support
LastPass is a cross-platform password manager which you can install on Windows, Mac, Ubuntu, Android and iOS devices and sync passwords and other data between them.
- Store Digital Records
LastPass is like a virtual vault where you can store all the important passwords and other important digital documents securely.
Installation
LastPass is available as a browser extension for almost all the popular web browsers across all the operating system platforms. So here is how you can install LastPass on Ubuntu.

Step02: Once the download is complete Firefox will ask for permission to install LastPass extension so just click on Allow and then finally click on Install.

Step03: Once the installations which should not take more than a minute you will notice LastPass icon on top right corner of your web browser.
That’s its now you are done with installation process and now we will see how to setup LastPass account and get started with it.
Getting Started With LastPass
Step 01: Click on the LastPass icon present on top right corner of web browser. Now it will ask you for Email and Master Password for Log In but if you don’t have LastPass account just click on Create an Account.

Step 02: Now it will ask you to select language, just select your preferred language and click on Create an Account. Just fill up details like Email, Master Password and Password Reminder then select all the check boxes.

Step 03: Finally click on Create an Account and then you will see a message as shown in the below image.

Step 04: Just click on Continue and now LastPass will ask you if you wish to import data into it. Then click on Continue. Now you will be redirected to LastPass homepage where you will see different tabs like Vault, Form Fill Profiles, Shares, Enterprise and Tutorials.

Step 05: Now you can store passwords of different websites like Amazon, Dropbox, Facebook, etc. and you can also add custom websites which are not present in the list. For example if you wish LastPass to remember your Amazon password then just click on Amazon tab and follow step-by-step process as described in image below.

Step 06: Now you can auto Form-filling profiles by clicking on Form Fill Profiles tab.

Now click on Create A Profile and fill in all the details and click OK. You can add different Form-filling profiles.

Step 07: You can also share your online account details with your friends, colleagues and family members in case of emergency without revealing your passwords.

That’s it now your LastPass account is completely set up and your passwords are saved securely in its vault. So this how you can install and set up your account on LastPass very easily.
About the author
David Adams
David Adams is a System Admin and writer that is focused on open source technologies, security software, and computer systems.
LastPass - это виртуальное хранилище, которое помогает вам защитить все ваши пароли и легко управлять ими. LastPass также предлагает некоторые функции, такие как заполнение форм, создание пароля, хранение цифровых записей и многое другое. Такие приложения, как LastPass, становятся все более важными в современном технически подкованном мире. Многие из нас сталкиваются с трудностями при запоминании паролей от различных учетных записей в социальных сетях, электронной коммерции и других веб-сайтах. LastPass немного упрощает эту задачу, сохраняя все наши пароли в хранилище.
Итак, прежде чем приступить к процессу установки, давайте взглянем на некоторые из лучших функций LastPass.
- Автозаполнение форм
Если вы сохранили свой пароль электронной торговли в хранилище LastPass, то во время покупки LastPass автоматически заполнит все данные, такие как способ оплаты и сведения о доставке, чтобы упростить процесс.
- Сгенерировать пароли
LastPass предлагает встроенный генератор паролей, который помогает создавать надежные пароли, защищающие от взлома.
- Кросс-платформенная поддержка
LastPass - это кроссплатформенный менеджер паролей, который вы можете установить на устройства Windows, Mac, Ubuntu, Android и iOS и синхронизировать пароли и другие данные между ними.
- Хранить цифровые записи
LastPass похож на виртуальное хранилище, где вы можете безопасно хранить все важные пароли и другие важные цифровые документы.
Монтаж
LastPass доступен как расширение браузера почти для всех популярных веб-браузеров на всех платформах операционных систем. Итак, вот как вы можете установить LastPass на Ubuntu.
Шаг 02: После завершения загрузки Firefox запросит разрешение на установку расширения LastPass, поэтому просто нажмите Позволять а затем, наконец, нажмите Установить.
Step03: После установки, которая не должна занять больше минуты, вы увидите значок LastPass в правом верхнем углу браузера.
Вот и все, вы закончили процесс установки, и теперь мы увидим, как настроить учетную запись LastPass и начать работу с ней.
Начало работы с LastPass
Шаг 01: Щелкните значок LastPass в правом верхнем углу браузера. Теперь он попросит вас ввести адрес электронной почты и главный пароль для входа в систему, но если у вас нет учетной записи LastPass, просто нажмите Завести аккаунт.

Шаг 02: Теперь он попросит вас выбрать язык, просто выберите предпочитаемый язык и нажмите Завести аккаунт. Просто заполните данные, такие как электронная почта, мастер-пароль и напоминание пароля, затем установите все флажки.


Шаг 04: Просто нажмите на Продолжать и теперь LastPass спросит вас, хотите ли вы импортировать в него данные. Затем нажмите на Продолжать. Теперь вы будете перенаправлены на домашнюю страницу LastPass, где вы увидите различные вкладки, такие как Vault, Form Fill Profiles, Shares, Enterprise и Tutorials.

Шаг 05: Теперь вы можете хранить пароли от разных веб-сайтов, таких как Amazon, Dropbox, Facebook и т. Д. и вы также можете добавить собственные веб-сайты, которых нет в списке. Например, если вы хотите, чтобы LastPass запомнил ваш пароль Amazon, просто нажмите вкладку Amazon и следуйте пошаговым инструкциям, как описано на изображении ниже.

Шаг 06: Теперь вы можете автоматически заполнять профили, нажав на Профили заполнения форм вкладка.

Теперь нажмите на Создать профиль заполните все данные и нажмите ОК. Вы можете добавить разные профили для заполнения форм.

Шаг 07: Вы также можете поделиться данными своей онлайн-учетной записи с друзьями, коллегами и членами семьи в случае возникновения чрезвычайной ситуации, не раскрывая свои пароли.

Вот и все, теперь ваша учетная запись LastPass полностью настроена, и ваши пароли надежно сохранены в ее хранилище. Вот как вы можете очень легко установить и настроить свою учетную запись на LastPass.

LastPass, which is a freemium password manager developed by the LogMeIn team, stores all the usernames and passwords from the computers and mobile phones using it in a vault for the next time they are needed to access a website. LastPass gives you control over your sensitive data and saves all kinds of information, including credit card and address data. In addition, LastPass automatically fills in your usernames and passwords and logs you into websites. LastPass has a free version and a paid version, with the former having a large set of features that many paid versions of other password managers do not possess.
2. Installing LastPass
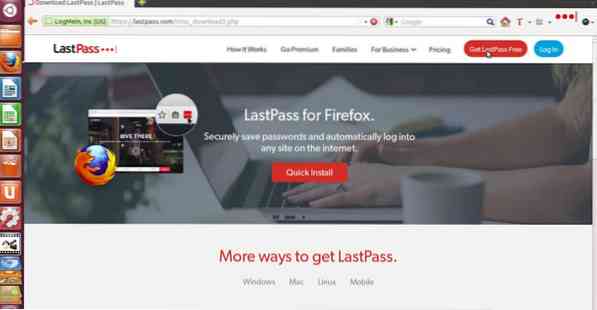
The installation process is extremely simple. First, open the official LastPass website and click on Get LastPass Free on the right side of the screen.

After clicking the red button, a screen will open to ask you to Create an Account. Here, it is necessary for you to have an email address and a strong password that meets a certain set of requirements.

For users that already have an account, simply click on the Log In button to open it.

After creating your account and logging in, LastPass provides the option to install a browser extension:


If the timer runs out, then it leads you to the official Firefox Add-on page of LastPass:
You can also use the Universal Installer of Linux to install LastPass and other download links provided on its official Download page.

3. Using LastPass
After downloading LastPass, you will see a red square icon with white dots in the add-on area.

LastPass prompts you to add passwords to the vault whenever you log into a website. Here, you can edit the settings to never save passwords for a website or to add a folder name.


Passwords can also be manually added to LastPass. To do this, click on the LastPass icon in your browser and then select the Open My Vault option.
Once in your vault, click the plus button on the bottom of your screen to add an item.

Then, there will be multiple options for you to select from; simply click on the item you want to store in LastPass to add an item.


After clicking an option, you must input all the necessary information in the window that pops up. The Add password window is shown below.

Advanced options, such as autologin, autofill, and the ability to add the password item to your favorites, are available, as highlighted below:
After adding passwords and other sensitive data to your vault, your vault will look something like this:


If you have a large set of collections in your vault, then you can locate a specific one by looking in its category:
You can also import and export your vault collections. To do this, first click More Options and then Advanced, where you will find the import and export options along with several others.


LastPass also offers a way for you to share your passwords with others. Simply search for the website whose password you want to share and click the share icon.


A prompt will ask you to enter the email address of the recipient. In the Sharing Center, you can check the shared elements, which may include the items shared with us, the items we shared with others, and the folders we shared with several people (this is a premium option):
LastPass even allows you to add emergency contacts (this is also a premium feature). It is important to note that you can add only people with a LastPass account as emergency contacts.

Why Use LastPass?
Because the web is an integral part of our lives, it is important to keep our machines and data safe. Malicious content can enter your computer via the internet, and this content may harm your data, resulting in severe security issues. Therefore, a password manager like LastPass is crucial, as it offers a way to keep your data secure and protects you from security threats.
About the author
Zeeman Memon
Hi there! I'm a Software Engineer by degree, Blogger by skills who loves to write about tech, develop websites & do SEO. You can reach out to me on LinkedIn.
In this article, we will go through 6 Easy Steps to Install LastPass CLI on Ubuntu 20.04. LastPass is a free and open source utility to store secret password in an external vault. It provides an ability to Developers and programmers to integrate and use it from a shell or bash script. It also provides better security and convenience to add, modify and update secret entries in the vault. We will see the steps to install this utility on Ubuntu 20.04 server in great detail. More on lpass.

Steps to Install LastPass CLI on Ubuntu 20.04
Step 1: Prerequisites
a) You should have a running Ubuntu 20.04 Server.
c) You should have apt utility installed in your Server.
Step 2: Update Your Server
It is always recommended to update all your installed server packages first before installing any package. This will prevent any breakdown in system. You can update it by simply using apt update command as shown below. This will pull and install all the latest updates from all the enabled Ubuntu Repositories.
Step 3: Install LastPass CLI
In the next step, you can install LastPass CLI package by using apt install lastpass-cli command as shown below. This will download and install the utility along with its dependencies from Ubuntu Repo.
Please note that here I am using root user to run all the below commands. You can use any user with sudo access to run all these commands. For more information Please check Step by Step: How to Add User to Sudoers to provide sudo access to the User.Step 4: Check lpass version
After successful installation, you can check LassPass CLI utility version by using lpass --version command as shown below.
Step 5: Using lpass command
Now that we have verified the installation of LastPass CLI utility, let's use it to login to LastPass using our valid email ID. You need to use lpass login <email_id> syntax to login to LastPass.
Step 6: Uninstall LastPass CLI utility
Once you are done with LastPass CLI utility, you can simply remove it by using apt remove lastpass-cli command as shown below.
Читайте также: